
User Manual


YOUR MICROSOFT OFFICE AND OTHER DOCUMENT TOOLS
EXCEL MOBILE
200
11
CHAPTER
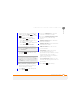
4 Select the Category list, and then
select the type of function you want to
insert.
5 Select the Function list, and then select
the specific function you want to insert.
6 Press OK (left softkey).
7 Enter any values needed in the function.
8 Press Done (left softkey).
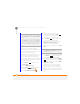
Selecting cells, rows, or columns
1 Open the workbook containing the
elements you want to select.
2 If the softkey text labels are hidden,
press the right or left
softkey to display the labels.
3 Press Menu (right softkey) and
select Edit Mode.
4 Navigate to one of the cells you want to
select so that it is highlighted.
5 Press Menu (right softkey), select
Select, and then select the type of item
you want to select: Cells, Columns,
Rows, or All (all cells in the worksheet).
6 If you selected Cells, Columns, or
Rows, use the 5-way to highlight
the items you want.
7 Press Done (left softkey).
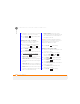
Adding cells, rows, or columns
1 Open the workbook you want.
2 If the softkey text labels are hidden,
press the right or left
softkey to display the labels.
3 Press Menu (right softkey) and
select Edit Mode.
4 Select the area above or to the left of
where you want to insert an element
(see Selecting cells, rows, or columns
).
5 Press Menu (right softkey),
select Insert > Cells, and then select
how you want to insert the elements:
Entire row: Inserts the same number
of new rows as the number of cells you
selected vertically in step 2—for
example, if you selected an area
containing two cells vertically (say A1
and A2), selecting Entire row inserts
two rows; so the original rows 1 and 2
(and their contents) are now rows 3 and
4. The rows containing the selected
area and all rows beneath it move the
same number of rows—two in this
example—down.