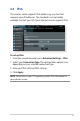
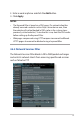
4.4 IPv6 This wireless router supports IPv6 addressing, a system that supports more IP addresses. This standard is not yet widely available. Contact your ISP if your Internet service supports IPv6. To set up IPv6: 1. From the navigation panel, go to Advanced Settings > IPv6. 2. Select your Connection Type. The configuration options vary depending on your selected connection type. 3. Enter your IPv6 LAN and DNS settings. 4. Click Apply.
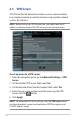
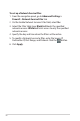
4.5 VPN Server VPN (Virtual Private Network) provides a secure communication to a remote computer or remote network using a public network such as the Internet. NOTE: Before setting up a VPN connection, you would need the IP address or domain name of the VPN server you are trying to access. To set up access to a VPN server: 1. From the navigation panel, go to Advanced Settings > VPN Server. 2. On the Enable PPTP Server field, select Yes. 3. On the Network Place (Samba) Support field, select Yes. 4.
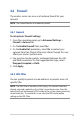
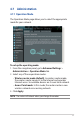
4.6 Firewall The wireless router can serve as a hardware firewall for your network. NOTE: The Firewall feature is enabled by default. 4.6.1 General To set up basic Firewall settings: 1. From the navigation panel, go to Advanced Settings > Firewall > General tab. 2. On the Enable Firewall field, select Yes. 3. On the Enable DoS protection, select Yes to protect your network from DoS (Denial of Service) attacks though this may affect your router’s performance. 4.
To set up a URL filter: 1. From the navigation panel, go to Advanced Settings > Firewall > URL Filter tab. 2. On the Enable URL Filter field, select Enabled. 3. Enter a URL and click the button. 4. Click Apply. 4.6.3 Keyword filter Keyword filter blocks access to webpages containing specified keywords. To set up a keyword filter: 1. From the navigation panel, go to Advanced Settings > Firewall > Keyword Filter tab. 2. On the Enable Keyword Filter field, select Enabled.
3. Enter a word or phrase and click the Add button. 4. Click Apply. NOTES: • The Keyword Filter is based on a DNS query. If a network client has already accessed a website such as http://www.abcxxx.com, then the website will not be blocked (a DNS cache in the system stores previously visited websites). To resolve this issue, clear the DNS cache before setting up the Keyword Filter. • Web pages compressed using HTTP compression cannot be filtered. HTTPS pages also cannot be blocked using a keyword filter.
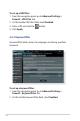
To set up a Network Service filter: 1. From the navigation panel, go to Advanced Settings > Firewall > Network Service Filter tab. 2. On the Enable Network Services Filter field, select Yes. 3. Select the Filter table type. Black List blocks the specified network services. White List limits access to only the specified network services. 4. Specify the day and time when the filters will be active. 5. To specify a Network Service to filter, enter the Source IP, Destination IP, Port Range, and Protocol.
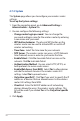
4.7 Administration 4.7.1 Operation Mode The Operation Mode page allows you to select the appropriate mode for your network. To set up the operating mode: 1. From the navigation panel, go to Advanced Settings > Administration > Operation Mode tab. 2. Select any of these operation modes: • Wireless router mode (default): In wireless router mode, the wireless router connects to the Internet and provides Internet access to available devices on its own local network.
4.7.2 System The System page allows you to configure your wireless router settings. To set up the System settings: 1. From the navigation panel, go to Advanced Settings > Administration > System tab. 2. You can configure the following settings: • Change router login password: You can change the password and login name for the wireless router by entering a new name and password.
4.7.3 Firmware Upgrade NOTE: Download the latest firmware from the ASUS website at http://www.asus.com To upgrade the firmware: 1. From the navigation panel, go to Advanced Settings > Administration > Firmware Upgrade tab. 2. In the New Firmware File field, click Browse to locate the downloaded file. 3. Click Upload. NOTES: • When the upgrade process is complete, wait for some time for the system to reboot.
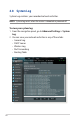
4.8 System Log System Log contains your recorded network activities. NOTE: System log resets when the router is rebooted or powered off. To view your system log: 1. From the navigation panel, go to Advanced Settings > System Log. 2.
5 Utilities NOTES: • Install the wireless router's utilities from the bundled support CD. • If Autorun is disabled, run setup.exe from the root directory of the support CD. • The utilities are not supported on MAC OS. 5.1 Device Discovery Device Discovery is an ASUS WLAN utility that detects an ASUS wireless router device, and allows you to configure the wireless networking settings.
5.2 Firmware Restoration Firmware Restoration is used on an ASUS Wireless Router that failed during its firmware upgrading process. It uploads the firmware that you specify. The process takes about three to four minutes. IMPORTANT: Launch the rescue mode on the router before using the Firmware Restoration utility. NOTE: This feature is not supported on MAC OS.
5.3 Setting up your printer server 5.3.1 ASUS EZ Printer Sharing ASUS EZ Printing Sharing utility allows you to connect a USB printer to your wireless router’s USB port and set up the print server. This allows your network clients to print and scan files wirelessly. NOTE: The print server function is supported on Windows® XP, Windows® Vista, and Windows® 7. To set up the EZ Printer sharing mode: 1. From the navigation panel, go to General > USB Application > Network Printer Server. 2.
NOTE: Network printer utility is supported on Windows® XP, Windows® Vista, and Windows® 7 only. To install the utility on Mac OS, select Use LPR protocol for sharing printer. 3. Unzip the downloaded file and click the Printer icon to run the network printer setup program. 4. Follow the onscreen instructions to set up your hardware, then click Next.
5. Wait a few minutes for the initial setup to finish. Click Next. 6. Click Finish to complete the installation. RT-AC66U B1 7. Follow the Windows® OS instructions to install the printer driver.
8. After the printer’s driver installation is complete, network clients can now use the printer.
5.3.2 Using LPR to Share Printer You can share your printer with computers running on Windows® and MAC operating system using LPR/LPD (Line Printer Remote/ Line Printer Daemon). Sharing your LPR printer To share your LPR printer: 1. From the Windows® desktop, click Start > Devices and Printers > Add a printer to run the Add Printer Wizard. 2. Select Add a local printer and then click Next.
3. Select Create a new port then set Type of Port to Standard TCP/IP Port. Click New Port. 4. In the Hostname or IP address field, key in the IP address of the wireless router then click Next.
5. Select Custom then click Settings. 6. Set Protocol to LPR. In the Queue Name field, key in LPRServer then click OK to continue.
7. Click Next to finish setting up the standard TCP/IP port. 8. Install the printer driver from the vendor-model list. If your printer is not in the list, click Have Disk to manually install the printer drivers from a CD-ROM or file.
9. Click Next to accept the default name for the printer. 10. Click Finish to complete the installation.
5.4 Download Master Download Master is a utility that helps you download files even while your laptops or other devices are switched off. NOTE: You need a USB device connected to the wireless router to use Download Master. To use Download Master: 1. Click General > USB application > Download Master to download and install the utility automatically. NOTE: If you have more than one USB drive, select the USB device you want to download the files to. 2.
5. Use the navigation panel to configure the advanced settings. 5.4.1 Configuring Bit Torrent download settings To configure BitTorrent download settings: 1. From Download Master’s navigation panel, click Bit Torrent to launch the Bit Torrent Setting page. 2. Select a specific port for your download task. 3. To prevent network congestion, you can limit the maximum upload and download speeds under Speed Limits. 4.
5.4.2 NZB settings You can set up a USENET server to download NZB files. After entering USENET settings, Apply.
6 Troubleshooting This chapter provides solutions for issues you may encounter with your router. If you encounter problems that are not mentioned in this chapter, visit the ASUS support site at: http://support.asus.com/ for more product information and contact details of ASUS Technical Support. 6.1 Basic Troubleshooting If you are having problems with your router, try these basic steps in this section before looking for further solutions. Upgrade Firmware to the latest version. 1. Launch the Web GUI.
Restart your network in the following sequence: 1. Turn off the modem. 2. Unplug the modem. 3. Turn off the router and computers. 4. Plug in the modem. 5. Turn on the modem and then wait for 2 minutes. 6. Turn on the router and then wait for 2 minutes. 7. Turn on computers. Check if your Ethernet cables are plugged properly. • When the Ethernet cable connecting the router with the modem is plugged in properly, the WAN LED will be on.
• Some cable modem service providers require you to use the MAC address of the computer initially registered on the account. You can view the MAC address in the web GUI, Network Map > Clients page, and hover the mouse pointer over your device in Client Status.
6.2 Frequently Asked Questions (FAQs) I cannot access the router GUI using a web browser • If your computer is wired, check the Ethernet cable connection and LED status as described in the previous section. • Ensure that you are using the correct login information. The default factory login name and password is “admin/admin”. Ensure that the Caps Lock key is disabled when you enter the login information. • Delete the cookies and files in your web browser. For Internet Explorer 8, follow these steps: 1.
The client cannot establish a wireless connection with the router. NOTE: If you are having issues connecting to 5Ghz network, make sure that your wireless device supports 5Ghz or features dual band capabilities. • Out of Range: • Move the router closer to the wireless client. • Try to adjust antennas of the router to the best direction as described in section 1.4 Positioning your router. • DHCP server has been disabled: 1. Launch the web GUI.
• SSID has been hidden. If your device can find SSIDs from other routers but cannot find your router’s SSID, go to Advanced Settings > Wireless > General, select No on Hide SSID, and select Auto on Control Channel. • If you are using a wireless LAN adapter, check if the wireless channel in use conforms to the channels available in your country/area. If not, adjust the channel, channel bandwidth, and wireless mode.
Internet is not accessible. • Check if your router can connect to your ISP’s WAN IP address. To do this, launch the web GUI and go to General> Network Map, and check the Internet Status. • If your router cannot connect to your ISP’s WAN IP address, try restarting your network as described in the section Restart your network in following sequence under Basic Troubleshooting. • The device has been blocked via the Parental Control function.
• If there is still no Internet access, try to reboot your computer and verify the network’s IP address and gateway address. • Check the status indicators on the ADSL modem and the wireless router. If the WAN LED on the wireless router is not ON, check if all cables are plugged properly. You forgot the SSID (network name) or network password • Setup a new SSID and encryption key via a wired connection (Ethernet cable).
Cannot access Web GUI Before configuring your wireless router, do the steps described in this section for your host computer and network clients. A. Disable the proxy server, if enabled. Windows® 7 1. Click Start > Internet Explorer to launch the browser. 2. Click Tools > Internet options > Connections tab > LAN settings. 3. From the Local Area Network (LAN) Settings screen, untick Use a proxy server for your LAN. 4. Click OK when done.
MAC OS 1. From your Safari browser, click Safari > Preferences > Advanced > Change Settings... 2. From the Network screen, deselect FTP Proxy and Web Proxy (HTTP). 3. Cllick Apply Now when done. NOTE: Refer to your browser's help feature for details on disabling the proxy server. B. Set the TCP/IP settings to automatically obtain an IP address. Windows® 7 1. Click Start > Control Panel > Network and Internet > Network and Sharing Center > Manage network connections. 2.
3. To obtain the IPv4 IP settings automatically, tick Obtain an IP address automatically. To obtain the IPv6 IP settings automatically, tick Obtain an IPv6 address automatically. 4. Click OK when done. MAC OS 1. Click the Apple icon located on the top left of your screen. 2. Click System Preferences > Network > Configure... 3. From the TCP/IP tab, select Using DHCP in the Configure IPv4 dropdown list. 4. Cllick Apply Now when done.
C. Disable the dial-up connection, if enabled. Windows® 7 1. Click Start > Internet Explorer to launch the browser. 2. Click Tools > Internet options > Connections tab. 3. Tick Never dial a connection. 4. Click OK when done. NOTE: Refer to your browser's help feature for details on disabling the dial-up connection.
Appendices Notices ASUS Recycling/Takeback Services ASUS recycling and takeback programs come from our commitment to the highest standards for protecting our environment. We believe in providing solutions for you to be able to responsibly recycle our products, batteries, other components, as well as the packaging materials. Please go to http://csr.asus. com/english/Takeback.htm for the detailed recycling information in different regions.
against harmful interference in a residential installation. This equipment generates, uses and can radiate radio frequency energy and, if not installed and used in accordance with the instructions, may cause harmful interference to radio communications. However, there is no guarantee that interference will not occur in a particular installation.
Safety Information To maintain compliance with FCC’s RF exposure guidelines, this equipment should be installed and operated with minimum distance 25cm between the radiator and your body. Use on the supplied antenna. Declaration of Conformity for R&TTE directive 1999/5/EC Essential requirements – Article 3 Protection requirements for health and safety – Article 3.1a Testing for electric safety according to EN 60950-1 has been conducted. These are considered relevant and sufficient.
Canada, Industry Canada (IC) Notices This device complies with Industry Canada license-exempt RSS standard(s). Operation is subject to the following two conditions: (1) this device may not cause interference, and (2) this device must accept any interference, including interference that may cause undesired operation of the device. Radio Frequency (RF) Exposure Information The radiated output power of the ASUS Wireless Device is below the Industry Canada (IC) radio frequency exposure limits.
doit accepter tout brouillage radioélectrique subi, même si le brouillage est susceptible d’en compromettre le fonctionnement. FCC Statement: For product available in the USA/Canada market, only channel 1~11 can be operated. Selection of other channels is not possible. IC Statement: For product available in the USA/Canada market, only channel 1~11 can be operated. Selection of other channels is not possible.
The maximum antenna gain permitted for devices in the band 5725-5850 MHz shall be such that the equipment still complies with the e.i.r.p. limits specified for point-to-point and non-pointto-point operation as appropriate. le gain maximal d’antenne permis (pour les dispositifs utilisant la bande 5725-5850 MHz) doit se conformer à la limite de p.i.r.e. spécifiée pour l’exploitation point à point et non point à point, selon le cas.
au gain maximal indiqué, sont strictement interdits pour l’exploitation de l’émetteur. Antenna list: Ant. Brand P/NO 1 2 3 Antenna 2.4G Gain 5G Gain Connector Type (dBi) (dBi) Walsin RFDPA181312IMLB701 Dipole Walsin RFDPA181306IMLB701 Dipole Walsin RFDPA181305IMLB701 Dipole I-PEX I-PEX I-PEX 1.85 1.83 2.22 3.14 2.7 3.28 Note: The EUT has three antennas.
web site for updated information. Note that we do not offer direct support for the distribution. GNU GENERAL PUBLIC LICENSE Version 2, June 1991 Copyright (C) 1989, 1991 Free Software Foundation, Inc. 59 Temple Place, Suite 330, Boston, MA 02111-1307 USA Everyone is permitted to copy and distribute verbatim copies of this license document, but changing it is not allowed. Preamble The licenses for most software are designed to take away your freedom to share and change it.
you if you distribute copies of the software, or if you modify it. For example, if you distribute copies of such a program, whether gratis or for a fee, you must give the recipients all the rights that you have. You must make sure that they, too, receive or can get the source code. And you must show them these terms so they know their rights.
The “Program”, below, refers to any such program or work, and a “work based on the Program” means either the Program or any derivative work under copyright law: that is to say, a work containing the Program or a portion of it, either verbatim or with modifications and/or translated into another language. (Hereinafter, translation is included without limitation in the term “modification”.) Each licensee is addressed as “you”.
third parties under the terms of this License. c) If the modified program normally reads commands interactively when run, you must cause it, when started running for such interactive use in the most ordinary way, to print or display an announcement including an appropriate copyright notice and a notice that there is no warranty (or else, saying that you provide a warranty) and that users may redistribute the program under these conditions, and telling the user how to view a copy of this License.
readable source code, which must be distributed under the terms of Sections 1 and 2 above on a medium customarily used for software interchange; or, b) Accompany it with a written offer, valid for at least three years, to give any third party, for a charge no more than your cost of physically performing source distribution, a complete machine-readable copy of the corresponding source code, to be distributed under the terms of Sections 1 and 2 above on a medium customarily used for software interchange; or,
their licenses terminated so long as such parties remain in full compliance. 5. You are not required to accept this License, since you have not signed it. However, nothing else grants you permission to modify or distribute the Program or its derivative works. These actions are prohibited by law if you do not accept this License.
apply in other circumstances. It is not the purpose of this section to induce you to infringe any patents or other property right claims or to contest validity of any such claims; this section has the sole purpose of protecting the integrity of the free software distribution system, which is implemented by public license practices.
10. If you wish to incorporate parts of the Program into other free programs whose distribution conditions are different, write to the author to ask for permission. For software which is copyrighted by the Free Software Foundation, write to the Free Software Foundation; we sometimes make exceptions for this. Our decision will be guided by the two goals of preserving the free status of all derivatives of our free software and of promoting the sharing and reuse of software generally.
NO WARRANTY 11 BECAUSE THE PROGRAM IS LICENSED FREE OF CHARGE, THERE IS NO WARRANTY FOR THE PROGRAM, TO THE EXTENT PERMITTED BY APPLICABLE LAW. EXCEPT WHEN OTHERWISE STATED IN WRITING THE COPYRIGHT HOLDERS AND/OR OTHER PARTIES PROVIDE THE PROGRAM “AS IS” WITHOUT WARRANTY OF ANY KIND, EITHER EXPRESSED OR IMPLIED, INCLUDING, BUT NOT LIMITED TO, THE IMPLIED WARRANTIES OF MERCHANTABILITY AND FITNESS FOR A PARTICULAR PURPOSE. THE ENTIRE RISK AS TO THE QUALITY AND PERFORMANCE OF THE PROGRAM IS WITH YOU.
For Turkey only Authorised distributors in Turkey: BOGAZICI BIL GISAYAR SAN. VE TIC. A.S. Tel. No.: +90 212 3311000 Address: AYAZAGA MAH. KEMERBURGAZ CAD. NO.10 AYAZAGA/ISTANBUL CIZGI Elektronik San. Tic. Ltd. Sti. Tel. No.: +90 212 3567070 Address: CEMAL SURURI CD. HALIM MERIC IS MERKEZI No: 15/C D:5-6 34394 MECIDIYEKOY/ ISTANBUL KOYUNCU ELEKTRONiK BiLGi iSLEM SiST. SAN. VE DIS TIC. A.S. Tel. No.: +90 216 5288888 Address: EMEK MAH.ORDU CAD. NO:18, SARIGAZi, SANCAKTEPE ISTANBUL AEEE Yönetmeliğine Uygundur.
ASUS Contact information ASUSTeK COMPUTER INC. (Asia Pacific) Address 15 Li-Te Road, Peitou, Taipei, Taiwan 11259 Website www.asus.com.tw Technical Support Telephone Support Fax Online support +886228943447 +886228907698 support.asus.com ASUS COMPUTER INTERNATIONAL (America) Address 800 Corporate Way, Fremont, CA 94539, USA Telephone +15107393777 Fax +15106084555 Website usa.asus.com Online support support.asus.
Networks Global Hotline Information Region Country Service Hours 09:00-13:00 ; 14:00-18:00 Mon-Fri 09:00-18:00 Mon-Fri Cyprus 800-92491 France Hungary 0033-170949400 0049-1805010920 0049-1805010923 (component support) 0049-2102959911 ( Fax ) 0036-15054561 Italy 199-400089 Greece 00800-44142044 Austria Netherlands/ Luxembourg Belgium Norway Sweden Finland Denmark Poland Spain Portugal Slovak Republic Czech Republic Switzerland-German Switzerland-French Switzerland-Italian United Kingdom Ireland R
Networks Global Hotline Information Region Country Australia New Zealand Japan Korea Thailand Asia-Pacific Singapore Malaysia Philippine India India(WL/NW) Indonesia Americas Hotline Numbers 1300-278788 0800-278788 0800-1232787 0081-570783886 (Non-Toll Free ) 0082-215666868 0066-24011717 1800-8525201 0065-64157917 0065-67203835 ( Repair Status Only ) 0060-320535077 1800-18550163 1800-2090365 0062-2129495000 500128 (Local Only) Vietnam 1900-555581 Hong Kong USA Canada Mexico 00852-35824770 1-812-2
Networks Global Hotline Information Region Middle East + Africa Country Egypt Saudi Arabia UAE Turkey South Africa Israel Romania Bosnia Herzegovina Bulgaria Balkan Countries Croatia Montenegro Serbia Slovenia Estonia Latvia Lithuania-Kaunas Lithuania-Vilnius Hotline Numbers 800-2787349 800-1212787 00971-42958941 0090-2165243000 0861-278772 *6557/00972-39142800 *9770/00972-35598555 0040-213301786 Service Hours 09:00-18:00 Sun-Thu 09:00-18:00 Sat-Wed 09:00-18:00 Sun-Thu 09:00-18:00 Mon-Fri 08:00-17:00 M