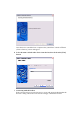
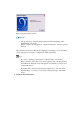
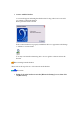
Once the device search has been completed, the [Add New Connection Wizard (Select a Device)] screen will appear. 4. Select the name of the headset device from the list, then click on the [Next] button 5. Answering with the headset If the service has been properly detected, a screen will appear indicating that the headset is being called, and a tone will accordingly sound in the headset.
Please press the headset switch. Important o The procedure for operating the headset may differ depending on the manufacturer and model. Please consult your user guide for a detailed description of how to operate the unit. The [Add New Connection Wizard (Configuring (Connecting to Voice Circuit))] screen will appear, and device configuration will be performed.
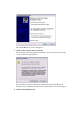
The [Install Hardware] screen will appear. 7. Click on the [Continue Anyway] button The following screen will appear automatically. You may disregard it and click on the [Continue Anyway] button. The [Add New Connection Wizard (Completing the Found New Hardware Wizard)] screen, which is the final screen of the installation wizard, will appear. 8.
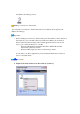
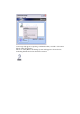
Once driver installation is complete, the [Add New Connection Wizard (Enter Connection Name)] will appear. 9. Confirm the information you have entered, and click on the [Next] button The [Add New Connection Wizard (Completing the Add New Connection Wizard)] screen will appear. 10.
the [Bluetooth Settings] screen. Making a connection to the headset You can make a connection to the headset from an icon that has been registered in [Bluetooth Settings]. Important • Before making a connection to the headset, please check that you have turned on the headset's power, and that it has been enabled for a Bluetooth connection. Please ensure that the following audio-related applications have been closed before you connect the headset to your PC.
2. Answer with the headset A screen will appear indicating that the headset is being called, and a tone will accordingly sound in the headset. Please press the headset switch. If the connection has been properly established, the icon's appearance will change to indicate a connected state. You may now launch conferencing and voice-recognition software and use the headset. Disconnecting from the headset Please follow the steps below to disconnect from the headset. Procedure 1.
A message will appear, requesting confirmation that you wish to disconnect. Click on the [Yes] button. The icon on the [Bluetooth Settings] screen will appear as shown below, indicating that the device has been disconnected.
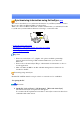
Synchronising information using ActiveSync [SPP] This section describes how to synchronize information on your PDA (calendars, contacts, inboxes etc) with your PC using Microsoft ActiveSync. When you connect via Bluetooth instead of with a standard cable, you will always be able to synchronise your data without the hassle of having to connect the cable.
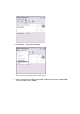
2. Click [File] [Connection Settings] The [Connection Settings] window will appear. 3. Place a check next to [Allow serial cable or infrared connection to this COM port], and then select "COM7".
Note o In the standard set-up, the port is configured to "COM7" (refer to Steps (3) and (4) under "Preparing the PDA" below). When using a different port, please also change the port number selected in this window.
1. Tap on the Bluetooth icon in the bottom right of the screen Important o The graphic above shows an example of a PDA operating window. The connection procedure may be different depending on the manufacturer or model of PDA you use. Please refer to the product instruction manuals for further details. The [Bluetooth Settings] window will open. The message "Connection not registered" will appear if no Bluetooth device has been registered. Please tap on [OK] to close the message.
2. Double click on [Tools] [Search for peripheral components] The application searches for nearby Bluetooth devices. 3. Tap and hold on the destination PC icon, and then select [Update Services] A search for services will be carried out, and then a list of service names and their connection status will appear as list in the lower window.
4. Tap and hold on "COM7" from the list of service names, and then select "Register ActiveSync". 5.
An ActiveSync connection will be initiated. Establishing a partnership between ActiveSync and a PDA Once a connection has been successfully established with a PDA, the procedure for establishing a partnership with the PDA will be started by the ActiveSync application on the PC. Performing this set-up procedure will enable data to be synchronised between your PC and PDA. Procedure 1.
The [New Partnership (Specify Data Synchronisation Method)] window will appear. 2. Select "Synchronise with this PC", and then click on the [Next] button The [New Partnership (Select Synchronisation Settings)] window will appear. 3.
The [New Partnership (Completing Setup)] window will appear. 4. Click on the [Finish] button When you click on the [Finish] button, ActiveSync will begin to synchronise your information.
(Synchronisation process) [Synchronisation complete] While the ActiveSync connection is active, synchronisation will be performed whenever information is changed on either the PC or the PDA. Once a partnership has been established, every time you start your PC (and PDA) thereafter, a Bluetooth connection will be opened and ActiveSync will synchronise your information.
Follow the procedure below on your PDA if you want to end an ActiveSync connection manually. Procedure 1. Tap and hold on "COM7" in the Bluetooth Settings window, and select [ActiveSync Release] Cancelling a partnership Follow the procedure below from the ActiveSync window on the PC if you want to cancel the partnership between your PC and PDA. Procedure 1.
Click on the [Yes] button when the confirmation message appears. Note o If you wish to create another ActiveSync connection, you will have to repeat the above procedure to re-establish a partnership.
Building a personal area network [PAN] You can use the PAN profile to build a network of Bluetooth-enabled devices. Operating as a server Operating as a client A personal area network comprises a client-server architecture. The device to which other devices connect is called the "server", and a device that connects to the server is called a "client." The client-server relationship is not necessarily a fixed one.
• The maximum total number of devices that can be used to constitute a single personal area network is seven: one server and six clients. A network comprising as many as seven devices could theoretically be built, but an operating environment that involves the use of other Bluetooth devices, leaving aside other complications, might require the network to comprise fewer components.. By using the PAN profile, you will be able to build a network that uses the same TCP/IP protocol used in regular LANs.
Important • Please refer to Windows Help for further information on TCP/IP, DHCP and configurations for sharing. Operating as a server The following icon will appear in the tasktray when the PAN server function has been activated. Should the icon not appear, please follow the procedure below to activate the PAN server function. 1. Right-click the Bluetooth icon in the task tray and make sure the Option [Use PAN Group Ad-hoc Network] is enabled.
Note • When you try to connect to another server as a client, the task tray icon will disappear, and your machine will not be able to function as a server in response to connection requests originating from other devices. Operating as a client Connecting to a server as a client is performed from the [Bluetooth Settings] window, as described below. Procedure 1.
3. Click on the [Next] button in the advisory dialog box The [Add New Connection Wizard (Searching for Bluetooth devices)] window will appear. Once the program has finished searching for the devices, the [Add New Connection Wizard (Device Selection)] window will appear. 4.
The [Add New Connection Wizard (Searching for Services)] window will appear. The [Add New Connection Wizard (Confirm Connection Name)] window will appear. 5.
The registered icon will appear in the [Bluetooth Settings] window. Connecting to a server Procedure 1.
Once you have connected, the icon will change to indicate that the device is connected. Ending a connection to a server Procedure 1.
A message confirming whether you wish to disconnect will appear. Click on the [Yes] button. Once you have disconnected, the icon will change to indicate that the device is not connected.
Printing This section describes how to use a Bluetooth-compatible printer for printing. Types of printer functions When printing using Bluetooth, the methods for configuring and using the printer will vary with the corresponding profile. Profile Bluetooth Settings HCRP (*1) You must register the printer in Bluetooth Settings SPP Operation Allows you to print from various applications, as with ordinary cable-connected printers.
Making a device undiscoverable to other users For security purposes, you may not wish your device to be detected by other Bluetooth users. The procedure for accomplishing this is provided below. Procedure 1. Right-click on the Bluetooth icon in the task tray, and click on [Device Properties & Security] The [Device Properties] window will appear. 2.