AT&T MERLIN LEGEND ™ Communications System Release 2.
Copyright © 1992 AT&T All Rights Reserved Printed in U.S.A. AT&T 555-620-120 Issue 1 October 1992 Notice Every effort was made to ensure that the information in this book was complete and accurate at the time of printing. However, information is subject to change. Federal Communications Commission (FCC) Electromagnetic Interference Information This equipment has been tested and found to comply with the limits for a Class A digital device, pursuant to Part 15 of the FCC Rules.
Contents About This Guide ■ ■ 1 Conventions How to Comment on This Guide Your Analog Multiline Telephone ■ ■ ■ ■ ■ ■ ■ ■ ■ ■ BIS-10 Telephone BIS-22 Telephone BIS-22D Telephone BIS-34 Telephone BIS-34D Telephone MLC-5 Cordless Phone Handset MLC-5 Cordless Phone Base Unit The Display Area Dedicated Feature Buttons Line Buttons 1 2 3 1-1 1-2 1-4 1-6 1-8 1-10 1-12 1-14 1-16 1-18 1-22 Contents i
Contents Your Analog Multiline Telephone (continued) ■ ■ ■ ■ 2 Caring for Your Phone Additional Equipment Quick Start ■ ■ ■ ■ ■ ii Line Button Lights on BIS Phones Line Button Lights on MLC-5 Cordless Phones Identifying Call Types Making Calls Answering Calls Transferring Calls Setting Up a Conference Contents 1-27 1-28 1-29 1-30 2-1 2-2 2-4 2-9 2-12 2-14
Contents Using and Programming Features 3 ■ Using Features 3-1 3-4 4 Feature Finder 4-1 5 Features 5-1 5-2 5-6 5-8 5-10 5-14 ■ ■ Account Code Entry Alarm Clock Auto Answer All Auto Dial ■ Calendar ■ ■ Contents i i i
Contents Features (continued) ■ ■ ■ ■ ■ ■ ■ ■ ■ ■ ■ ■ ■ ■ ■ ■ ■ iv Callback Call Waiting Conference Coverage Do Not Disturb Feature Button Forward and Follow Me Last Number Dial Line Request Messaging Night Service Paging Park Personal Speed Dial Pickup Privacy Recall Contents 5-15 5-20 5-22 5-26 5-34 5-37 5-39 5-44 5-45 5-46 5-54 5-55 5-58 5-62 5-64 5-67 5-69
Contents Features (continued) ■ ■ ■ ■ ■ ■ ■ ■ Reminder Service Ringing Options Saved Number Dial Signaling and Notify System Speed Dial Timer Transfer Voice Announce 5-71 5-73 5-77 5-79 5-82 5-84 5-85 5-95 Contents v
Contents A Programming Special Characters A-1 B Feature Codes B-1 C Programming Codes C-1 vi Contents
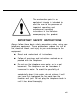
The exclamation point in an equilateral triangle is intended to alert the user to the presence of important operating and maintenance (servicing) instructions in the literature accompanying the product. IMPORTANT SAFETY INSTRUCTIONS Always follow these basic safety precautions when using your telephone equipment. These precautions reduce the risk of fire, electrical shock, and injury to you and damage to the equipment. ■ Read and understand all instructions.
■ Do not use the telephone during electrical storms in your immediate area. There is a remote risk of electrical shock from lightning. ■ Unplug the telephone from the wall outlet before cleaning. Use a damp cloth for cleaning. Do not use liquid or aerosol cleaners on the telephone. ■ Never push objects of any kind into the telephone through openings or slots. Never spill liquid of any kind on the telephone. ■ Do not use the telephone near a gas leak.
ix
About This Guide This guide gives you the information you need to use your analog multiline phone with the MERLIN LEGEND™ Communications System. If you have questions about using your phone’s features, contact your system manager. He or she is a co-worker who is responsible for managing the system.
About This Guide Conventions The following typographical conventions are used in this guide: ■ Bold type is used for phone buttons. Press Transfer to send a call to another phone. ■ Constant width type is used for information on telephone display or on a PC screen. Your phone posts the message: Do Not Disturb ■ Bold constant width type indicates information that you enter exactly as shown.
About This Guide How to Comment on This Guide We welcome your feedback on this guide. Please use the feedback form on the next page. If the form is missing, send your comments to A. Sherwood, AT&T, 99 Jefferson Road, Rm. # 2A25, Parsippany, NJ 07054.
About This Guide 4 How to Comment on This Guide
Your Analog Multiline Telephone 1 Your analog multiline phone is one of several phones that can be used with your communications system. These phones have from 5 to 34 line buttons for making and receiving calls and for programming features. The six models of analog multiline phones covered in this guide are the BIS-10; the BIS-22 and its display model, the BIS-22D; the BIS-34 and its display model, the BIS-34D; and the MLC-5 cordless phone. Each of these phones is illustrated on the following pages.
Your Analog Multiline Telephone BIS-10 Telephone 1-2 BIS-10 Telephone
Your Analog Multiline Telephone Button labeling card A card you can label with the line or feature assigned to each line button Dedicated feature buttons The 8 imprinted buttons for the features used most often Desk stand (not shown) A support that adjusts to two angles and can be removed for wall mounting Dialpad The numbered buttons, including ✱ and # that are used to dial phone numbers and feature codes Handset The hand-held part of the phone that you pick up, talk into, and listen from Line buttons The
Your Analog Multiline Telephone BIS-22 Telephone 1-4 BIS-22 Telephone
Your Analog Muitiline Telephone Button Iabeling card A card you can Iabel with the line or feature assigned to each line button Dedicated feature buttons The 9 Imprinted buttons for the features used most often Desk stand (not shown) A support that adjusts to two angles and can be removed for wall mounting Dialpad The numbered buttons, along with ✱ and #, that are used to dial phone numbers and features codes Handset The hand-held part of the phone that you pick up, talk into, and listen from Line buttons
Your Analog Multiline Telephone BIS-22D Telephone 1-6 BIS-22D Telephone
Your Analog Multiline Telephone Button labeling card A card you can label with the line or feature assigned to each line button Timekeeping buttons The 4 buttons used to control display timekeeping functions Dedicated feature buttons The 9 imprinted buttons for the features used most often T/P switch A switch used to test and program the phone Desk stand (not shown) A support that adjusts to two angles and can be removed for wall mounting Dialpad The numbered buttons, along with ✱ and #, that are used
Your Analog Multiline Telephone BIS-34 Telephone 1-8 BIS-34 Telephone
Your Analog Multiline Telephone Button labeling card A card you can label with the line or feature assigned to each line button Dedicated feature buttons The 9 imprinted buttons for the features used most often Desk stand (not shown) A support that adjusts to two angles and can be removed for wall mounting Dialpad The numbered buttons, along with and ✱ and #, that are used to dial phone numbers and feature codes Handset The hand-held part of the phone that you pick up, talk into, and listen from Line butto
Your Analog Multiline Telephone BIS-34D Telephone 1-10 BIS-34D Telephone
Your Analog Multiline Telephone Button labeling card A card you can label with the line or feature assigned to each line button Speakerphone volume control A dial used to adjust the volume of the speakerphone Contrast control A dial used to control the contrast of the display Timekeeping buttons The 4 buttons used to control display timekeeping functions Dedicated feature buttons The 9 Imprinted buttons for the features used most often T/P switch A switch used to test and program the phone Desk stand
Your Analog Multiline Telephone MLC-5 Cordless Phone Handset 1-12 MLC-5 Cordless Phone Handset
Your Analog Multiline Telephone Antenna A retractable (or flexible) antenna that must be fully extended for clear reception Battery contacts Metal contacts that recharge the handset.
Your Analog Multiline Telephone MLC-5 Cordless Phone Base Unit 1-14 MLC-5 Cordless Phone Base Unit
Your Analog Multiline Telephone Antenna A retractable antenna that must be fully extended for clear reception Battery contacts Metal contacts used to recharge the handset. The contacts may need to be cleaned periodically with a soft pencil eraser Channel indicator An electronic display of the channel currently being used or programmed.
Your Analog Multiline Telephone The Display Area The display gives you the following information to help you handle calls and messages and program your phone. Caller and Feature Identification When you receive inside calls, you see the name of the caller, if programmed by your company, or the extension of the caller. You also see Ext R, indicating the call is on your ICOM or SA Ring button or Ext V, indicating the call is on your ICOM or SA Voice button.
Your Analog Multiline Telephone Timekeeping The display shows the time and date. It also has an alarm clock you can set to remind you of important meetings or events, and a timer that can be used to keep track of the duration of your calls or work periods. See Chapter 5 for more information on Alarm Clock, Calendar, and Timer.
Your Analog Multiline Telephone Dedicated Feature Buttons Imprinted (dedicated) feature buttons are located directly above and below the dialpad. BIS Phones On BIS phones, four of the dedicated feature buttons — Message, HFAI, Microphone, and Speakerphone — have a light next to them to indicate on or off. Conference Press to add another person to a call for conferencing with up to five people. Drop Press Drop and a line button to disconnect a person from a conference call.
Your Analog Multiline Telephone Message Press to read your messages when the light is on next to the message button on a display phone. On display and non-display phones, the light is on when you have a voice-mail message, a fax, a message from a co-worker, or a message from the system operator. Microphone Press to turn the speakerphone microphone on and off. By pressing Microphone during a conversation, you can speak privately with someone in your office without being heard by the caller.
Your Analog Multiline Telephone ■ Transfer Press Speakerphone while the speakerphone is in use to hang up the phone. Press to send a call to another phone or to an outside number. NOTE: Depending on how your system is set up, Recall, Transfer, Conference, Drop, and Hold may not work as described in this guide. Ask your system manager if these features work differently.
Your Analog Multiline Telephone MLC-5 Cordless Phone On the MLC-5 cordless phone, there are five imprinted buttons, as described below. Hold Press to put a call on hold. The red light next to the line button with the call on hold flashes until the call is resumed or the person hangs up. As a reminder, the phone beeps once every 60 seconds. (The interval may vary depending on how your system is administered. ) More than one call at a time can be put on hold.
Your Analog Multiline Telephone Line Buttons There are 10 or more line buttons on your BIS phone, located in the center on the BIS-10, and above and along the right side of the dialpad on the BIS-22, BIS-22D, BIS-34, and BIS -34D. On the cordless phone, there are 5 line buttons at the top of the phone just above the dedicated feature buttons. Use these buttons to make inside calls (calls to and from other extensions) and outside calls.
Your Analog Multiline Telephone Phones with SA Buttons ❑ ❑ ❑ ❑ ❑ ❑ ❑ ❑ ❑ ❑ ❑ ❑ ❑ ❑ ❑ ❑ ❑ ❑ ❑ ❑ SA Ring. Use this button to make and receive both inside and outside calls. To call an inside number, dial only the extension. For outside calls, dial a dial-out code (usually a 9) before the phone number. SA Voice. Use this button to make inside voice-announced calls and outside calls, and to receive both inside and outside calls.
Your Analog . Multiline Telephone SA Originate Only. Use this button only to make calls; calls do not come in on this button. To make an outside call on this button, enter a dial-out code (usually a 9) before dialing the phone number. This button is set up by your company to make either inside ringing or voice-announced calls (not both). Shared SA. Use these buttons to answer calls for coworkers and to join their conversations. Each button is linked to a specific SA button on a co-worker’s phone.
Your Analog Muitiline Telephone Phones with ICOM Buttons ❑ ❑ ❑ ❑ ❑ ❑ ❑ ❑ ❑ ❑ ❑ ❑ ❑ ❑ ❑ ❑ ❑ ❑ ❑ ❑ ICOM Ring. Use this button to make inside ringing calls and to receive both inside ringing and voice-announced calls. You cannot use this button for outside calls, but outside calls can be transferred to you. ICOM Voice. Use this button to make inside voiceannounced calls and to receive both inside ringing and voice-announced calls.
Your Analog Multiline Telephone ICOM Originate Only. Use this button to make Inside calls; calls do not come in on this button. This button is set up by your company to make either inside ringing or voice announced calls. 555-1234. Use any button labeled with a phone number to make or receive outside calls only. This is called a “personal line” because it appears only on your phone or a specific group of phones. It is a direct outside line that does not need a dial-out code.
Your Analog Multiline Telephone Line Button Lights on BIS Phones On BIS phones, each line button has two lights next to it, a red one and a green one, showing whether the line is available, in use, or on hold. Light Meaning Steady red You are automatically connected to this line when you lift the handset. Steady green The line or the feature programmed onto the line button is in use. Steady red and green You are using this line button or the Line Request feature is in use.
Your Analog Multiline Telephone Line Button Lights on MLC-5 Cordless Phones On MLC-5 cordless phones, there are five line buttons, each with a red light indicating whether the line is available, in use, or on hold. Light Meaning Steady red The line or the feature programmed onto the line button is in use. Flashing red An incoming call is ringing on this line button. Fast flashing red You have put a call on hold on this line button.
Your Analog Multiline Telephone Caring for Your Phone First unplug the phone from the wall jack, then use a soft cloth lightly dampened with water or a mild soap solution to clean the phone. CAUTION: To prevent permanent damage, do not immerse the phone in water or any other liquid, or use aerosol cleaners directly on the phone.
Your Analog Multiline Telephone Additional Equipment For detailed information about the actual use of the following equipment, refer to the documentation packaged with each item. Headsets For hands-free operation of the telephone, four headsets are available: ■ The StarSet® Headset — has a single ear tip and is worn without a headband. ■ The Mirage® Headset — has a single disk-shaped receiver worn without a headband. ■ ■ 1-30 The Supra® Headset — has a single disk-shaped receiver and headband.
Your Analog Multiline Telephone Amplifiers The headsets described in the previous section will work with any phone connected to the system when combined with one of the following amplifiers: ■ Modular Ampltfier — connects the StarSet, Mirage, Supra, and Supra NC headsets to a phone equipped with a modular handset. ■ Plug Prong Amplifier — connects the StarSet, Mirage, Supra, and Supra NC headsets to a phone equipped with a headset adapter and to many automatic call distributors.
Your Analog Multiline Telephone 1-32 Additional Equipment
Quick Start 2 Quick Start helps you begin using the basic features of your phone immediately. To use features not addressed in this chapter, see Chapter 5, “Features.
Quick Start Identifying Call Types Your phone provides distinctive rings to identify ringing calls. It also provides tones to assist you in using system features or making calls. To Identify Ringing Calls Your phone uses three distinctive ringing patterns to help you identify different types of incoming calls.
Quick Start To Identify Tones When making a call or using a feature, you may hear a tone. Each tone has a different meaning. Tone Meaning Dial tone (steady tone) You can make a call. Busy (slow repeating tone) The phone you are calling is busy. Fast busy (fast repeating tone) No lines are avilable. Alternating high and low tones You dialed a number incorrectly or misused a feature. Confirmation tone (double break in dial tone followed by steady tone) You used a feature properly.
Quick Start Making Calls A steady red light beside a line button indicates a free line. When you lift the handset to make a call, you are automatically connected to this line. To Make Inside Calls Inside calls are either voice-announced or ringing. When you make a voice-announced call, your co-worker’s phone does not ring; your voice is heard over the speakerphone if your co-worker’s phone is programmed to receive voice announcements.
Quick Start NOTE: If you have difficulty hearing the other person while using your speakerphone, background noise may be interfering with the reception and transmission. Lowering the volume of the speakerphone reduces the interference. Also, do not place anything in front of the microphone. On BIS Phones 1. If the red light next to the ICOM or SA button is not on, press the button. The red light goes on. 2. Lift the handset or press Speaker. The green light next to the line button goes on. 3. 4.
Quick Start On MLC-5 Cordless Phones 1. 2. Extend the antenna on both the handset and the base unit. If the red light next to the SA or ICOM button is not on, press the button. The red light goes on. 3. Press On/Off. The red light next to it goes on. The Talk light on the base unit also goes on. 4. 5. 6. Dial the extension number. For voice-announced calls, begin talking when you hear a beep. To disconnect the call, press On/Off or place the handset in the base unit.
Quick Start To Make Outside Calls Use any SA or Pool button or any line button labeled with a phone number to make an outside call. ICOM buttons are resewed for inside calls. Only SA buttons need a dial-out code (usually a 9) before dialing the phone number. On BIS Phones 1. If the red light next to the line button you want to use is not on, press the button. The red light goes on. 2. Lift the handset or press Speaker. The green light next to the line button goes on. 3. 4.
Quick Start On MLC-5 Cordless Phones 1. 2. 3. Extend the antenna on both the handset and the base unit. Press Status to see which lines or features are in use. Press On/Off. The red light next to it goes on. The Talk light on the base unit also goes on. 4. If the red light next to the line button you want to use is not on, press the button. The red light goes on. 5 . If you are using a SA button, dial the dial-out code. 6 . Dial the phone number. 7 .
Quick Start Answering Calls Your phone alerts you to an incoming call in several ways. The phone can ring or you can receive a voice-announced call over the speakerphone. If you are using your phone, you may hear a Call Waiting signal (a beep) during your call. This beep indicates that you have another call. See “Call Waiting” in Chapter 5.
Quick Start To Answer Ringing Calls on BIS Phones If You Are Not on the Phone: 1. A flashing green light next to a line button indicates a call is ringing on that line button. If the red light next to the button with the call is not on, press that line button. The red light goes on. 2. Lift the handset or press Speaker. Both the red and green lights next to the line button stay on while you are on the call. If You Are on the Phone: 1. To put a call on hold, press Hold. 2.
Quick Start To Answer Ringing Calls on MLC-5 Cordless Phones If You Are Not on the Phone: 1. Press On/Off. The red light next to it goes on. The Talk light on the base unit and the light next to the line button with the call also go on. 2. To disconnect the call, press On/Off or place the handset in the base unit. The handset turns off automatically when placed in the base unit. If You Are on the Phone: 1. 2. 3. To put a call on hold, press Hold.
Quick Start Transferring Calls You can transfer a call from your extension to another inside extension or outside number. The following procedure provides the basic steps for transferring a call. To use OneTouch transfer and other system features available during transfer, see “Transfer” in Chapter 5. To Transfer to an Inside Extension 1. If your phone has Auto Dial buttons, check the light next to the button for the person’s extension. ■ If the light is oft, the person is unavailable.
Quick Start On MLC-5 cordless phones, disconnect from the transfer after connecting two parties by doing one of the following: ■ ■ Press On/Off. Place the handset unit in the base unit to disconnect automatically. To Transfer to an Outside Number 1. Press Transfer. The call is put on hold automatically. 2. Press a line button to get an outside line, or press an SA button and dial the dial-out code. You hear a dial tone. 3. Dial the outside number. ■ If the person is available, hang up.
Quick Start Setting Up a Conference A conference can have up to three inside participants, including yourself, and up to two outside participants. When using an MLC-5 cordless phone, you can participate in a conference but you cannot initiate the conference call. 1. Make a call to the first extension or outside number. 2. Press Conference after the person answers and you have announced the call. The green light next to the the button flashes, signaling that the call is on hold for the conference. 3.
Quick Start 5. Confirm participation: If the person is available, announce the ■ conference and press Conference. All participants, including you, are connected. ■ If the person is unavailable, hang up. ■ If this is the case, select a new line and make another call or return to the original call. CAUTION: If the system selects an SA Voice button when adding a conference participant, you hear a beep instead of ringing after you dial the extension to be included in the conference.
Quick Start 8. While on a conference: Disconnect yourself without ending the call by ■ pressing Hold. ■ Rejoin the conference by pressing the line button for any participant. ■ Disconnect a participant by pressing Drop and then pressing participant’s line button. (Do not use Drop to disconnect a participant when the conference is on hold. Do not use Drop to disconnect yourself from a conference you initiated. ) 9. To end the conference, hang up. To Leave a Conference Temporarily 1. Press Hold.
Using and Programming Features 3 You can use most of your phone’s features either by pressing programmed line buttons or by dialing feature codes, depending on the following: The number of unlabeled line buttons. If all the line buttons have lines assigned to them, you can use features only by dialing feature codes. If there are unlabeled line buttons, you can program features onto them. You can then use the feature by pressing that button instead of dialing the feature code.
Using and Programming Features ■ ■ ■ ■ ■ ■ ■ Auto Answer All Auto Dial Coverage — Coverage Off — Primary Individual Coverage — Secondary Individual Coverage — Group Coverage — Coverage VMS Off Do Not Disturb Messaging — Posted Message Saved Number Dial Signaling and Notify Whether the feature can be used only by dialing a feature code. Some features are meant to be used by dialing a 1-, 2-, or 3- digit code.
Using and Programming Features ■ ■ Messaging — cancel Personal Speed Dial General instructions for using and programming features follow. Specific instructions for using and programming each feature are in Chapter 5.
Using and Programming Features Using Features There are two ways to use your phone’s features: ■ Press a programmed button. You can program some features on line buttons for one-touch use or to toggle the feature on and off. Your phone may already have features programmed. You can program any unlabeled line buttons with additional features. ■ Press a Feature button and dial a feature code. You must program a Feature button on your phone so that you can use feature codes.
Using and Programming Features NOTE: Using a Feature button or a button with a specific feature programmed on it are the recommended access methods. However, you can press # instead of pressing the Feature button in some instances: ■ ■ When you have lifted the handset (or used Speakerphone or Speaker or a headset) on an ICOM or SA button and hear dial tone. You must not be on an outside line — that is, you must be listening to the system’s dial tone, not the phone company’s dial tone.
Using and Programming Features Programming a Feature Button 1. Label the button you want to program as Feature. 2. Slide the T/P switch to the P position. You hear a tone every 20 seconds to remind you that you are in programming mode. 3. Press the button you labeled Feature. 4. Dial ✱ 20. 5. Slide the T/P switch to the center position. Using a Feature Code 1. 2. Press the programmed Feature button. Dial the feature code. See Appendix B for more information on feature codes.
Using and Programming Features 6. Dial the programming code. See Appendix C for more information on programming codes. Some features require additional entries. For example, you must enter an extension for inside Auto Dial. 7. Repeat Steps 5 and 6 for any other button you want to program. 8. Slide the T/P switch to the center position. To use this feature, press the programmed button. NOTE: Using this procedure reprograms a previously programmed button.
Using and Programming Features 3-8 Using Features
Feature Finder 4 The Feature Finder on the next few pages helps you easily identify and find features by function instead of by name: ■ ■ ■ ■ ■ ■ Calling Basics Covering Calls Messaging and Paging Privacy Ringing Timekeeping Chapter 5 lists features alphabetically with descriptions and step-by-step instructions for programming and use.
Feature Finder Calling Basics If you Want to… See… Dial numbers with the touch of a button Auto Dial Quickly dial numbers you call often Personal Speed Dial Quickly dial numbers programmed by your company System Speed Dial Automatically redial a number you dialed previously Last Number Dial Saved Number Dial Connect automatically to a busy extension or outside line when it’s free Callback Line Request Quickly disconnect one call and dial another without pressing the switchhook Recall Enter an
Feature Finder Covering Calls If you want to… See… Answer a co-worker’s ringing phone from your phone Pickup and Coverage Have a co-worker answer your calls Coverage Forward your calls to another phone Forward and Follow Me Messaging and Paging If you want to… See… Let a co-worker know you called or find out if you have a fax or message Messaging Broadcast an announcement Put a call on hold while you page a coworker Paging Park Paging Signal a co-worker to contact you Signaling and Notify U
Feature Finder Privacy If you want to… See… Prevent your phone from ringing Do Not Disturb Prevent co-workers from joining your calls Privacy Choose if you want to receive voiceannounced calls Voice Announce Ringing If you want to … See … Have your phone ring differently from other phones Ringing Options — Personalized Ring Set your phone to ring immediately, after a delay, or not at all Ringing Option — Ring Timing Set your phone to ring once or repeatedly while you’re on the phone Ringing
Feature Finder Timekeeping If you want to… See… Remind yourself of meetings or appointments Alarm Clock Reminder Service Change the time, day, and date on your display Calendar Keep track of the duration of calls or meetings Timer Feature Finder 4-5
Feature Finder 4-6 Feature Finder
Features 5 This chapter describes features alphabetically with instructions for programming and using them. Some features have to be programmed on your phone before you can use them. Others are built into the system and do not need programming. You use most features by dialing a feature code or pressing a programmed line button.
Features Account Code Entry Account codes help your company track phone use to bill clients and to forecast and budget costs. You can use account codes for incoming as well as outgoing calls if your system is programmed for both. If your system has this feature, your choices are: ■ Required. You must enter an account code before making an outside call. Entering an account code for incoming calls is optional. ■ Optional.
Features To Program an Account Code Entry Button 1. 2. 3. 4. 5. Label the button to be programmed as Account Code. Slide the T/P switch to P. Press the button you labeled Account Code. Dial ✱ 82. Slide the T/P switch to the center position. To Enter an Account Code Before Calling 1. 2. 3. 4. 5. Press the programmed Account Code button, or press the programmed Feature button and dial 82. Dial the account code, followed by #. See Notes. Press an outside line or SA button.
Features NOTE: ■ ■ For Step 2, if you have programmed an outside Auto Dial button with a specific account code followed by #, you can press the button whenever you need to enter the code. (See Auto Dial.) If you are using account codes on a conference call, follow Steps 1 through 5 above and press Conference. When adding participants, repeat steps 1, 2, 3, and 5 and press Conference again. This associates an account code with each participant. To Enter or Change an Account Code During a Call 1.
Features NOTE: ■ ■ ■ If you make a mistake, you can correct the code by repeating this procedure. For Step 2, if you have programmed an outside Auto Dial button with a specific account code followed by #, you can press the button whenever you need to enter the code. (See Auto Dial.) If an account code was already entered for a call that is transferred to you, it cannot be changed.
Features Alarm Clock If you have a display phone, you can use your phone as an alarm clock and set it to beep at a particular time to remind you of an appointment, meeting, or other important event. Until canceled, the alarm sounds every day at the set time. To Use the Alarm 1. Press Set. ALARM Off begins to flash. 2. Press Fwd. ALARM On begins to flash. 3. Press Set. Hour and am/pm begin to flash. 4. 5. Press Fwd or Rev until the setting you want appears on the display. Press Set.
Features To Cancel the Alarm 1. Press Set. ALARM On begins to flash 2. Press Fwd. ALARM Off begins to flash. 3. Press Exit. The bell disappears from the display.
Features Auto Answer All To answer calls using a headset, an answering machine, a modem, or a fax machine, you must program an Auto Answer All button on your phone. You must also turn off Voice Announce on your phone (see Voice Announce) and you need to have a General Purpose Adapter (GPA) or headset adapter. You cannot use this feature on a MLC-5 cordless phone or other analog multiline phones that do not have a jack labeled “other” on the back to plug the GPA into.
Features To Use Auto Answer All 1. 2. If you are using a GPA, make sure the switch is on Auto. To turn on, press the programmed Auto Answer All button on your phone. The green light next to the button goes on. Calls are answered automatically. 3. To turn off, press the programmed Auto Answer All button again. The green light next to the button goes off.
Features Auto Dial Use Auto Dial to automatically dial either inside or outside numbers you call often. YOU can program inside Auto Dial buttons for the extensions of co-workers or for paging areas. The green light next to the Auto Dial button goes on when your co-worker is on the phone or using Do Not Disturb. You can program outside Auto Dial buttons for phone numbers, account codes, long-distance billing numbers, bank access codes, or emergency contact numbers.
Features To Program Inside and Outside Auto Dial Buttons 1. 2. 3. 4. 5. 6. 7. Label the button to be programmed with a person’s name or other identifier. Slide the T/P switch to P. Press the button you labeled. Dial: ■ ✱ 22 for inside numbers ■ ✱ 21 for outside numbers. See Notes. Dial the extension or outside number (including any necessary dial-out code, long-distance carrier code, area code, and special characters). See Notes. Repeat Steps 3, 4, and 5 to program additional buttons.
Features To Use Auto Dial Buttons on BIS Phones An inside Auto Dial button will automatically select an available SA or ICOM button. If you want to use a specific SA or ICOM button, press that button before you press the Auto Dial button. To use an inside Auto Dial button for voiceannounced calls, press ICOM Voice or SA Voice. To use an inside Auto Dial button for ringing calls, press ICOM Ring or SA Ring. ■ ■ 1. Press the programmed Auto Dial button.
Features To Use Auto Dial Buttons on MLC-5 Cordless Phones An inside Auto Dial button will automatically select an available SA or ICOM button. If you want to use a specific SA or ICOM button, press that button before you press the Auto Dial button. ■ To use an inside Auto Dial button for voiceannounced calls, press ICOM Voice or SA Voice. NOTE: MLC-5 cordless phones can make but not receive voice-announced calls. ■ To use an inside Auto Dial button for ringing calls, press ICOM Ring or SA Ring. 1. 2.
Features Calendar If you have a display phone, the display shows the time, day, and date while your phone is idle. You can set and reset the calendar as needed. To Set the Time, Day, and Date 1. Press Set repeatedly to select the time, day, or date. The calendar item that you are currently able to change, flashes. 2. 3. 4. 5-14 Press Fwd or Rev to change the item (minutes, hours, day month, date). Repeat Steps 1 and 2 to select and change another item. Press Exit.
Features Callback When you reach a busy extension or the outside line you want to use is busy, use Callback to automatically place the call when the extension or line is free. You’ll hear two short rings and one long ring as soon as the extension or line is free. The call is placed when you lift the handset or press Speakerphone. On phones with ICOM buttons, Callback works only for busy inside extensions; use Line Request for busy outside lines. (See Line Request.
Features To Program a Selective Callback Button 1. 2. 3. 4. 5. Label the button to be programmed as CalIback. Slide the T/P switch to P. Press the button you labeled Callback. Dial ✱ 55. Slide the T/P switch to the center position. To Use Selective Callback for Busy Extensions 1. 2. When you reach a busy extension, press the programmed Callback button or press Feature and dial 55. Hang up when you hear five short beeps. Your call is placed in queue until the extension becomes available.
Features To Use Selective Callback for Busy Outside Lines 1. 2. 3. If you hear a fast busy signal after dialing a dial-out code, press the programmed Callback button or press Feature and dial 55. Dial the outside number. Hang up when you hear five short beeps. Your call is placed in queue until the line becomes available. The green light next to the line button flashes. 4. Lift the handset or press Speakerphone or press On/Off on a cordless phone, when you hear two short rings and one long ring.
Features To Turn Automatic Callback On and Off 1. Slide the T/P switch to P . 2. Press any ICOM or SA button. 3. Dial: ■ ✱ 12 to turn on ■ ✱✱ 12 to turn off. 4. Slide the T/P switch to the center position. To Use Automatic Callback 1. When you reach a busy line or extension and hear five short beeps, hang up. Your call is placed in queue until the line or extension becomes available. The green light next to the line button flashes. 2.
Features To Cancel a Callback Request 1. 2. Press the button the callback request is on. Lift the handset, press Speakerphone, or On/Off on a cordless phone. The green light next to the button goes on. 3. Press Drop. 4. Press the button the call is on again. The green light next to the button goes off.
Features Call Waiting When all the ICOM or SA buttons on your phone are busy and another call comes in, Call Waiting informs you of inside calls (single beep) and outside calls (double beep). To answer a waiting call, you can either hang up or put your current call on hold. If you hang up, your phone will ring with the waiting call. If you put the call on hold, press ICOM Originate Only or SA Originate Only and dial the feature code to pick up a waiting call.
Features To Complete a Call and Answer a Waiting Call 1. When you hear the Call Waiting tone, hang up, or press On/Off on a cordless phone. Your phone rings. 2. Lift the handset, press Speakerphone, or press On/Off on a cordless phone. You are connected to the call. To Put a Call on Hold and Pick Up a Waiting Call 1. Press Hold. 2. Press ICOM Originate Only or SA Originate Only.
Features Conference Use Conference to include up to five people in the same conversation. You can conference one or two outside numbers and up to three extensions, including your own. Conference allows you to consult privately with each participant before adding him or her to the conference and to put the entire conference on hold. To drop any participant from the conference, press Drop and press the line button that the call is on.
Features 3. If the next call is an inside extension, press an ICOM or SA button; if it is an outside number, press an SA or line button. NOTE: If you have SA buttons and any are available, the system selects one automatically for you. 4. Dial the next extension or outside number. NOTE: If you make a dialing error while adding a participant to a conference, you must hang up and restart the procedure to add a participant, beginning with Step 3. 5.
Features CAUTION: 6. If the system selects an SA Voice button when adding a conference participant, you hear a beep instead of ringing after you dial the extension to be included in the conference. If the call is not answered, and you press Conference to complete the call, your conversation with other parties on the conference is broadcast on that extension’s speakerphone. Be sure to Drop an unanswered extension on an SA Voice button to prevent an unintentional broadcast from happening.
Features To Leave a Conference Temporarily 1. Press Hold. Conference participants are still able to converse. 2. To rejoin the conference, press the line button of any participant To Drop a Conference Participant 1. Press Drop. 2. Press the line button of participant you want to drop. NOTE: Drop does not work when the conference is on hold.
Features Coverage Coverage allows a call ringing at one extension to ring at another extension at the same time, and to be answered at either phone. Coverage can be set up for an individual or a group and turned on or off as necessary. You can program your phone so that all your calls, both inside and outside, are covered, or so that only outside calls are covered.
Features In each case, phones continue to ring (as programmed) and the green light on both phones continue to flash until the call is answered, either by you or by your co-worker.
Features Coverage either immediately or after a delay. (Ask your system manager for details.) If you have both Individual and Group Coverage, your calls go to Group Coverage only if the person who provides Individual Coverage does not answer after a system-programmed number of rings, or if his or her phone is busy. Coverage VMS If your calls are covered by voice mail, you can use Coverage VMS to prevent outside calls from being sent to voice mail.
Features Coverage interacts with other features in the following ways: If a co-worker is covering your calls and places a call ■ to you, coverage does not send the call back to that person's extension. However, the call is sent to any other extensions covering you. If you set the Ring Timing option for No Ring on any ■ outside line, or the SA or ICOM button on your phone, calls arriving on those buttons do not go to Coverage. (See Ringing Options.
Features NOTE: This feature does not require a programmed button. Once you have dialed ✱✱ 48 only your outside calls are covered. This remains in effect until you repeat this procedure and dial ✱ 48 to send all your calls to Coverage. To Program a Coverage VMS Off Button 1. Label the button to be programmed as Coverage VMS Off. 2. Slide the T/P switch to P. 3. Press the button you labeled Coverage VMS Off. 4. Dial ✱ 46. 5. Slide the T/P switch to the center position. To Turn Coverage VMS On and Off 1.
Features To Program a Coverage Off Button 1. 2. 3. 4. 5. Label the button to be programmed as Coverage Off. Slide the T/P switch to P. Press the button you labeled Coverage Off. Dial ✱ 49. Slide the T/P switch to the center position. To Turn All Coverage Off and On 1. Press the programmed Coverage Off button. The green light next to the button goes on. No calls to you will go to Coverage. 2. Press the programmed Coverage Off button again. The green light next to the button goes off.
Features Receiving Calls Sent to Coverage If you provide Individual Coverage, you must program an Individual Coverage button (either primary Or secondary) for each person whose calls you cover. If you provide Group Coverage, you must program at least one Group Coverage button for each group whose calls you cover. To handle more than one call at a time for a particular group, you can program more than one Group Coverage button for that group.
Features To Program a Group Coverage Button 1. 2. 3. 4. 5. Label the button to be programmed as Group Coverage — (name). Slide the T/P switch to P. Press the button you labeled Group Coverage — (name). Dial ✱ 42. Dial the group number. Your system manager must provide this number. 6. Slide the T/P switch to the center position. To Cover Calls for an Individual or a Group 1.
Features Do Not Disturb Do Not Disturb prevents your phone from ringing and prevents paging and voice-announced inside calls from being heard on your speakerphone. When you have Do Not Disturb on, calls to you are handled as follows: Calls from outside numbers Your phone does not ring, but the green light next to the line button flashes. The caller hears ringing. Calls from inside extensions Your phone does not ring, and the light next to the line button does not flash.
Features When you turn on the Do Not Disturb feature, your phone automatically posts the message Do Not Disturb. This message appears on the display of an inside caller with a display phone when he or she calls you. When you turn off the feature, the message is canceled. NOTE: For the Do Not Disturb feature to post the Do Not Disturb message, you must also program a Posted Message button on your phone, as described later in this section. (Also see Messaging.
Features To Program a Posted Message Button 1. 2. 3. 4. 5. Label the button to be programmed as Posted Message. Slide the T/P switch to P. Press the button you labeled Posted Message. Dial ✱ 751. Slide the T/P switch to the center position. To Use Do Not Disturb 1. To turn on Do Not Disturb, press the programmed Do Not Disturb button. The green light next to the button goes on. The green light next to the programmed Posted Message button also goes on, lndicating that the Do Not Disturb message is posted.
Features Feature Button To activate features using features codes, you need to press a programmed Feature button. This sends a signal to the system that you are about to dial a feature code. Many features have a one-, two-, or three- digit code. If you have no more avaiIable line buttons for programming a feature, you can access additional features by dialing their feature codes. For more information on feature codes, see Appendix B.
Features To Program a Feature Button 1. 2. 3. 4. 5. Label the button you want to program as Feature. Slide the T/P switch to P. Press the button you labeled Feature. Dial ✱ 20. Slide the T/P switch to the center position. To Use a Feature Button 1. Press the programmed Feature button. 2. Dial a feature code.
Features Forward and Follow Me Forward and Follow Me send your calls to another extension or to an outside phone. This allows callers to reach you when you are not working at your own desk, or allows you to send your calls to another phone when you are too busy to answer or want them screened. When your calls are being sent to another phone, an arriving call makes your phone ring once, while the phone receiving your calls continues to ring until answered.
Features The following calls are not sent from your phone to another destination by Forward or Follow Me: voice-announced calls, calls you receive on a Coverage button, Callback calls, or transferred calls returning to you. To Program a Forward Button 1. 2. 3. 4. 5. Label the button to be programmed as Forward. Slide the T/P switch to P. Press the button you labeled Forward. Dial ✱ 3 3 . Slide the T/P switch to the center position. To Forward Calls to an Inside Extension 1. 2.
Features To Forward Calls to an Outside Number Before you try to forward your calls to an outside number, check with your system manager. Your communications system may have restrictions on forwarding calls to outside numbers. NOTE: Calls forwarded to outside locations may vary in transmission quality. 1 . Press the programmed Forward button, or press the programmed Feature button and dial 33. 2. If you have SA buttons, dial the dial-out code; if you have ICOM buttons, dial 9, then the phone number, and #.
Features To Turn Off Forward or FolloW Me at Your Phone 1. 2. Press the programmed Forward button, or press the programmed Feature button and dial 33. Dial your extension. (In effect, you are "forwarding" your calls to your own phone.) If you have a programmed Forward button, the green Iight next to it goes off. If you have lifted the handset or pressed Speaker, you hear a double break In dial tone. Your calls WiII now ring at your own extension.
Features To Turn Off Forward and Follow Me Calls Sent from All Extensions 1. At your phone, press the programmed Feature button and dial ✱ 34 ✱ . If you have lifted the handset or pressed Speaker, you hear a double break in dial tone. Calls for all other extensions that were being sent to your phone are no longer sent to you. lf you hear a high and low tone, no calls were being sent to you.
Features Last Number Dial Use Last Number Dial to automatically redial the last inside or outside number you called. If you use Inspect to see the number you saved, the number will appear on your display. To Program a Last Number Dial Button 1. 2. 3. 4. 5. Label the button to be programmed as Last Number. Slide the T/P switch to P. Press the button you labeled Last Number. Dial ✱ 84. Slide the T/P switch to the center position. To Use Last Number Dial 1.
Features Line Request Line Request puts you in queue for access to a busy outside line. When the line becomes available, your phone alerts you with a beep. For example, when you want to use an outside line and it is busy, use Line Request to notify you when the line is free. A line is busy if the green light next to the line button is on. Line Request works only on line buttons labeled with a phone number, that is personal lines.
Features Messaging When you call a co-worker who has a display phone, you can leave a message that you called on his or her display. You can also post a message that co-workers with display phones will see when they call you. The Message light on your phone is on when there is a message for you from the system operator. A voice messaging system or a fax machine can also turn on the light.
Features To Program a Leave Message Button 1. Label the button to be programmed as Leave Message. 2. Slide the T/P switch to P. 3. Press the button you labeled Leave Message. 4. Dial ✱ 25. 5. Slide the T/P switch to the center position. To Leave a Message on a Display Phone when Calling 1. When you reach a busy or unanswered extension, do one of the following: ■ Press the programmed Leave Message button. ■ Press the programmed Feature button and dial 2 5 .
Features To Leave a Message on a Display Phone without Calling 1. 2. Press the programmed Feature button and dial 53. Dial your coworker’s extension. Your co-workers Message light goes on and the message is recorded. If you have a display phone, you see the message Msg Sent ext. or name. If the person has a full message box or does not have a display phone, you hear a single beep or, tf you have a display phone, you see the message Cannot Send. To Cancel a Message YOU Left on a Display Phone 1.
Features Code 01 02 03 04 05 Posted Message DO NOT DISTURB OUT TO LUNCH AT HOME OUT SICK IN A MEETING Code 06 07 08 09 10 Posted Message IN CONFERENCE WITH A CLIENT WITH A CUSTOMER AWAY FROM DESK OUT ALL DAY NOTE: If you have a programmed Posted Message button, when you turn on the Do Not Disturb feature, your phone automatically posts the message Do Not Disturb. When you turn off the feature, the message is canceled.
Features To Post a Message 1. Press the programmed Posted Message button. The green light next to the button flashes. 2. Dial the code for the message you want to post, from 01 through 20. The Iight next to the button becomes steady. To Cancel a Posted Message 1. Press the programmed Posted Message button. The green light next to the button flashes. 2. Dial 00. The light next to the button goes off. Receiving Messages When the green Message light on your phone is on, you have a message.
Features If you have a display phone and the Message light is on, you have a message which was sent by the system operator or another co-worker. Depending on how your system is set up, you may also have a voice mail message or a fax. Your phone stores up to 10 messages, which are displayed in reverse order of their arrival (last-in, first-out). Each message is displayed as Call ext. or name. A new or unread message is marked with a ✱ symbol.
Features To Program Message-Handling Buttons (Display Phones Only) 1. 2. 3. 4. 5. 6. 5-52 Label the buttons to be programmed as follows: Delete Message ■ Return Call ■ ■ Next Message ■ Scroll Slide the T/P switch to P. Press one of the buttons you labeled. Dial one of the following codes: ■ ✱ 26 for Delete Message ■ ✱ 27 for Return Call ■ ✱ 28 for Next Message ■ ✱ 29 for Scroll Repeat Steps 3 and 4 for each remaining button. Slide the T/P switch to the center position.
Features To Read Messages (Display Phones Only) 1. Press Message. Your first (last-in) message is displayed. 2. Press one of the following programmed buttons, or press the programmed Feature button and dial the corresponding code: Delete Message (code 26) to delete the ■ message. ■ When you have deleted all messages, your Message light goes off. ■ Return Call (code 27) to call the co-worker who left you the message. Next Message (code 28) to see the next message.
Features Night Service Your system may use Night Service to treat calls differently at night and on weekends than during office hours. For example, Night Service can send calls to different coverage points after hours. If Night Service is activated, it may restrict you from making outside calls. If you need to make an outside call, you must dial a password to override the restrictions. Your system manager can supply the password.
Features Paging Paging is using your phone to broadcast an announcement. You can page over your co-workers’ speakerphones or over the building’s loudspeaker system, if your company has one. Speakerphone Paging is heard on all speakerphones or, if set up by your company, by a selected group such as a department or work area. A Page All number is reserved for paging all speakerphones; Group Page numbers are reserved for paging certain groups of speakerphones. Your system manager can provide these numbers.
Features To Program Speakerphone Paging Buttons 1. 2. 3. 4. 5. Label the button to be programmed as Group Page — (name) or Page All. Slide the T/P switch to P. Press the button you labeled Group Page — (name) or Page All. Dial ✱ 22 and Group Page or Page All extension. Slide the T/P switch to the center position. To Use Speakerphone Paging 1. Press any ICOM or SA button. 2. Lift the handset or press On/Off on a cordless phone.
Features To Use Loudspeaker Paging 1. Lift the handset or press On/Off on a cordless phone. NOTE: Using the speakerphone for Loudspeaker Paging may create a feedback tone. 2. 3. 4. Press the programmed Loudspeaker Page button, or press the programmed Feature button and dial 9 and the Loudspeaker Page line number. Dial the code for the zone you want to page (if necessary). If the loudspeaker system has more than one zone, you will hear a beep or dial tone after pressing the Loudspeaker Page button.
Features Park If your co-worker doesn’t answer when you transfer a call, use Park to hold the call while you page him or her. When you park a call on your phone, you are putting it on hold so it can be answered from any phone in the system. You then page your co-worker and announce the call. Your co-worker can pick up the call from the nearest phone by using Pickup and dialing your extension.
Features To Use Park and Speakerphone Page 1. While on a call, do one of the following: ■ Press the programmed Park button. ■ Press Transfer, dial your extension, and press Transfer again. ■ Press Transfer, dial your extension, and hang up. NOTE: If you park the call by transferring the call to your extension, you’ll hear a busy signal. 2. 3. Press the appropriate Group Page or Page All button, or press any ICOM or SA button, go off-hook, and dial the Group Page or Page All extension.
Features To Use Park and Loudspeaker Page 1. While on a call, do one of the following: ■ Press the programmed Park button. ■ Press Transfer, dial your extension, and press Transfer again. ■ Press Transfer, dial your extension, and hang up. NOTE: If you park the call by transferring the call to your extension, you’ll hear a busy signal. 2. Press the programmed Loudspeaker Page button or press the programmed Feature button and dial 9 and the Loudspeaker Page line number. 3.
Features NOTE: ■ ■ You can pick up a call you parked at your extension without waiting for it to ring back by pressing the line button where the call is parked. Loudspeaker pages can be made on MLC-5 cordless phones only by using a programmed Loudspeaker Page button, which must be programmed by your company. To Pick Up a Parked Call 1. Lift the handset or press Speakerphone or On/Off on a cordless phone. 2. Press the programmed Pickup button, or press the programmed Feature button and dial 9. 3.
Features Personal Speed Dial Use Personal Speed Dial to dial 2-digit codes instead of the entire dialing sequence for numbers you dial often on your BIS-10 or MLC-5 cordless phone. Personal Speed Dial can be used for account codes, long-distance access codes, and area codes. You can program up to 24 Personal Speed Dial codes that can be used only from your phone. If you have a BIS-34 or a BIS-22 phone, with or without display, you must use Auto Dial instead.
Features To Use Personal Speed Dial on BIS-10 Phones 1. 2. Press the programmed Feature button. Dial the 2-digit code (01-24). Your speakerphone goes on, and the number is dialed automatically. To Use Personal Speed Dial on MLC-5 Cordless Phones 1. Press On/Off. 2. Press the programmed Feature button. 3. Dial the 2-digit code (01-24). The number is dialed automatically.
Features Pickup Pickup lets you answer a ringing phone from another extension. You can pick up calls by dialing the feature code for Pickup along with the ringing phone’s extension or the number of the line with the call. You can also press a programmed Pickup button. Your company can also use Group Pickup to organize your co-workers into groups. When you are part of a Pickup group, you can answer other phones in the group by pressing a button or dialing a code. (You can only be in one Pickup group.
Features To Program a General Pickup Button 1. 2. 3. 4. 5. Label the button to be programmed as Pickup. Slide the T/P switch to P. Press the button you labeled Pickup. Dial ✱ 9. Slide the T/P switch to the center position. To Use General Pickup 1. 2. Press the programmed Pickup button, or press the programmed Feature button and dial 9. Dial the extension or line number. You are connected to the call. To Program a Pickup Button for a Specific Line or Extension 1. 2. 3. 4. 5. 6.
Features To Use Pickup for a Specific Line or Extension 1. 2. On MLC-5 cordless phones, press On/Off. Press the programmed Pickup button for the line or extension. On BIS phones, your speakerphone turns on automatically, and you are connected to the call. To Program a Group Pickup Button 1 . Label the button to be programmed as Pickup — (name of group). 2 . Slide the T/P switch to P. 3 . Press the button you labeled Pickup — (name of group). 4 . Dial ✱ 88. 5 . Slide the T/P switch to the center position.
Features Privacy Privacy prevents co-workers who share a line with you from connecting to your calls. You can turn on Privacy before or during a call, and it remains on (for all calls to and from your extension) until you turn it off. If another person has already joined your call, turning Privacy on does not drop the person from the call. When you put a call on hold, it is no longer protected by Privacy.
Features To Use Privacy 1. To turn Privacy on, do one of the following: ■ Press the programmed Privacy button. The light next to the button goes on. ■ Press the programmed Feature button and dial 31. 2. To turn Privacy off, do one of the following: Press the programmed Privacy button again. ■ The light next to the button goes off. ■ 5-68 Privacy Press the programmed Feature button and dial ✱ 31.
Features Recall Depending on how your system is set up, you may be able to use the Recall button to disconnect from one call and get a new inside or outside dial tone without hanging up, or to use certain system features, such as Transfer or Hold. You can then make another call, use the appropriate feature, or, if you have made a mistake in dialing, start over.
Features To Use Recall 1. Press Recall (don’t hang up). 2. Wait for the dial tone and make another call.
Features Reminder Service Use Reminder to set your phone to ring at a specific time like an alarm clock. Your phone rings at that time, then cancels the reminder. You can set only one reminder at a time. NOTE: Reminder Service is set using a 12-hour format. To Program a Reminder Set Button 1. 2. 3. 4. 5. Label the button to be programmed as Reminder Set. Slide the T/P switch to P. Press the button you labeled Reminder Set. Dial ✱ 81. Slide the T/P switch to the center position. To Set a Reminder 1.
Features To Program a Reminder Cancel Button 1. Label the button to be programmed as Reminder Cancel. 2 . Slide the T/P switch to P. 3 . Press the button you labeled Reminder Cancel. 4 . Dial ✱✱ 81. 5 . Slide the T/P switch to the center position. To Cancel a Reminder 1. Press the programmed Reminder Cancel button, or press the programmed Feature button and dial ✱ 81. The reminder is canceled.
Features Ringing Options You can program several ringing options that determine how your phone rings when you receive a call from an inside extension or an outside number. (These options are in addition to the system’s distinctive ringing patterns for inside, outside, transferred, and Callback calls, described in Chapter 2.) ■ Ring Timing options allow you to program each outside line, SA, ICOM, and Coverage button individually so that calls received on those buttons ring in one of the following ways.
Features — No Ring keeps your phone from ringing at all. (However, the distinctive returning transfer and Callback rings do ring at your phone.) NOTE: Ring Timing options do not apply to SA Originate Only or ICOM Originate Only buttons because they do not receive calls. ■ Abbreviated Ringing options specify how your phone rings when you are already on a call and another call comes in. You program your phone to ring in one of the following ways: — Abbreviated Ring is the standard (default) setting.
Features To Program Ring Timing Options 1. Slide the T/P switch to P. 2. Do one of the following: ■ To program this option for all outside line buttons, press any outside line button. ■ To program this option on an individual outside line, SA, ICOM, or Coverage button, press that button. 3.
Features To Program Personalized Ring NOTE: If you have an MLC-5 cordless phone, you cannot program Personalized Ring. Ask your system manager to program it for you. 1. 2. 3. 4. Slide the T/P switch to P. Press any ICOM or SA button. Dial ✱ 32. Dial a digit from 1 to 8. Each time you dial a digit, the phone rings once with the pattern corresponding to your selection. 5. Repeat Step 4 as many times as you like. When you hear the ringing pattern you want, slide the T/P switch to the center position.
Features Saved Number Dial When you reach a busy or unanswered number that you intend to call again later, use Saved Number Dial to store it and redial it automatically with the press of a programmed button. Saved Number Dial lets you make other calls in the meantime. The number remains stored, no matter how many times you redial it, until you replace it with another number. YOU must program Saved Number Dial on a button.
Features To Save and Redial a Number 1. When you reach a busy or unanswered number, press the programmed Saved Number button before hanging up. 2. To redial the number, press the same type of button (ICOM, SA, or Pool) you used to place the call the first time. ■ For BIS phones, press the programmed Saved Number button. Your speakerphone goes on, and the number is dialed automatically. ■ For MLC-5 cordless phones, press On/Off, then press the programmed Saved Number button.
Features Signaling and Notify In addition to calling directly, there are two other ways to use the phone to contact your co-worker. Use Signaling to beep or use Notify to turn on a light on a co-worker’s phone. Signaling. To use Signaling, program a Signal button. You can signal your co-worker without lifting your handset. Your co-worker’s phone beeps for as long as you press the button. You can use Signaling even when you and/or your co-worker are on the phone.
Features To Program a Signal Button 1. 2. 3. 4. 5. 6. Label the button to be programmed as Signal — (name). Slide the T/P switch to P. Press the button you labeled Signal — (name). Dial ✱ 23. Dial your co-worker’s extension. Slide the T/P switch to the center position. To Use Signaling 1. Press the programmed Signal — (name) button. Your co-workers phone beeps. To Use Signaling to Call a Co-Worker 1. 2. 3. Press any ICOM or SA button.
Features To Program Notify Buttons 1. 2. 3. 4. 5. 6. Label button to be programmed as Notify Send — (name) or Notify Receive — (name). Slide the T/P switch to P. Press the button you labeled Notify Send — (name) or Notify Receive - (name). Dial: ■ ✱ 757 for Notify Send ■ ✱ 758 for Notify Receive. Dial your co-worker’s extension. Slide the T/P switch to the center position. NOTE: Notify Send will not work unless your co-worker programs a Notify Receive button for your extension. To Use Notify 1.
Features System Speed Dial Use System Speed Dial to dial 3-digit codes instead of phone numbers. These 3-digit codes are programmed by your company. Ask your system manager for a list of the codes. You can also program System Speed Dial (3-digit) codes on an Auto Dial button for one-touch dialing. Press the button to dial the code. To Program System Speed Dial Buttons 1. Label the button to be programmed with name or other identifier. 2. Slide the T/P switch to P. 3. Press the button you labeled. 4.
Features To Use System Speed Dial 1. Lift the handset, press Speakerphone, or press On/Off on an MLC-5 phone. 2. Do one of the following: ■ Press the programmed System Speed Dial button. ■ Press the programmed Feature button and dial the 3-digit Speed Dial code. Your call is dialed automatically.
Features Timer If you have a display phone, you can use the Time/Timer button to set a 60-minute clock to time calls, meetings, breaks, or other events. You press Time/Timer to start the timer, which is at the top of the display next to the date. It counts to 59 minutes and 59 seconds, then resets to zero and continues counting. To Use the Timer 1. Press Time/Timer. 2. Press Start to reset timer. The timer starts counting at 00:00. 3. When finished timing, press Stop. The timer stops counting. 4.
Features Transfer You can transfer calls to inside extensions and outside numbers. When a call you transferred to an extension goes unanswered (for a length of time that depends on how your system is set up), it may ring back at your phone. Unanswered calls transferred to outside numbers do not ring back at your phone.
Features 5-86 ■ Telephone setup. If you have Auto Dial buttons and your system is programmed for One-Touch Transfer, see “To Transfer to an Inside Extension Using OneTouch Transfer” in this section. If you do not have Auto Dial buttons or your system is not set up for One-Touch Transfer, see “To Transfer to an Inside Extension without Using One-Touch Transfer” in this section. ■ Whether the number accepting the transfer is an extension or an outside number.
Features NOTE: ■ ■ You must have an available SA or ICOM button to transfer a call using an Auto Dial button. When you press an Auto Dial button to transfer a call, the system automatically selects an SA or ICOM button for the transfer. If an SA Voice or ICOM Voice button is selected for a transfer with consultation, the transfer is called a voice-announced transfer. The person to whom you are transferring will hear your voice on his or her speakerphone after a beep.
Features 4. 5. For a transfer without consultation, hang up. For a transfer with consultation, announce the call. ■ If the person accepts the call, hang up. The call is transferred. If the person does not accept the call, press the line button with the held call to return to the call. ■ If your system is not programmed for One-Touch Transfer, you can use the following alternative method for transferring an outside call only to a co-worker whose phone has the same line buttons as your phone: 1.
Features To Transfer to an Inside Extension Using One-Touch Transfer If your system is programmed for One-Touch Transfer, it is also programmed either for automatic completion or manual completion. (There is no need to press Transfer.) Automatic completion sends the call directly to the extension. Manual completion lets you consult with the person, if you wish, before sending the call. With automatic completion: 1. Check the light next to the Auto Dial button for the person’s extension.
Features 4. For a transfer with consultation, announce the call. ■ If the person can take the call, hang up. The call is transferred. ■ If the person cannot take the call, press the line button with the held call to return to the caller. To Transfer to an Outside Number Before you try to transfer a call to an outside number, check with your system manager. Your communications system may have restrictions on outside transfers. NOTE: Calls transferred to outside numbers may vary in transmission quality. 1.
Features Handling an Unsuccessful Transfer An unsuccessful transfer results when the extension you are calling is busy or unanswered. You can either return to the held call and take a message, or continue trying to connect the call by using one of the following features: ■ ■ ■ Camp-On puts the transferred call on hold for a preset time. (If the call is unanswered, it rings back at your phone.) Paging allows you to broadcast an announcement over co-workers’ speakerphones or over a loudspeaker system.
Features Camp-On When you are transferring a call to a busy extension, you can use Camp-On to keep the call at your co-worker’s extension for a longer period of time than Transfer allows. An unanswered Camp-On call rings back at your phone after 30 seconds to 5 minutes, depending on how your system is set up. Camp-On is used in either of the following circumstances: ■ The extension receiving the transfer is busy.
Features To Program a Camp-On Button 1. 2. 3. 4. 5. Label the button to be programmed as Camp-On. Slide the T/P switch to P. Press the button you labeled Camp-On. Dial ✱ 57. Slide the T/P switch to the center position. To Use Camp-On 1. If you try to transfer a call and reach a busy extension, or if the person receiving the transfer wants to wait before taking the call, do one of the following: ■ Press the programmed Camp-On button. ■ Press the programmed Feature button and dial 57.
Features To Answer a Camp-On Call Answering a call that has been transferred to your phone and left there with Camp-On is the same as answering a Call Waking call. 1. Do one of the following: ■ If your extension was busy when the call arrived, the call rings as soon as an SA or ICOM button becomes free. Answer it as you would any other call. ■ If your extension was not busy when the call arrived, when you are ready, press the programmed Feature button and dial 87.
Features Voice Announce To prevent interruptions from voice-announced calls and speakerphone paging, you can turn off your phone’s ability to receive all voice announcements. If you later decide that you want to hear voice announcements, you can turn it back on. You can’t program a button to turn this feature on. NOTE: ■ If you have programmed your phone with Auto Answer All, you must turn off Voice Announce.
Features 5-96 Voice Announce
Programming Special Characters A When you program Auto Dial buttons or Personal Speed Dial codes, you are storing a sequence of numbers to be dialed automatically. Some dialing sequences need special characters. For example, you would press Hold to insert a pause (p) after the dial-out code in a dialing sequence so the system is allowed to seize an outside line before dialing the number. It can also be used to separate a phone number from an extension number.
Programming Special Characters Special Characters Table Press… Drop† See*... s Hold P Conference f # # Means… Stop. Inserts a stop within a sequence of automatically dialed numbers. For example, an outside Auto Dial button may be programmed with a password then a Stop, followed by a phone number. To use Auto Dial with a Stop in the sequence, press the button to dial the password, listen for the dialing and connection, and press the button again to dial the phone number. Pause. Inserts 1.
Feature Codes B Feature codes activate features when you have not programmed a line button. To use a feature code, press the programmed Feature button and then dial the code. Not all features can be activated by a code. Some features, like Do Not Disturb, must be programmed onto a line button to turn the feature on and off. The light next to the button reminds you that the feature is in use. Feature codes for your analog multiline phone follow.
Feature Codes Feature Code Account Code Entry 82 + Account Code + # Callback — Selective 55 Call Waiting† pick up 87 Camp-On 57 Forward/Follow Me forward to an inside extension forward to an outside number follow me to another cancel sending from cancel sending from cancel sending from extension† all extensions† one extension† your telephone 33 + extension 33 + dialout code + number + # 34 + extension ✱ 34 ✱ ✱ 34 + extension 33 + your extension Last Number Dial 84 Messaging cancel message† d
Feature Codes Feature Paging loudspeaker page Personal Speed Dial† Pickup group inside outside Privacy turn on turn off Code 9 + line number + zone code Personal Speed Dial code (01 — 24) 88 9 + extension 9 + line 31 Recall ✱ 31 775 Reminder Service cancel reminder set reminder ✱ 81 81 + time + A or P (English only) System Speed Dial System Speed Dial code (600 — 729) † Denotes feature that must be used via feature codes.
Feature Codes B-4 Feature Codes
Programming Codes C Programming codes are used to program a feature onto a button for one-touch feature use or to set up how your phone works. You can use any unlabeled line button to program features of your choice. See Chapter 3 for more on programming.
Programming Codes Feature Code Account Code Entry ✱ 82 Auto Answer All† ✱ 754 Auto Dial inside† outside† ✱ 22 + extension ✱ 21 + number Callback automatic callback off‡ automatic callback on‡ selective callback ✱✱ 12 ✱ 12 ✱ 55 Call Waiting on‡ off‡ ✱ 11 ✱✱ 11 Camp-On ✱ 57 Coverage off† inside off‡ inside/outside on‡ VMS Off† individual, primary† individual, secondary† group† ✱ 49 ✱✱ 46 ✱ 48 ✱ 46 ✱ 40 + extension ✱ 41 + extension ✱ 42 + group Do-Not Disturb† ✱ 47 Feature button† ✱ 20 † D
Programming Codes Feature Code Forward ✱ 33 Last Number Dial Messaging delete message leave message next message posted message† return call scroll ✱ 84 ✱ ✱ ✱ ✱ ✱ ✱ 26 25 28 751 27 29 Paging group paging ✱ 22 + group ext.
Programming Codes Feature Code Ringing Options abbreviated off‡ abbreviated on‡ delayed all Iines‡ delayed one line‡ immediate all lines‡ Immediate one line‡ no ring all lines‡ no ring one Iine‡ personalized ring‡ ✱ 342 ✱ 341 ✱ 346 ✱ 36 ✱ 347 ✱ 37 ✱ 345 ✱ 35 ✱ 32 + ring pattern [1-8] Saved Number Dial† ✱ 85 Signaling and Notify signaling notify receive† notify send† ✱ 23 + extension ✱ 758 + extension ✱ 757 + extension System Speed Dial ✱ 24 + System Speed Dial code Voice Announce on‡ off‡ ✱ 10 ✱
Index A Abbreviated ring 5-74— 5-75 Account code 5-11 Account Code Entry 5-2— 5-5 Alarm Clock 5-6—5-7 Amplifiers 1-31 Antenna 1-13, 1-15 Auto Answer All 5-8—5-9, 5-95 Auto Dial 5-4, 5-10—5-13, 5-79, 5-82 Special characters A-1 Automatic completion 5-89—5-90 callback 5-15, 5-18—5-19 B Battery contacts 1-13, 1-15 lights 1-13 Button labeling card 1-3, 1-5, 1-7, 1-9, 1-11, 1-13 C Calendar 5-14 Call Waiting feature 5-20—5-21 tone 2-3 Callback feature 5-15—5-19 tone 2-3 Calls answering 2-9—2-11 conference 2-14
Index Contrast control 1-11 Coverage 5-26—5-33 D Date 5-14 Dedicated feature buttons 1-3, 1-5, 1-7, 1-9, 1-11, 1-13, 1-18 Delay ring 5-26—5-27, 5-73, 5-75 Delete message 5-51—5-53 Desk stand 1-3, 1-5, 1-7, 1-9, 1-11 Dial-out code 1-22—1-24 Dialpad 1-3, 1-5, 1-7, 1-9, 1-11, 1-13 Directory card 1-15 Display area 1-16 screen 1-7, 1-11 Distinctive ringing 2-2, 5-73 Do Not Disturb 2-4, 5-34— 5-36 Drop 1-18, 5-22, 5-25 IN-2 Index F Feature button 3-3—3-6, 5-37— 5-38 codes 3-1—3-6, B-1 programming 3-4—3-7 For
Index H Handset 1-3, 1-5, 1-7, 1-9, 1-11 Headsets 1-30 adapter 5-8 HFAl 1-18 Hold 1-18, 1-21 Leave message 5-46—5-48 Line buttons 1-3, 1-5, 1-7, 1-9, 1-11, 1-13, 1-22, 3-1 lights 1-27—1-28 Line Request 5-45 Loudspeaker Page 5-55, 5-60 Low battery light 1-13 M I ICOM buttons 1-22, 1-25— 1-26 ICOM Originate Only buttons 1-26 Immediate ring 5-26—5-27, 5-73, 5-75 Individual Coverage 5-26— 5-27, 5-32 Manual completion 5-89— 5-90 Message 1-19 light 1-13, 1-15 posted 5-48—5-50 Messaging 1-16, 5-46— 5-53 Microp
Index Night Service 5-54 Notify (see Signaling and Notify) Number card 1-13 No ring 5-26—5-27, 5-74— 5-75 O One-Touch transfer 5-85— 5-86 On/Off 1-13, 1-21, Outside line buttons 1-24 1-26 Special characters 5-62, A-1 Personalized Ring 5-74, 5-76 Pickup 5-64—5-66 Pool 1-24 Posted message 5-35, 5-48—5-50 Privacy 5-67—5-68 Program light 1-15 Programming buttons 3-4 codes C-1 features 3-4—3-7 R P Page All 5-55 Paging 5-55—5-57 Park 5-58—5-61 Password 5-54 Personal line buttons 1-24, 1-26 Personal Speed Dial
Index Ringing volume control 1-3, 1-5, 1-7, 1-9, 1-11, 1-15 S SA buttons 1-22—1-24 Originate Only buttons 1-24 shared 1-24 Saved Number Dial 5-77— 5-78 Scroll 5-51—5-53 Selective callback 5-15— 5-17 Signaling and Notify 5-79— 5-81 Speakerphone 1-19—1-20 paging 5-55, 5-58, 5-59 volume control 1-3, 1-5, 1-7, 1-9, 1-11 Special characters 5-62, A-1 Status 1-21 System Speed Dial 5-82— 5-83 T Talk light 1-15 Telephone BIS10 1-2 BIS-22 1-4 BIS-22D 1-6 BIS-34 1-8 BIS-34D 1-10 MLC-5 Cordless 1-12, 1-14 Timekeepin
Index Voice Announce 1-23, 1-25, 2-4, 2-9, 5-8, 5-95 Voice messaging system 5-26, 5-28 Z Zone, Page 5-55 IN-6 Index