MERLIN LEGEND Reporter Installation and Use ®
Copyright © 1997 Lucent Technologies All Rights Reserved Printed in USA 555-640-200 Comcode 107910085 Issue 1.0 January 1997 Notice Every effort was made to ensure that the information in this document was complete and accurate at the time of printing. However, information is subject to change. Disclaimer Intellectual property related to this product (including trademarks) and registered to AT&T Corporation has been transferred to Lucent Technologies Incorporated.
Contents About This Guide ■ ■ ■ How to Use This Guide Related Resources Terminology vii vii ix ix PART I — Standard System 1 About MERLIN LEGEND Reporter ■ ■ 2 Installation ■ ■ ■ ■ ■ ■ ■ 3 The Basics What Is a Call Record? How MERLIN LEGEND Reporter Works for You The Workplace Menus and Dialog Boxes On-line Help MERLIN LEGEND Reporter Icons Starting and Ending a Work Session Checking the Equipment Gathering Information Installing the Software Loading Remote Access Software Loading MERLIN LEGEND
Contents PART I — Standard System (continued) 3 System Management (continued) ■ ■ 4 Reports and Listings ■ ■ ■ 5 Common Functions Running a Report or Listing on Demand Scheduling Reports Output Chart Report-Specific Functions Organization Reports Selection Reports Account Code Reports Traffic Reports Viewing Functions Report Viewer Message Log Immediate Output Utilities ■ ■ ■ ■ ■ ■ ■ iv Configuration Dialed Digit Processing Call Types Lines Call Collection Interface Immediate Output to Printer Ac
Contents PART II — Multi-site Configuration 6 MERLIN LEGEND Reporter at a Polled Site ■ ■ 7 PSU at a Polled Site ■ ■ ■ ■ 8 Helping Central Site to Add This Site Preparing This Site to Be Polled Enable "Save Call Data for Sending" Enable the Call Sender Interface Add the Central Site as a "System User" Connecting the Unit Configuring the Unit Powering Up the Unit Setting Up the Site Central Site of a Multi-site Configuration ■ ■ ■ ■ Overview Setting Up the Central Site Adding Polled Sites Multi-site
Contents C Specifications ■ ■ ■ ■ ■ D Getting Assistance for Problems ■ ■ ■ E Processor Serial Port Pinouts Modems Capacities Implementation Guidelines How to Report a Problem Using Remote Access Basic Troubleshooting PC Serial Ports ■ ■ ■ Background IRQ Mechanism Serial Ports Under Windows Workarounds and Solutions to the IRQ Conflict Probrem Selecting an Add-In Serial Port Card C-1 C-1 C-2 C-2 C-3 C-4 D-1 D-1 D-2 D-3 E-1 E-1 E-2 E-4 E-5 E-6 GL Glossary GL-1 IN Index IN-1 vi
I. About This Guide ® This guide explains how the MERLIN LEGEND Reporter works and how it is used for calling group or other cost center reporting operations. The guide is divided into three parts, corresponding to standard system functions, those specific to a multi-site configuration, and appendices with additional reference material.
About this Guide Installers should read the following material: ■ Chapter 2, Installation, provides instructions to load the application, set it up, and verify call processing; its companion Appendix A, Worksheets, provides blank worksheets to collect the information required at this time. ■ Chapter 6, MERLIN LEGEND Reporter at a Polled Site, provides additional installation instructions to enable sending SMDR data to a Central Site.
About This Guide Related Resources The documents listed below are part of the MERLIN LEGEND Communications System, Release 3.1 and 4.0 documentation set. Within the continental United States, these documents can be ordered from the Lucent Technologies Fulfillment Center by calling 1 800 457-1235. MERLIN LEGEND Communications System, Release 3.1 and Release 4.
About this Guide Terminology In the context of this guide, we use the following terms: ■ Telephone system — refers to the MERLIN LEGEND Communications System, Release 4.1 or later. ■ Multi-site configuration — refers to the configuration of a Model 5,000, Model 10,000, or Model 20,000 MERLIN LEGEND Reporter that allows the site where it is installed (the “Central Site”) to connect with and report on up to 25, 50 or 100 sources of call records respectively (“polled” sites).
FEEDBACK FORM Product: Document: MERLIN LEGEND® Reporter Installation and Use, Issue 1 Note to readers: We welcome your feedback on this book and the MERLIN LEGEND Reporter product. Your suggestions will help us improve the quality of our reference materials and products. Thank you for taking the time to give us your comments.
1 About MERLIN LEGEND Reporter 1 MERLIN LEGEND Reporter is a new Windows tool designed to work with your telephone system to help you manage telephone facilities and track their effectiveness in your business. Why telephone and calling group management? Simple. Telephones and calling groups are a major asset in handling customers, as well as a source of revenue for serviceoriented companies. Here are some ways MERLIN LEGEND Reporter can help.
About MERLIN LEGEND Reporter MERLIN LEGEND Reporter can help you answer these and similar questions for MERLIN LEGEND calling groups or any type of cost center you identify. Doing so is not difficult; the next few pages introduce some concepts concerning telecommunications management and briefly describe how the system works. We recommend that you become familiar with these topics to derive the most benefit from MERLIN LEGEND Reporter.
About MERLIN LEGEND Reporter a call answered by an eligible Calling Group overflow receiver that is administered as the Listed Directory Number (the extension for the Queued Call Console (QCC) queue MERLIN LEGEND Reporter links each field in the call record to functions which sort the call, process it, adjust running sub-totals (“summary buckets”), and finally stores or discards it. The figure below illustrates a breakdown of the information in an outgoing (Dir. = C) and two incoming (Dir.
About MERLIN LEGEND Reporter Account Code Reports Selection Reports Traffic Reports Archives Data from the last accounting period is kept as an “archive.” This may be backed up to floppy diskettes for safe-keeping and, if needed, restored to the PC to print reports from that period. Remote Access Optionally, MERLIN LEGEND Reporter users can install Remote Access software and a modem to receive remote assistance from the hotline.
About MERLIN LEGEND Reporter The Workplace MERLIN LEGEND Reporter works with all basic elements in Windows — icons, menus, and dialog boxes. Setup automatically creates the main menu and icons for various tasks. Menus and Dialog Boxes The main menu displays the titles of pull-down menus. All operations are initiated here, through a system of sub-menus like the one shown below. An ellipsis (...) next to an option leads to a dialog box — for example: A triangle ( ) leads to a “cascading” sub-menu.
About MERLIN LEGEND Reporter You may work with a mouse and keyboard. This document shows examples using the mouse. Quick Reference* Open a menu or dialog box Using the mouse Click on the option's name. Using the keyboard Press Alt and do either (1) or (2): (1) move to the option's name with the arrow keys and press Enter. (2) type the underlined letter in the name — for example, type R for Reports. Close a menu Click elsewhere. Press Esc (this also closes a dialog box).
About MERLIN LEGEND Reporter MERLIN LEGEND Reporter Icons After installing MERLIN LEGEND Reporter, you will see icons on your Windows' Desktop (if using Windows 3.1), or on the task bar buttons (using Windows 95). The following icons are used to open or use a feature: MERLIN LEGEND Reporter. Icon to reopen the main menu after it has been reduced. Immediate Output. Icon to open the Immediate Output file. This function is also accessible as an option under the Listings menu. or Message Log.
2 Installation 2 This chapter contains instructions to install MERLIN LEGEND Reporter and verify call processing. It includes a summary of custom setup procedures, with references to the appropriate detailed explanations in this manual. The chapter is organized into installation tasks, as follows: Checking the Equipment. This involves taking an inventory of the requirements for a successful installation.
Installation Checking the Equipment Verify that the following equipment is in place and properly set up, as documented in its installation manuals (see the Required Configuration table for equipment specifications).
Installation (1) (2) (3) (4) (5) Not including Operating System storage requirements. Serial ports must meet RS232 communications standards. If additional ports are needed, you may use Equinox MARK-IV boards with Cherry Hill Software HiCom/9 driver (in a Windows 95 environment use Comtrol RocketPort multiport serial boards) and a modem on each additional port. For information, contact Equinox Systems, Inc.
Installation 1. Enter the appropriate information in the verification checklist below: A personal computer (PC) with the recommended class, speed, RAM, and storage configuration for your expected traffic and two available serial ports. Make/model: Class/speed: RAM: Mb Hard Disk: Mb Keyboard and mouse (indicate mouse type: bus, serial, or PS/2): Graphics monitor (type): (Check one) Windows 95 3.1 , Windows for Workgroups 3.11 , or Windows , with a default configuration. DO NOT USE DISK COMPRESSION.
Installation Gathering Information This task involves collecting information about your company and its telephone services and equipment. To do so, you should meet with your information contacts — MERLIN LEGEND service representative, System Consultant, your own personnel department, and so forth — and complete the worksheets provided in Appendix A. These worksheets contain the same information as in the dialog boxes used for data entry at installation. Make as many copies of the worksheets as necessary.
Installation Skip in a minimal setup 4. Follow the screen instructions to: a. Register your name (required) and your company. b. Skip viewing the README.TXT with the No button. c. Accept the default directory (c:\microcom) for installation. d. Accept the default installation options (Carbon Copy Host). 5. Screen instructions will prompt you to install Disk #2 and Disk #3. (Disk #4 is not used with the above options.
Installation Skip in a minimal setup When Windows re-starts, notice the newly-created Carbon Copy group: From here you start the Host program to enable Remote Access. This completes the Remote Access setup. Proceed to Loading MERLIN LEGEND Reporter Software. If you make changes in your PC configuration — such as installing a new video board, mouse, or sound driver — that require running the Windows Setup program again, or if you manually change these entries in the system.
Installation Some of the information you need is displayed on this screen next to the corresponding category. To see additional information for any of the categories, point to the category name and click the left mouse button. 3. Verify the processor type (386, 486, etc.) shown to the right of the Computer category. To view additional Computer category detail, point to Computer and click the left mouse button. A 486 or higher PC is required. 4.
Installation PC Configuration Checks Using Windows 95 Use the following procedure to verify PC configuration information using Windows 95. If the correct PC configuration is not present, the PC must be upgraded before MERLIN LEGEND Reprter can be installed. 1. Verify the processor type (386, 486, etc.) by clicking on My Computer, then double clicking on Control Panel, then clicking on General tab on the System Properties screen. The processor type is shown on the screen. A 486 or higher PC is required. 2.
Installation Make a note of the IRQs used for the MERLIN LEGEND Reporter (typically COM ports 1 and 2). Some potential conflicts include: COM ports 3 and 4 may share IRQs with COM ports 1 and 2, or a serial mouse may share an IRQ with COM port 1 or 2. (typically IRQs 3 and 4) cannot be used by any other function. Some Network Interface cards (NIC) are not detected by MSD. In many cases, an NIC is assigned to IRQs above 5, while COM ports are often assigned IRQs 3 and 4 (that is, no conflict).
Installation After the PC reboots, proceed to Setting Up MERLIN LEGEND Reporter. Setting Up MERLIN LEGEND Reporter After Windows restarts, the Lucent Technologies logo appears on the screen followed by the MERLIN LEGEND Reporter setup dialog box: In this procedure, when you select [x] an item from the setup display, the item's dialog box appears. When you close the item's dialog box, the setup display reappears so that you may continue to the next item. Skip in a minimal setup 1.
Installation 2. Select [x] Set Accounting Period. In a minimal setup, select OK and proceed to step 3. Skip in a minimal setup a. Make any required changes from PART II of the SYSTEM-WIDE PARAMETERS worksheet. b. Select OK to continue. 3. Select [x] Call Collection Interface. a. Load the Call Collection diskettes, one at a time: i. Use Add then select Yes to continue. ii. Load Disk 1 and select OK. iii. Repeat i and ii above with Disk 2. b.
Installation If you selected Direct Connect, a dialog box similar to this one appears. When complete, select OK and proceed to step 3e. If you selected Collect from File, a dialog box similar to this one appears. When complete, select OK and proceed to step 3e. If you selected PollComm, a dialog box similar to this one appears. When complete, select OK and proceed to step 3d. d. If you selected PollComm protocol: i.
Installation 4. Select [x] Trunk. In a minimal setup, select Close and proceed directly to step 6. Skip in a minimal setup a. Use the Facilities button, then Add to enter one at a time, every facility name, grade of service, and number of lines from the LINES & FACILITIES worksheet (after each entry, select Apply). b. When complete, use Close. c. Back at the Line dialog box: i. Use Add to enter lines from the LINES & FACILITIES worksheet and associate them with the appropriate facility. ii.
Installation a. If you completed personnel information in your ORGANIZATION Worksheets - Levels 1 and 2, select the Personnel button and proceed to step 5b; otherwise, proceed to step 5c.
Installation Skip in a minimal setup b. Select Add. i. One at a time, enter all personnel names from the ORGANIZATION WORKSHEET - Levels 1 and 2. After each entry, use Apply. ii. When complete, use Close. c. Back at the Extension dialog box, use the Cost Center button and proceed to step 5d. d. If your Organization contains only two levels, proceed directly to step 5e; for Organizations with higher levels, we recommend working from the top down to enter your ORGANIZATION WORKSHEET - Levels 2 and Higher.
Installation Skip in a minimal setup f. Back at the first level: i. Select Add to enter extension information from the Worksheet, including associations with the Personnel and Cost Center database already in existence. After each addition, use Apply. ii. When complete, use Close. 6. When the MERLIN LEGEND Reporter setup dialog box reappears, use the Close button. The MERLIN LEGEND Reporter main menu and system icons appear on the screen. Proceed to Establishing the SMDR Interface.
Installation Assign calling group options (Hunt Type, Delay Announcement, MessageWaiting Receiver, Calls-in-Queue Alarm Threshold, External Alert for Callsin-Queue Alarm, Overflow Coverage, Overflow Threshold, Overflow Threshold Time, Group Type). b.
Installation You should see this number increase as calls are processed and stored. If calls do not appear in the status window and yet you had followed the Call Collection Interface and MERLIN LEGEND system setup procedures, call for support as instructed on the inside cover. 4. a. If you performed a minimal setup, stop processing calls by selecting the check box in the Call Processing Status dialog box.
Installation Completing a Minimal Setup This last task involves finalizing the setup of any incomplete databases and re-starting call processing. 1. Collect the completed worksheets and enter their information in this order: a. SYSTEM-WIDE PARAMETERS — use Organization Levels under the Customize menu and Accounting Period under the Configuration menu. Follow steps 1 and 2 of Setting Up MERLIN LEGEND Reporter in this chapter. b. TELEPHONE LINES AND FACILITIES — use Line under the Configuration menu.
Installation Location Table — you can create a table of telephone number locations to enhance your detail reports with a “location name” and to report the distribution of your incoming calls with Caller ID. See Location Table in Chapter 3. Report Schedules — you can schedule up to 25 groups of reports to print automatically, including a group to run as soon as the accounting period ends. See Scheduling Reports in Chapter 4.
3 3 System Management This chapter describes the functions under the Administration, Configuration, and Customize menus. It is organized into the following sections: Your Daily, Weekly, and Monthly Tasks — provides a suggested maintenance schedule of MERLIN LEGEND Reporter functions.
System Management This chapter documents functions as if they were run in a single-site, standalone environment. Whenever a function or procedure requires a different approach in a multi-site configuration, the icon on the left appears in the margin. Your Daily, Weekly, and Monthly Tasks All MERLIN LEGEND Reporter functions that are required to start processing calls were set up at installation; most of them either will never change or they will be automatically maintained by the system.
System Management Administration This section describes the following functions: Organization Table — describes how to set up the site-specific table of telephone extensions, their attributes, and their place in a system-wide hierarchy. Immediate Output — describes how to log incoming, abandoned, and/or lenghty calls; it also describes how to view this log. Alert / Alarm Numbers — describes how to “flag” specific dialed numbers.
System Management Extension. The identifier (up to four digits) corresponding to the extension reported as the source of an outgoing call or destination of an incoming call. An entry in this field is site-dependent, required. Undefined extensions that appear in call records are added to the table automatically with default attributes. Authorization Code. The code (up to 10 digits) reported by some telephone systems to use limited-access facilities. Not used by a MERLIN LEGEND Communications System.
System Management Delete at End of Accounting Period. The option to remove this entry AND ITS LOWER LEVELS from the system table when the period ends.
System Management Summary of Procedures (Organization Table) 1. Select Organization from the Administration menu. See Site Selection in Chapter 8. 2. To update entries in: the Extension level, proceed to step 3. the Personnel levels, select Personnel and proceed to step 4. the Cost Center or higher levels, select Cost Center and proceed to step 5. 3. For a new extension, select Add; otherwise, select the desired extension and use Edit or Delete, as appropriate.
System Management Immediate Output Purpose To log ICLID-abandoned calls (incoming calls terminated by the caller before being answered; the record includes the originating phone number), all incoming calls, and/or lengthy outgoing calls. Call records that meet any of the selected conditions are logged into the Immediate Output file and, optionally, printed immediately. The Immediate Output log is a “FIFO” (first-in, first-out) self-maintaining file that can hold up to 500 records.
System Management Alert / Alarm Numbers Purpose To log calls to specified number patterns and, optionally, sound an alarm at the PC. A call to any number matching the pattern is logged into the Immediate Output file and flagged in the TYPE column as “ALERT” (if selected to sound an alarm, the flag changes to “ALARM”). Related Functions Immediate Output (Administration menu) is used to log incoming, abandoned, and/or lengthy calls.
System Management Account Codes Purpose To administer the table of account codes reported by the telephone system. Related Functions Account Code Reports can generate printouts of calls with account codes. Call Record Edit (Utilities menu) may be used to correct dialed errors in stored call records. Dialog Box These fields are reversed in Accounts by Name. Account Code Number and Name.
System Management Password Purpose To change the current user’s password. (This dialog box is disabled on systems that do not have “users.”) Related Users (Configuration menu) identifies who can access the system and assigns Functions privileges. Dialog Box Summary of Procedures (Password) 1. Select Password from the Administration menu. 2. Enter your old password (asterisks mask your entries), then enter the new one twice. 3. Select OK to accept the change and exit (Cancel exits without changes).
System Management Configuration This section describes these functions: Dialed Digit Processing — describes an administrator’s tool to correct inconsistencies in the dialed number field of call records. Call Types — describes the function which identifies call types with a dialed pattern and sets a storage filter based on duration. Lines — describes the function that identifies the call’s route reported by the telephone system and associates the line to a facility name.
System Management Search For: — Dialed Digit Pattern. The dialing pattern targeted for additional processing. Search patterns are represented by up to 18 characters: the numbers 0 through 9, star (*) and pound (#) signs, and/or wild cards (? = single character in the position it appears; % = any number of trailing characters). — Facility. The facility and direction — incoming, outgoing, or tandem calls — targeted for additional processing.
System Management Call Types Purpose To identify call types by their dialed number and, optionally, to set a storage filter based on a minimum duration. Calls rejected by the minimum duration filter are logged in the Immediate Output file. Related Function View Immediate Output (Listings menu) is used to display the Immediate Output file. (Rejected calls appear with an asterisk (*) under the “TYPE” column.) Dialog Box Call Type. The system name (up to 5 characters) used in dialog boxes and listings.
System Management Summary of procedures (Call Types) 1. Select Call Types from the Configuration menu. See Site Selection in Chapter 8. 2. For a new entry, select Add; for changes, select the desired entry and use Edit or Delete, as appropriate. 3. Complete the dialog box. To add or change the number patterns associated with this call type, select Dialing Patterns. a. For a new pattern, select Add; for changes, select the desired entry and use Edit or Delete, as appropriate. b.
System Management Facility. The identifier (up to 15 characters) for a group of lines that carry calls requiring similar services — typically, these line groupings are already programmed for your telephone system. For example, if you have a pool of Central Office lines, you may call the facility “CO” and associate the lines in that pool under this name. Other examples are: “Private” (private lines), “WATS” or “IN-WATS” (for 800-number service lines), “ICLID” (for lines with “Caller ID” service).
System Management Call Collection Interface Purpose To set up or change interface details with the source of call records for a site. Details consist of a transmission protocol, the call record format, and the timetable to enable (and, if necessary, schedule) call collection. Dialog Box See Call Collection Interface in Chapter 8. Summary of Procedures (Call Collection Interface ) 1. Select Call Collection Interface from the Configuration menu. See Site Selection in Chapter 8. 2.
System Management a. For Direct Connect: i. Select the PC port to connect to the telephone system and then the other values EXACTLY as shown. ii. Select OK and proceed to step 6. b. For Collect from File: i. Enter the name of the file (include the complete path to the PC directory) and the polling interval in seconds. ii. Select OK and proceed to step 6. c. For PollComm: i. Select the PC port and baud rate to collect SMDR and whether it is a direct connection. ii.
System Management a. To remove a schedule, select it and choose Delete. b. For a new schedule, choose Add; for changes, select a schedule and choose Edit. If you selected Add or Edit, the Polling Schedule Add or Edit dialog box appears. i. Select the type of day, times, and polling cycle. ii. Select OK and return to the Polling Schedule dialog box. c. Back at the Polling Schedule dialog box, click OK to return to the Call Collection Interface dialog box. 6.
System Management Banner. Type in the text that you wish to precede the printout of each call record. Centered. Select [x] to center this text on the page. Number of blank lines after banner. Specify how many blank lines you wish to place between the banner and the call record printout. Enabled. Select [X] to activate the option of printing calls flagged for “immediate output.” Printer Setup Printer. Select a printer from the system list, the Font and Point size. Output Device. Select the printer’s port.
System Management Accounting Period Purpose To set up system-wide values based on your company’s fiscal year and accounting practices. MERLIN LEGEND Reporter uses the concept of accounting period to create “current” and “archive” call record and database files automatically and to produce complete period statistics on closing dates and times. At the closing of an accounting period, the “current” file is moved to the “archive” file — overwriting the old “archive” contents.
System Management Users Purpose To set up or change the login names and access privileges of all system users. Dialog Box User ID. The login name of a user. Privilege. The functions this user is permitted to use. Summary of Procedures (Users) 1. Select Users from the Configuration menu. 2. For a new entry, select Add; for changes, select the user ID and use Edit or Delete, as appropriate. 3. For additions or edits, when you select Apply, the dialog box appears to set this user’s password.
System Management Customization This section describes the following functions: Organization Levels — used to identify your company name and the number and names of the hierarchical levels used in your organization. Location Table — used to associate call destination names with specific dialing patterns, and thus customize Organization, Selection, and Account Code Detail Reports, as well as the ICLID Call Distribution Report. Languages — used to change the language used on screen displays and reports.
System Management Location Table Purpose To identify the called area in Organization, Selection, and Account Code Detail Reports, as well as the ICLID Call Distribution Report. Up to 5000 entries are allowed. Dialog Box Dialing Pattern. Up to 10 digits and/or wild cards (? = single digit; % = multiple digits). Do not use toll codes (1 or 011) for long distance or international calls as part of the dialing pattern. Location Name. Up to 10 characters for the name of this area.
System Management Languages Purpose To select the language used in dialog boxes, messages, on-line help, and reports. Currently, only English (US) is available. Changing languages does not affect the values of any database entries or userdefined parameters. Dialog Box Summary of procedures (Language Selection) 1. From the Customize menu, select Language. 2. To load a Language Disk, press Add and follow the screen instructions to name a drive and load the diskette in it. 3.
4 Reports and Listings 4 This chapter describes how to generate reports and listings and how to use the report, immediate output and message viewer functions. The chapter is organized into the following sections: Common Functions — describes the general procedures to run reports or listings on a schedule or immediately, how to define their output and set up charts.
Reports and Listings Common Functions MERLIN LEGEND Reporter offers a variety of reporting options to meet practically all of your information needs. You can generate reports and listings on demand (via the individual reportgenerating functions) for the current accounting period or for an archived period. You can schedule up to 25 groups of reports for the current accounting period (for a maximum of 1000 scheduled reports).
Reports and Listings Running a Report or Listing on Demand Purpose To generate any report or listing from the stored current or archived accounting period. Summary of Procedures (Running a Report or Listing on Demand) 1. For an archived period residing on backup diskettes, restore it to your PC into the “archive” file — see Backup and Restore in Chapter 5 for details. 2. Open Select Accounting Period from the Reports menu. Select the accounting period of interest and then OK. 3.
Reports and Listings Scheduling Reports Purpose To define up to 25 groups of up to 1000 reports (combined) to run on automatic schedules. Definitions include frequency to run the group and setup and output criteria for each report. Dialog Box Report Group. A descriptive name (one to 20 characters) for the group of reports. Frequency. Select from: Once. The group runs once on the Next Run Date and Time and then it is removed from the schedule. Monthly or a Number of Days (1 to 255).
Reports and Listings 4. a. To remove a report from the group, select it and use Delete. b. To add to the group, select Add. When the list box (below) appears, select a report and use OK. Add Report dialog box c. To define report criteria and/or its output, select a report from the group and use Criteria. See the report specifics in this chapter and the topics Output and/or Chart for details. d.
Reports and Listings Output Purpose To define where and how reports and listings are generated. Summary of Procedures 1. Select the Output button on any report or listing dialog box. 2. Complete the dialog box as described below. 3. Use OK to save settings and return to the originating report or listing dialog box. (Cancel returns without changing the default output). Only on Organization and Selection Detail Reports. Printer.
Reports and Listings Margins. Select from the following: — Center Left to Right. Enable automatic selection of left and right margins; this choice results in a report centered on the page. — Left, Right, Top, Bottom. Enter size of margins in the unit specified (if “Center Left to Right” is enabled, the left and right margins are set by the system). — Units. Choose between Inches or Millimeters. Orientation. Select between Portrait or Landscape printing.
Reports and Listings Chart Purpose To choose a graphic representation for a summary report: The bar chart displays report parameters — for example, hours in a Time of Day Report — as bars against a vertical (or horizontal) scale. 2-D Bar A bar’s height (or length) corresponds to a value on the scale — typically the number of calls. (with grids on the X-axis and on Y-axis) A pie chart displays report parameters — for example, hours in a Time of Day Report — as individual “slices” in a pie.
Reports and Listings Report-specific Functions This section describes all reports on the call record database, as well as the selection criteria with which you can focus report information. Organization Reports Purpose To show your company’s telephone activity sorted by organization level. These reports are typically used in tracking telephone response and usage, particularly when groups or individuals must be accountable and need to remain within certain performance levels.
Reports and Listings Cost Center* Summary If there are more than two organization levels, the next level (for example, Department) would appear as follows: * as well as other level summaries. Cost Center Trends Summary of Procedures (Organization Reports) 1. From the Reports menu, select Organization Reports and then, your choice of report. 2. Type or select organization entries (fields change, depending on the report).
Reports and Listings Selection Reports Purpose To provide summary or detail information based on very specific criteria. Details are sorted in chronological order and include talk-time for incoming calls; summaries provide total number of calls, total and average duration and incoming call total and average talk-time. Selection Reports are versatile tools, used to pinpoint details or summarize trends in problem areas discovered by other reports. Sample reports appear in Appendix B.
Reports and Listings Account Code Reports Purpose To report on calls associated with Account Codes. (Account codes are typically dialed when placing or receiving a call to identify the call subject matter, client account, and so on.) MERLIN LEGEND Reporter offers an Account Code Summary Report and an Account Code Detail Report.
Reports and Listings Traffic Reports Purpose To generate a Traffic Report for the current or archived period. Traffic Reports summarize call activity under various categories. Summaries are based on the collected information for the period and — except where noted — only include data of incoming calls, their total and average queue-time, and total and average talk-time. The Date Report summarizes incoming call activity for each day in the period.
Reports and Listings Talk and Queue Time Distribution Report 3. a. In a Facility GOS Report, type or select 6 facility names. You may use wild cards (? = single character; % = multiple characters) in the first facility field. b. Use the Output and Chart buttons as described earlier in the chapter. c. Select OK to generate the report and exit. Facility GOS Report 4. For all other traffic reports: a. Use the Output button (and Chart, if availale) as described earlier in the chapter. b.
Reports and Listings Viewing Functions You can access MERLIN LEGEND Reporter reports, calls flagged for immediate output, and system messages via window displays. This section describes these functions: Report Viewer — to display reports sent to the window or saved to a system file. If you use Windows 3.1, the minimized Viewer icon appears at the bottom of the screen, or with Windows 95 the icon appears on a status bar button. Message Log — to display system messages.
Reports and Listings Message Log Purpose To view and/or print system messages. Access Select the Message Log icon (if using Windows 3.1) or the status bar button (Windows 95), or select View Message Log from the Listings menu. File options: Clear (removes all messages from the file) and Print. View options: selects (√) fatal, severe, information, and/or other types of messages, with or without a detail header.
5 5 Utilities This chapter describes how to perform maintenance tasks using the system Utilities. The chapter is organized into the following topics: Backup and Restore — describes how to copy data from the current or archived accounting period onto diskettes and vice-versa. Call Record Edit — describes how to correct information and/or add call records to the current database. Call Record Deletion — describes how to delete current call records from storage.
Utilities Backup and Restore Purpose Backup is used to copy the current or the archived period’s data onto floppy diskettes; Restore, loads a prior backup — typically, to run reports on archived data or to rebuild MERLIN LEGEND Reporter files after a system failure. You should back up current data at least weekly and archived data once, after closing the accounting period. For large databases, tape backups are recommended.
Utilities Call Record Edit Purpose To correct information and/or to add call records to the current period’s database and to change its summary statistics. Dialog Box Summary of Procedures (Call Record Edit) 1. From the Utilities menu, select Call Record Edit. 2. To search for existing call records, enter and/or select an Extension, Date, and/or Account Code, then select Search. 3. Matching calls will be queued for display in the Call Record Information box.
Utilities Call Record Deletion Purpose To purge all calls from the current period’s file. Calls should be purged only in extreme situations. Normally there is no need to do so as MERLIN LEGEND Reporter automatically moves a closed period's file to the archive file (the old archive is written over and the current file is cleared for new calls). Dialog Box Summary of Procedures You should not attempt to purge call records from the database unless this is recommended by the hotline. 1.
Utilities File Import/Export Purpose To transfer Organization data from/to an external source — typically, another PC with the MERLIN LEGEND Reporter application — to help maintain shared Organization files. MERLIN LEGEND Reporter can import and export files as text in the format described below — we show a pipe “|” as a delimiter, but you may use any character that does not appear as a field value. Use quotes (“”) where indicated.
Utilities Duplicates. (File import only) Select the action to take if an imported entry duplicates an existing entry: reject the new entry or update the existing entry. Summary of Procedures (File Import or Export) 1. From the Utility menu, select File Import or File Export. 2. For an import, prepare the data and place it in a file. 3. Complete the dialog box. 4. If you specified a floppy disk drive in Disk File Name, make certain to insert the appropriate diskette in the named drive. 5.
Utilities Database File Maintenance Purpose To check the integrity of your files and repair them if possible: Rebuild Internal Summaries — processes all calls in the current period and recomputes summary statistics. Use this function if you had changed the stored call record database via the Call Record Edit function. Rebuild Indexes — repairs database files. Use this function after a system error or a power interruption. Verify Database — checks file integrity.
Utilities System Upgrades Purpose To install a System Upgrade diskette containing a new software version or a larger model system. Summary of Procedures 1. From the Utility menu, select Upgrades. 2. Select the drive, insert the diskette, and select OK to start. 3. Follow the screen instructions to complete the procedure, and then remove the diskette from the drive. 4. If you need to configure a new option, proceed to the appropriate topic where it is documented in this manual.
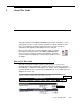
6 MERLIN LEGEND Reporter at a Polled Site 6 This chapter describes the functions specific to a MERLIN LEGEND Reporter site that is part of a multi-site configuration in the capacity of a “polled” remote site. These functions are all part of setting up your system so that the processing center — or “Central Site” — can (1) add this site to its database, (2) poll this site’s call record data, and (3) run reports on this site’s call record data. Examples show Windows 3.1 / Windows for Workgroups 3.
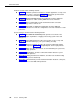
MERLIN LEGEND Reporter at a Polled Site The User ID and Password which you will assign to the Central Site when you add it as a “user” of your PC and the Phone Number to call your PC’s Remote Access modem (this will have the double function of Remote Access and Polled modem). The above values will match the Remote System User ID, Password, and Phone Number on the Call Collection Interface for this site, when the site is added to the Central Site’s database.
MERLIN LEGEND Reporter at a Polled Site Enable the Call Sender Interface 1. Select Call Sender Interface from the Configuration menu. 2. Complete the following fields (and ONLY these fields) in the dialog box: Port Name. Select the port to be used by the Central Site to retrieve calls from this site — typically, this is the same port used by the Remote Access modem. Baud Rate. Select the speed of the transmissions — typically, 9600 (but you may use the highest supported by the modem). Direct Connection.
MERLIN LEGEND Reporter at a Polled Site Add the Central Site as a “System User” 1. Select Users from the Configuration menu. 2. Select Add, enter the User ID and select Apply. Privileges are not required for the Central Site to access your PC. 3. Enter the password twice, then select OK. 6-4 Issue 1 January 1997 This User ID and this Password must be used by the Central Site to login to your PC.
7 7 PSU at a Polled Site This chapter will help you install a Pollable Storage Unit (PSU) and connect it to a MERLIN LEGEND communications system at a site. Have all components at hand, at their final location: PSU and power cord (Remote connection) Modem, PSU-to-modem cable (special cable, provided), and phone cord or...
PSU at a Polled Site MERLIN LEGEND Reporter operations require that the communications system at the polled site be administered properly. There are many variations; however, the example given in Establishing the SMDR Interface in Chapter 2 is typical of call center type of operations. Consult the above mentioned topic in Chapter 2 for details. Connecting the Unit Refer to the illustrations below as you install the unit.
PSU at a Polled Site d. Proceed to Configuring the Unit. 4. For a direct connection, connect the PSU-to-PC cable from the PSU “DCE OUTPUT” port to the serial port on the PC used for collecting SMDR data from this site. Configuring the Unit 1. Turn the PSU upside down to configure the DIP switches: DIP Switches INPUT PORT—SWITCH A> O 1 2 3 4 5 6 7 8 N OUTPUT PORT—SWITCH B> O 1 2 3 4 5 6 7 8 N CONFIGURATION—SWITCH C> O 1 2 3 4 5 6 7 8 N 2.
PSU at a Polled Site Powering Up the Unit 1. Plug the PSU power cord into the “10-12VAC” jack and into a power outlet. 2. To secure the cord, wind it one or two turns through the wire clip on the PSU back panel. 3. Turn the PSU “ON/OFF” switch to “ON”. You should see the front panel “Power” light flash, then turn solid green. If your communications system is passing SMDR, you should see the “Data In” light flash as the PSU receives it.
PSU at a Polled Site Issue 1 January 1997 7-5
8 Central Site of a Multi-site Configuration 8 This chapter describes the functions specific to MERLIN LEGEND Reporter in the capacity of the “Central Site” in a multi-site configuration. The chapter is organized as follows: Overview. Provides a high level description of what is involved in collecting, storing and reporting call record data from a system configuration that contains multiple MERLIN LEGEND Reporters. Setting Up the Central Site.
Central Site of a Multi-site Configuration Overview In a multi-site configuration, the Central Site performs the collection and processing of SMDR from every site it includes. SMDR is handled at each site by either a direct connection from the site’s MERLIN LEGEND communications system into the Central Site’s PC, or indirectly, from another PC running MERLIN LEGEND Reporter or from a PSU (these “call collectors” themselves receive SMDR directly from the site’s MERLIN LEGEND communications system).
Central Site of a Multi-site Configuration Setting Up the Central Site The Central Site is set up as documented in Chapter 2. Sample screens will look like they are shown in Part I of this book, with the exception noted below: Some dialog boxes will show the name of the site on its title bar. At first, it reads “Default.” This will be changed in the next few steps: 1. Select Site Maintenance from the Utilities menu. 2. When a dialog box similar to the one below appears, proceed as follows: a.
Central Site of a Multi-site Configuration Adding Polled Sites Purpose To add new polled sites, as well as rename, delete, or modify information on any installed sites. Multi-site configurations support 25, 50, or 100 sites, depending on the model. One site, typically, the operation center, is designated as the “Central Site.” To add a site, you must complete the following requirements: At the polled sites Enable SMDR collection.
Central Site of a Multi-site Configuration Summary of Procedures (Site Maintenance) 1. For deletions, select the site, then use Delete and confirm removal. Proceed directly to step 4. 2. For changes, select the site, then: a. Use Edit and complete the Site dialog box. b. Select Apply to accept the changes. Proceed directly to step 4. 3. For additions, make certain to have the site’s database listings at hand. Then proceed as follows: a. Use Add and complete the Site dialog box. b.
Central Site of a Multi-site Configuration Multi-site Functions This section describes additional functions or differences in standard functions, related to administering a multi-site configuration. Topics include: Site Selection. This function is required whenever you must work in a specific site’s database. Call Collection Interface and Schedules. This topic describes an overview of call collection functions from the Central Site’s standpoint. Reports.
Central Site of a Multi-site Configuration Diagram of Related Functions: Call Collection Interface, Call Sender Interface, Users Modem (999-1234) MERLIN LEGEND System A com1 com2 Site 1 MERLIN LEGEND Reporter PC com3 Central Site MERLIN LEGEND Reporter com4 MERLIN LEGEND System B Modem MERLIN LEGEND System C Modem (999-1234) Central Site Call Collection Interface - Central Site protocol = Direct Connect format = MERLIN LEGEND Reporter Protocol Options (Direct Connect) Port = Com3 Baud rate, data
Central Site of a Multi-site Configuration Call Collection Interface See Call Collection Interface in Chapter 3 for protocol details. Polling Schedule The Start and End Times refer to the time-slot in which a site has claim to that port. If a poll runs over its time-slot, it will end (the remainder of the data will be down-loaded on the next poll). Once a poll ends, the next site with a claim to that port will be polled. 1.
Central Site of a Multi-site Configuration 3. Back at the Polling Schedule dialog box, you may work on another time-slot or select OK to exit.
Central Site of a Multi-site Configuration Reports Most report dialog boxes will include a site selection list box to identify sites to be included in the report. Choices will be either "(ALL)" or a specific site from the list of installed sites. Call Processing Status This window will have a slightly different look in a multi-site configuration. The window will display the name of the site whose calls are currently being processed.
A A Worksheets This appendix contains blank forms to collect the information required for installation: SYSTEM-WIDE PARAMETERS WORKSHEET CALL COLLECTION INTERFACE WORKSHEET CALL COLLECTION - POLLING SCHEDULE WORKSHEET TELEPHONE LINES & FACILITIES WORKSHEET ORGANIZATION WORKSHEET Issue 1 January 1997 A-1
Worksheets Instructions to complete the SYSTEM-WIDE PARAMETERS WORKSHEET: 1. Enter the Company Name (1-15 characters) as you wish it to appear on report headers. The Company Name is a system-wide parameter, not equivalent to the name of a site in a multi-site configuration. Sites are named (1-15 characters) at the time they are added (or renamed anytime thereafter) via the Site Maintenance function under the Utilities menu. 2.
Worksheets SYSTEM-WIDE PARAMETERS WORKSHEET PART I - Organization Levels Company Name Number of levels: (15 characters) Level Names: Extension or (15 characters) (default) 2 Cost Center or (15 characters) 3 Department or (15 characters) 4 Division or (15 characters) 5 Branch or (15 characters) PART II - Accounting Period Monthly Bi-monthly Quarterly Number of Days: User Specified Dates: First day of accounting period: (month) / (day) / / / / / / / / / / / / / / / / / /
Worksheets Instructions to complete the CALL COLLECTION INTERFACE WORKSHEET: 1. Make as many copies of this worksheet as needed. 2. (Multi-site configuration only) Enter the name of the site. Sites are named at the time they are added (or renamed anytime thereafter) via the Site Maintenance function under the Utilities menu. 3. Select the protocol and complete the protocol options: For a Direct Connect protocol, enter the PC port to connect to the telephone system.
Worksheets CALL COLLECTION INTERFACE WORKSHEET Site Name Protocol Options Direct Connect Port Name (COM1, COM2, etc.) Baud Rate = 1200 Data bits = 8 Parity = none Stop Bits = 1 Flow Control = Xon / Xoff PollComm (PSU or MERLIN LEGEND Reporter). Also complete the POLLING SCHEDULE WORKSHEET. Port Name (COM1, COM2, etc.
Worksheets Instructions to complete the CALL COLLECTION - POLLING SCHEDULE WORKSHEET: 1. Make as many copies of this worksheet as needed. 2. Plan a complete schedule. (This is particularly important in a multi-site configuration, in which many sites are polled through the same port.) a. Port Used for polling sites: b. Use a “scratch” sheet for a single PC serial port. Divide the days (weekday/weekend) into non-overlapping hour or half-hour slots and assign them to a site.
Worksheets interval in hours and minutes to repeat polls within the time-slot (note that the interval must fit within the time-slot — that is, it must be shorter — for polls to occur more than once).
Worksheets CALL COLLECTION - POLLING SCHEDULE WORKSHEET Site Name Days Weekday Port Used: Start (hr:min) Weekend Days Weekday Weekday Start (hr:min) Weekday Start (hr:min) Weekday Start (hr:min) Weekday Start (hr:min) Weekday Start (hr:min) Weekday Start (hr:min) Weekday Start (hr:min) Weekday End (hr:min) End (hr:min) Start (hr:min) End (hr:min) Weekend A-8 Issue 1 January 1997 End (hr:min) intervals (hr:min) intervals (hr:min) intervals (hr:min) intervals (hr:min) in
Worksheets Instructions to complete the TELEPHONE LINES & FACILITIES WORKSHEET: 1. Make as many copies of this worksheet as needed. 2. (Multi-site configuration only) Enter the name of the site. Sites are named at the time they are added (or renamed anytime thereafter) via the Site Maintenance function under the Utilities menu. 3. Enter the facility name.
Worksheets TELEPHONE LINES & FACILITIES WORKSHEET Site Name: Facility Name: Grade of Service: Number of Lines: Lines (in this Facility — list as they appear in an SMDR call record from the telephone system): Facility Name: Grade of Service: Number of Lines: Lines (in this Facility — list as they appear in an SMDR call record from the telephone system): Facility Name: Grade of Service: Number of Lines: Lines (in this Facility — list as they appear in an SMDR call record from the telephone system
Worksheets Instructions to complete the ORGANIZATION WORKSHEETS - Levels 1 and 2: 1. If using different organization level names than the system defaults of “Cost Center” and “Extension,” change them to those used in the SYSTEM-WIDE PARAMETERS worksheet. 2. Make as many copies of this worksheet as needed. 3. (Multi-site configuration only) Enter the name of the site. Sites are named at the time they are added (or renamed anytime thereafter) via the Site Maintenance function under the Utilities menu. 4.
Worksheets ORGANIZATION WORKSHEET - Levels 1 and 2 Site Name: Cost Center: Extension: Personnel Name (Title, first name, last name): Immediate Output? yes Extension: Personnel Name (Title, first name, last name): Immediate Output? yes Extension: Personnel Name (Title, first name, last name): Immediate Output? yes Extension: Personnel Name (Title, first name, last name): Immediate Output? yes Extension: Personnel Name (Title, first name, last name): Immediate Output? yes Extension: P
Worksheets Instructions to complete the ORGANIZATION WORKSHEET - Levels 2 and higher: 1. Make as many copies of the worksheet as needed. 2. If using different organization level names than the system defaults, enter them from the SYSTEM-WIDE PARAMETERS worksheet. 3. List all entries in each of the levels you are using, sorted by the “parent” level. If necessary, skip lines and/or draw lines to help you delimit the groupings.
Worksheets ORGANIZATION WORKSHEET Department Cost Center (or Level-2 name , if different) - Levels 2 and higher (or Level-3 name , if different) A-14 Issue 1 January 1997 Division (or Level-4 name , if different) Branch (or Level-5 name , if different)
Worksheets Issue 1 January 1997 A-15
B B Sample Reports This appendix provides samples of the following reports: Organization Detail Report — see page B-2 Organization Summary Report — see page B-3 Cost Center Summary Report — see page B-4 Organization Trends Report — see page B-4 Selection Detail Report — see page B-5 Selection Summary Report — see page B-5 Account Code Detail Report — see page B-6 Account Code Summary Report — see page B-6 Date Report (Incoming Traffic only) — see page B-7 Time of Day Report (Incoming Traffic only) — see
Sample Reports Organization Detail Report Date: Thursday, September 28, 1995 Page: 1 Time: 1:47:24 PM Company Name -----------------------------------------------------------------------------SELECTION CRITERIA : DATE RANGE : TIME RANGE : MINIMUM TALK TIME: Cost Center : Extension : CALL TYPE : DIALED NUMBER : 9/26/95 to 10/1/95 12:00:00 AM to 11:59:59 PM 0:00:00 Cust Svc 04 All All PAGE BREAK AFTER EACH Extension: No Cost Center Extension PERSONNEL NAME DATE -------09/27/95 09/27/95 09/27/95 : Cust Svc
Sample Worksheets Organization Summary Report Date: Thursday, September 28, 1995 Page: 1 Time: 2:27:02 PM Company Name --------------------------------------------------------------------------------------------------------------------------------SELECTION CRITERIA : DATE RANGE : TIME RANGE : MINIMUM TALK TIME: Cost Center : Extension : CALL TYPE : DIALED NUMBER : 9/27/95 to 9/27/95 12:00:00 AM to 11:59:59 PM 0:00:00 Cust Svc All All All PAGE BREAK AFTER EACH Cost Center: No Cost Center Extension ------
Sample Reports Cost Center Summary Report Date: Thursday, September 28, 1995 Page: 1 Time: 2:27:47 PM Company Name -----------------------------------------------------------------------------DATE RANGE: Wednesday, September 27, 1995 to Sunday, October 01, 1995 COMPANY TOTALS: Company Name Cost Center --------------Admin Cust Svc TOTALS: ----- DURATION ----TOTAL TOTAL PER CALL CALLS HHHH:MM:SS HH:MM:SS ----- ---------- -------0 0:00:00 0:00:00 25 6:30:00 0:15:36 ----- ---------- -------25 6:30:00 0:15
Sample Worksheets Selection Detail Report Date: Thursday, September 28, 1995 Page: 1 Time: 2:29:35 PM Company Name --------------------------------------------------------------------------------------------------------------------------------SELECTION CRITERIA : DATE RANGE : TIME RANGE : MINIMUM TALK TIME: Cost Center : Extension : ACCOUNT CODES : Line : CALL TYPE : DIALED NUMBER : DATE -------09/27/95 09/27/95 09/27/95 09/27/95 09/27/95 09/27/95 09/27/95 09/27/95 09/27/95 09/27/95 09/27/95 09/27/95 09/2
Sample Reports Account Code Detail Report Date: Thursday, September 28, 1995 Page: 1 Time: 5:30:48 PM Company Name --------------------------------------------------------------------------------------------------------------------------------SELECTION CRITERIA DATE RANGE ACCOUNT CODES : : 9/27/95 to 9/27/95 : All PAGE BREAK AFTER EACH ACCOUNT CODE: No ACCOUNT CODE: 1000 (ACME Food Supply) DURATION TALK TIME DATE TIME HHHH:MM:SS HHHH:MM:SS Extension DIALED NUMBER LOCATION -------- ----- ---------- -----
Sample Worksheets Date Report Date: Thursday, September 28, 1995 Page: 1 Time: 1:36:02 PM Company Name ------------------------------------------------------------------------------ DATE -------09/26/95 TOTALS: TOTAL CALLS -----14 -----14 ---- QUEUE TIME ---TOTAL PER CALL HHHH:MM:SS HH:MM:SS ---------- -------0:10:00 0:00:42 ---------- -------0:10:00 0:00:42 ----- TALK TIME ---TOTAL PER CALL HHHH:MM:SS HH:MM:SS ---------- -------2:40:00 0:11:25 ---------- -------2:40:00 0:11:25 Date Report Date: Thurs
Sample Reports Time of Day Report Date: Thursday, September 28, 1995 Page: 1 Time: 9:45:22 AM Company Name --------------------------------------------------------------------------------------------------------------------------------DATE RANGE: Wednesday, September 27, 1995 to TIME OF DAY --------------------00:00 - 00:59 01:00 - 01:59 02:00 - 02:59 03:00 - 03:59 04:00 - 04:59 05:00 - 05:59 06:00 - 06:59 07:00 - 07:59 08:00 - 08:59 09:00 - 09:59 10:00 - 10:59 11:00 - 11:59 12:00 - 12:59 13:00 - 13:59 1
Sample Worksheets Extension Summary Report Date: Thursday, September 28, 1995 Page: 1 Time: 1:39:55 PM Company Name ------------------------------------------------------------------------------ EXTENSION ---------01 04 05 07 TOTAL NAME CALLS ------------ -----DiMarco, Mr 4 Herrero, Ms 2 LaFalce, Mr 3 LaSalle, Mr.
Sample Reports Talk and Queue Time Distribution Report Date: Thursday, September 28, 1995 Page: 1 Time: 1:41:54 PM Company Name --------------------------------------------------------------------------------------------------------------------------------DATE RANGE: Wednesday, September 27, 1995 to Sunday, October 01, 1995 DURATION DISTRIBUTION --------------------- DURATION RANGE MM:SS --------------------00:00 - 00:14 00:15 - 00:29 00:30 - 00:44 00:45 - 00:59 01:00 - 01:14 01:15 - 01:29 01:30 - 01:44
Sample Worksheets Talk and Queue Time Distribution Report Date: Thursday, September 28, 1995 Page: 1 Time: 1:43:47 PM Company Name --------------------------------------------------------------------------------------------------------------------------------DATE RANGE: Thursday, September 28, 1995 to Sunday, October 01, 1995 DURATION DISTRIBUTION --------------------- DURATION RANGE MM:SS --------------------00:00 - 04:59 05:00 - 09:59 10:00 - 14:59 15:00 - 19:59 20:00 - 24:59 25:00 - 29:59 30:00 - 34:
Sample Reports Facility Grade of Service Report Date: Thursday, September 28, 1995 Page: 1 Time: 9:53:49 AM Company Name --------------------------------------------------------------------------------------------------------------------------------DATE RANGE: Wednesday, September 27, 1995 SELECTION CRITERIA FACILITIES to Sunday, October 01, 1995 : : ALL FACILITY --------------CO inbound CO outbound NUMBER OF Lines -------2 3 AVERAGE BUSY HOUR ------------11:00 - 11:59 15:00 - 15:59 AVERAGE CALLS --
C C Specifications This appendix provides technical information about the hardware and software requirements for running MERLIN LEGEND Reporter on your PC. Processor MERLIN LEGEND Reporter must have the following minimal configuration in order to operate in a normal manner. Any deviations will have to be handled completely by you, the user, or if you require help, by an Lucent Technologies technician (at an extra charge).
Specifications Single-site Multi-site • A COM port available for SMDR input at all times (3) (2) Serial Ports and Modems • A COM port available for SMDR input at all times (3) • A 1200-baud (or faster) modem for SMDR input See Serial Port Pinouts and Modems later in this appendix.
Specifications Modems MERLIN LEGEND Reporter requires Hayes-compatible modems (error-correcting, 9600baud or faster modems are recommended). Typically, default settings work.
Specifications Implementation Guidelines The table below shows our recommended schedule of system management tasks.
D Getting Assistance for Problems D This appendix describes basic troubleshooting procedures to identify and correct problems and explains how to get assistance for problems that you cannot correct. How to Report a Problem If a problem arises when you are using MERLIN LEGEND Reporter, first attempt to solve the problem using the troubleshooting flowchart later in this appendix. If the problem is caused by a peripheral system or device, consult the system or device documentation.
Getting Assistance for Problems Using Remote Access 1. To enable Remote Access: a. Make certain your Remote Access modem is ready and on-line. b. Open the Carbon Copy program group, and double-click on the Host icon. c. When the Carbon Copy Host main menu appears, click on the Wait for Call button. The Host - Waiting for Call icon appears at the bottom of your screen, indicating that your PC is ready for access: 2. To disable Remote Access: a.
Getting Assistance for Problems Basic Troubleshooting The flowchart below displays the path to take when a problem manifests itself. START Is the system processing calls? no yes Calls rejected or not received? yes Check & correct possible causes: • The Call Collection Interface protocol options (baud rate, parity, etc.) do not match the source of call records. If problem persists, call the hotline. • There are bad cable, serial port or modem problems.
Getting Assistance for Problems If problem persists, call the hotline. A Is the data OK? Is number of calls OK? no Check for errors or conditions that result in discarding or not reporting calls: no • Report selection criteria • Call Type minimum duration • Dialed Digit Processing yes yes Are extension & accts. OK? no yes Are other call details OK? yes Check the Organization and Account Code tables.
E PC Serial Ports E This appendix provides detailed information about PC serial ports, including background information about what they are and how they work. It also explains how Windows manages serial ports, how to resolve problems using COM3 or COM4 under Windows, and how to choose serial port hardware that is well-suited to MERLIN LEGEND Reporter. The appendix is organized as follows: Background — provides an overview of serial port communications, in particular, under Windows.
PC Serial Ports Under DOS (and Windows, which works cooperatively with DOS), the serial port interfaces in a PC are uniquely identified by specific device names: COM1 (“serial communications port 1”), COM2 (“serial communications port 2”), and so on, usually up through COM4. A particular PC might have none of these devices, some of them, or all of them installed.
PC Serial Ports announce that it’s ready to receive more outgoing data and/or that new data has arrived from the peripheral device that needs to be processed. Like I/O port addresses, IRQs must generally be unique among the active hardware devices in a computer system. In the mailbox analogy, the doorbell is probably not a good signal since virtually anyone could ring the doorbell for any number of reasons, not just to indicate the arrival of mail.
PC Serial Ports more than one COM port (that is, the COM1 and COM3 ports were both assigned to IRQ4, and the COM2 and COM4 ports were both assigned to IRQ3). Then, under the assumption that at most two serial ports would be active simultaneously (for example, COM1 and COM2, which have unique IRQs), conflicts would not occur.
PC Serial Ports Serial Ports Under Windows Unlike the DOS-only world of yesterday, today’s multitasking environments like Windows permit the microprocessor to communicate with up to four active serial port devices at the same time (COM1 through COM4).
PC Serial Ports Workarounds and Solutions to the IRQ Conflict Problem It is important to remember that the IRQ conflict is a problem in hardware; it cannot be resolved in software alone. Consequently, there are only three alternatives for working around or resolving it. These are described in the following topics. Workaround 1: Configure your serial devices such that you use only two at any one time, and those two use serial ports with unique IRQs.
PC Serial Ports COM2, COM3, or COM4, but the I/O port addresses and IRQs associated with each of these configurations is usually fixed to the settings in the table.
PC Serial Ports Fortunately, some serial port add-in cards do permit you to select IRQs other than 3 or 4 (the additional choices are often IRQ2 and IRQ5). If your serial port hardware provides this flexibility — and at least one of the IRQ numbers available as an option is currently unused in your PC setup — you can solve the IRQ conflict directly. For example, consider once again the scenario of a COM1 mouse, a COM2 fax/modem card, and a COM3 call collection input.
PC Serial Ports 2. For best performance with MERLIN LEGEND Reporter, choose a card which has hardware support for high-speed communications. The MERLIN LEGEND Communications System transmits call records to the MERLIN LEGEND Reporter at a data rate of 9600 baud, and it relies on Windows to manage the flow of data through your PC's serial port. Depending upon your configuration, Windows may have problems maintaining high data rates through traditional serial ports.
Glossary A ABAND The MERLIN LEGEND Reporter call type for “abandoned” call — that is, incoming calls terminated by the caller while waiting in a queue to be answered (that is, calls with no talk-time). account code A field in a call detail record that contains a user-defined identifier. An account code is dialed typically when placing or receiving a call to identify the call subject matter, client account, and so on.
Glossary C call record A record of a telephone transaction created by the telephone system at the completion of every call (also called SMDR for Station Message Detail Recording). This record includes such information as date, time and duration of the call, number dialed, account code, extension placing or receiving the call, and line used. central office (CO) The telephone company facility that routes and connects calls from a local area — also known as “public exchange” outside North America.
Glossary G Grade of Service (GOS) A way to measure telephone facility service on a worst case scenario. GOS is the probability of receiving a busy signal on any given day, during a facility’s busiest hour. I IDDD International Direct Distance Dialing. The MERLIN LEGEND Reporter call type for calls placed to a location outside the U.S.A. by dialing the toll prefix “011” followed by a country and/or city code, then the local dialing pattern.
Glossary M message log The MERLIN LEGEND Reporter file that records system messages upon the occurrence of events that warrant the user's attention. This log is available for viewing by opening the Message Log icon or the View Message Log function under the Listings menu. modem A device that converts digital data signals to analog signals for transmission over telephone lines. Analog signals are converted back to original digital data signals by another modem at the other end of the circuit.
Glossary pie chart A graphical representation of a summary report displaying pie slices as line entries (such as hours in a Time of Day Traffic Report). The size of the slice corresponds to the percent value of the line entry over the total value — number or usage (depending on the report). polled site The MERLIN LEGEND Reporter term for a site that makes its call record data available for polls from the Central Site in a multi-site network (also called “remote site”).
Glossary S Selection Reports The MERLIN LEGEND Reporter reports that provide summary or detail information based on userdefined criteria such as organization levels, date, time, duration, account code, line, call type, and/or dialed number. These reports are useful in pinpointing details or summarzing trends in problem areas or exceptions (such as lengthy calls or calls to alert numbers) discovered in other reports. SMDR Station Message Detail Recording.
Index Configuration functions (continued) call types, 3-12 A Abandoned calls see Call types Account codes, 3-8 reports, 4-12, B-6 Accounting period initialization, 2-8 function, 3-19 worksheet, A-2 Administration functions, 3-3 account codes, 3-8 alert numbers, 3-7 immediate output, 3-6 organization, 3-3 password, 3-9 site selection, 8-6 Alert / alarm numbers setup, 3-7 viewing, 4-16 dialed digit processing, 3-10 immediate output to printer, 3-17 lines, 3-13 users, 3-20, 6-3 Cost center, see Organization
Index I P ICLID (caller ID), 2-3 call distribution report, 4-13, B-9 Icons, 1-6 Immediate output , 3-6 extensions, 3-4 printer, 3-17 viewing file, 4-16 Import/export files, 5-5 Installation, 2-1 add site (multi-site network), 6-1, 8-4 database setup (complete or minimal), 2-7 database setup (completing minimal), 2-15 equipment check, 2-2, C-1 PARTNER Reporter software, 2-6 PSU, 7-1 remote access software, 2-4 telephone system interface, 2-12 upgrades, 5-8 worksheets, A-1 Password change own, 3-9 set up
Index T Talk-time (report), 4-13, B-10, B-11 Telephone lines, see Lines Telephone system, viii.