
Installation guide


Synapse Installation Guide Back to Contents
Getting Started 69
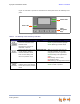
ATA Configuration
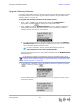
Press / in the ATA Main menu until Configuration is highlighted, as
shown in Figure 41, and press to display the Configuration menu. The current
setting is indicated with [*]. You can use this interface or the WebUI to upgrade
software.
Figure 41. ATA Configuration
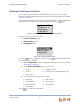
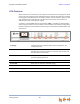
Configuration — Current ATA settings:
Auto IP — Is set automatically.
Static IP — You can change the Static IP only from the ATA. See your network
administrator if you require details regarding IP assignments.
Restore Defaults — Highlight Restore Defaults and press and hold
for two seconds when prompted to restore the ATA to factory defaults.
Upgrade Software — Highlight Upgrade Software, and press . If new
software is available, you are prompted to press again to accept the
upgrade.
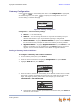
Upgrade ATA Software
If you have system settings that you want to retain, back up the settings before upgrading
the system software. You can also upgrade ATA software using the WebUI. See “Updating
Devices” on page 90.
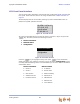
To upgrade the ATA software to the latest version:
1. Press / in the ATA Main menu until Configuration is highlighted and
press to display the Configuration menu.
2. Press to highlight Upgrade Software and press to initiate the
software upgrade process. The device initiates a link to the Synapse software updates
web site host and any new software.
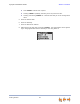
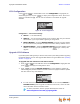
If a host cannot be found or the server name cannot be resolved, Timeout or
Host Not Found appears. Upgrade the software from the PC, which can offer
more information about connection issues.
For more information, see the Synapse Administrator’s Guide at
www.telephones.att.com/synapseguides.