
Operation Manual


GB 20
INSTALLATION
You are advised to install this product with the help of a second person.
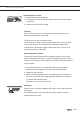
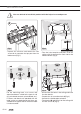
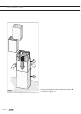
- Unpack the structure and remote the two
screws A to separate the top part from the
bottom one (Fig.1).
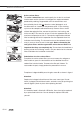
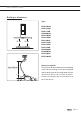
- Take the hole template and place it on the
ceiling, with the arrow on the same side as the
hood’s controls (Fig.2).
For the mounting work, use screws and
expansion dowels suited to the type of wall
(e.g. reinforced concrete, plasterboard, etc.).
If screws and dowels are provided with the
hood, make sure beforehand that these are
suitable for the type of wall on which the hood
is to be mounted.
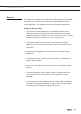
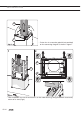
- Drill the four Ø 8 holes in the ceiling and insert
the four dowels.
- Prepare the air evacuation hole A (Fig.3).
- Connect the flexible pipe to hole A.
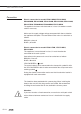
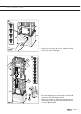
- Take bracket B and fasten it on the ceiling with
the four screws C (Fig.4).
Fig.4
Fig.3
Fig.1
Fig.2