
User's Manual


8
OPERATION
When properly set up, this masking station will hold up to rolls of masking paper and up to 4
rolls of masking tape. These materials may be arranged so the masking station will
dispense the paper with the tape pre-applied to the edges of the paper. This paper/tape
assembly may be pulled out and cut from the masking station for easy and rapid use in
masking work pieces for painting or other treatment.
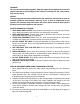
Installing the tape rolls
1. Select any of the upper or lower pairs of tape roll holders for installation of a new tape
roll.
2. Check to be sure that both wing nuts are tight against the tape roll holder.
3. Press the tape roll onto the holder
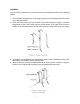
4. Check the alignment of the tape with the paper roll
5. If you need to adjust the position of the tape roll, you may adjust the wing nuts. First,
move the outer wing nuts back out of the way. Then, move the inner wing nuts in or out
until the tape is properly aligned with the paper roll. Retighten both wing nuts to fix the
tape roll into position.
Note: If you are using narrower paper rolls, you may replace the long bolts with
threaded rods of the same diameter to allow you to position the tape roll holders even
closer together.
You can also adjust the position of the paper roll to better align with the tape rolls.
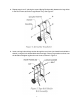
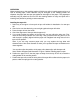
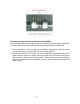
Note: Review the paper path illustration in Figure 7 before installing paper or tape.
6. Position the paper roll so that the paper unwraps from the top of the roll, toward the
cutting blades of the masking station.
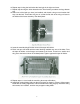
7. Position the tape rolls so that the sticky side of the tape will be adhered to the paper as it
passes under the springs on the cutting blades.