Using the LCD TV Configuring the PIP/POP/PBP Functions 2-31
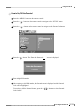
Various functions for watching TV can be configured. (Language, Transparency, ISM Method, Timer, Caption, Parental etc.) Selecting the Main Screen Language 1 Press the
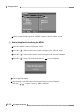
Using the LCD TV Adjusting Image Transparency 1 Press the
Using the LCD TV Setting Sleep Timer Set the sleep timer to switch the TV power to the standby mode automatically when a specified time has elapsed. N O T E ▶ Press the button on the remote control to set the sleep timer. 1 Press the
Using the LCD TV 7 In ‘Off Timer’, press the < > button and the < > button on the remote control to set the ‘TV Off’ timer. (When setting time, press the < > button on the remote control to set ‘Hour’, press the < > button to move to ‘Minutes’, press the < > button to set ‘Minutes’, press the < > button to move to ‘AM/PM’, and press the < > button to select ‘AM/PM’.) N O T E ▶ To turn the TV off automatically, see the section on ‘Off Timer’ settings for visual settings.
Using the LCD TV 3 Press the < submenu. 4 Press the < 5 Press the < > buttons to move to ‘Analog Caption’. And the press the buttons to select ‘CC1~4’ or ‘TEXT1~4’. 6 The options available for Digital Caption are Option, Font Setup and Font Style. N O T E > button on the remote control to navigate to the ‘Caption’ > buttons on the remote control. S ▶ In Caption mode, captions appear at the bottom of the screen, and they usually cover only a small portion of the picture.
Using the LCD TV 6 When you have finished, press the
Using the LCD TV 4 Press the < > button. The ‘Enter the Password : ’ screen is displayed. 5 Enter 4-digit PIN number. N O T E ▶ The default PIN number for a new set is ‘1-1-1-1’. 6 After entering a valid PIN number, the ‘Parental’ menu screen will appear. Press the < > buttons to select ‘Set Password’. 7 When you have finished, press the
Using the LCD TV How to On/Off the Parental 1 Press the
Using the LCD TV 7 When you have finished, press the
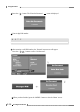
Using the LCD TV 7 Press the < The < > buttons to select particular MPAA category. > buttons will cycle through the MPAA categories. MPAA G & Above PG & Above PG-13 & Above R & Above NC-17 & Above X Unblocked General audience (no restrictions). Parental guidance suggested. Parents strongly cautioned. Restricted. Children under 17 should be accompanied by an adult. No Children under age 17. Adults only Not rated 8 When you have finished, press the
Using the LCD TV How to Setup Restriction Using the TV Guidelines 1 Press the
Using the LCD TV 7 Press the < and press the < > buttons to move to one of the six age-based categories in column > buttons will cycle through the MPAA categories. For example, if you block TV-Y category, then TV-Y7 will be automatically blocked. Similarly, if you block TV-G & Above category, then all the categories in the ‘young adult’ will be blocked (TV-G & Above, TV-PG & Above, TV-14 & Above and TV-MA).
1 Connect the RS-232C input jack to an external control device (such as a computer or an A/V control system) and control the Monitor’s functions externally. 2 Connect the serial port of the control device to the RS-232C jack on the Monitor back panel. 3 RS-232C connection cables are not supplied with the Monitor. N O T E ▶ Type of Connector : D-Sub 9-pin Male No.
Using the LCD TV N O T E ▶ RS-232C Configurations 7-Wire Configuration (Standard RS-232C cable) 3-Wire Configuration (Not standard) Set ID - Use this function to specify a monitor ID number. - Refer to ‘Real Data Mapping 1’. 1 Press the
Using the LCD TV Command Reference List COMMAND 1 COMMAND 2 DATA(Hexadecimal) k a 0~1 k b 0~7 k e 0~1 k f 0 ~ 64 k g 0 ~ 64 k h 0 ~ 64 k i 0 ~ 64 k j 0 ~ 64 k k 0 ~ 64 k n 0~4 k q 0~3 k r 0 ~ 14 k s 0 ~ 14 k t 0 ~ 64 k u 0~3 k v 0 ~ 64 k w 0 ~ 64 k y 0~7 Power Input Select Volume Mute Volume Control Contrast Brightness Color Tint Sharpness PIP/POP/PBP PIP Position Treble Bass Balance Color Temperature AV and HD H Position AV and HD V Position PIP Inp
Using the LCD TV N O T E ▶ Transmission / Receiving Protocol Transmission [Command1][Command2][ ][Set ID][ ][Data][Cr] [Command 1] : k, [Command 2] : To control LCD set. [Set ID] : You can adjust the Set ID to choose desired monitor ID number in Special menu. Adjustment range is 0 ~ 99. When selecting Set ID ‘0’, every connected LCD set is controlled. Set ID is indicated as decimal (0~99) on menu and as Hexadecimal (0x0~0x63) on transmission/receiving protocol. [DATA] : To transmit command data.
Using the LCD TV ● To show Power On/Off. - Transmission [k][a][ ][Set ID][ ][FF][Cr] Data 0 : Power Off 1 : Power On - Acknowledgement [a][ ][Set ID][ ][OK][Data][x] In a like manner, if other functions transmit ‘FF’ data based on this format, Acknowledgement data feedback presents status about each function. Input Select (Command2 : b) (Main Picture Input) ● To select input source for the Monitor. You can also select an input source using the INPUTSELECT button on the Monitor’s remote control.
Using the LCD TV Volume Control (Command2 : f) ● To adjust volume. You can also adjust volume with the volume buttons on remote control. - Transmission [k][f][ ][Set ID][ ][Data][Cr] Data Min : 0 ~ Max : 64 Refer to ‘Real data mapping1’ as shown below. - Acknowledgement [f][ ][Set ID][ ][OK][Data][x] Contrast (Command2 : g) ● To adjust screen contrast. You can also adjust contrast in the Video menu.
Using the LCD TV Color (Command2 : i) ● To adjust the screen color. You can also adjust color in the Video menu. - Transmission [k][i][ ][Set ID][ ][Data][Cr] Data Min : 0 ~ Max : 64 Refer to ‘Real data mapping 1’. - Acknowledgement [i][ ][Set ID][ ][OK][Data][x] Tint (Command2 : j) ● To adjust the screen tint. You can also adjust tint in the Video menu. - Transmission [k][j][ ][Set ID][ ][Data][Cr] Data Red : 0 ~ Green : 64 Refer to ‘Real data mapping 1’.
Using the LCD TV PIP/POP/PBP (Command2 : n) ● To control the PIP (Picture-in-Picture) or Twin Picture. You can also control the PIP/Twin picture mode using the PIP or TWIN PICTURE button on the remote control or in the Twin menu. - Transmission [k][n][ ][Set ID][ ][Data][Cr] Data 0 : PIP OFF 2 : POP 1 : PIP 3 : PBP1 4 : PBP2 - Acknowledgement [n][ ][Set ID][ ][OK][Data][x] PIP Position (Command2 : q) ● To select sub picture position for PIP. You can also adjust the sub picture position using Win.
Using the LCD TV Bass (Command2 : s) ● To adjust bass. You can also adjust bass in the Audio menu. - Transmission [k][s][ ][Set ID][ ][Data][Cr] Data Min: 0 ~ Max: 64 Refer to ‘Real data mapping 1’. - Acknowledgement [s][ ][Set ID][ ][OK][Data][x] (Operates only when SSM is set to USER.) Balance (Command2 : t) ● To adjust balance. You can also adjust balance in the Audio menu. - Transmission [k][t][ ][Set ID][ ][Data][Cr] Data Min: 0 ~ Max: 64 Refer to ‘Real data mapping 1’.
Using the LCD TV AV and HD H Position (Command2 : v) ● To adjust AV and HD mode H Posion - Transmission [k][v][ ][Set ID][ ][Data][Cr] Data 0 ~ 64 - Acknowledgement [v][ ][Set ID][ ][OK][Data][x] AV and HD V Position (Command2 : w) ● To adjust AV and HD mode V Posion - Transmission [k][w][ ][Set ID][ ][Data][Cr] Data 0 ~ 64 - Acknowledgement [w][ ][Set ID][ ][OK][Data][x] PIP Input Select (Command2 : y) ● To select input source for sub picture in PIP mode.