
User's Manual


Monitor Properties 53
Note: Use centered timings will not resize the desktop to fit the
screen, and may result in a centered image with a black border around
it.
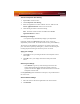
Adjust the DVI Settings
1 From the Tree View pane, expand Digital Panel Properties.
2 Click Attributes.
3 Under DVI Settings, click to enable the desired setting.
Note: Reducing DVI frequency on high-resolution displays can
resolve either display corruption or the complete absence of any
image when a display is set to a high resolution. This should only be
enabled if the Digital Panel is experiencing these types of problems.
Note: Alternate DVI operational mode, when enabled, may eliminate
display corruption.
Apply your settings
1 Click Apply to save your changes and leave the Catalyst™ Control
Center open.
2 Click OK to save your changes and exit the Catalyst™ Control
Center.
Restore default settings
1 Move the mouse to the bottom right-hand corner of the window.
2 Click Defaults.
Note: Clicking Defaults will restore the defaults for the current view
only. Previous settings are not altered and will be saved once you
click OK.
Discard your settings
•Click Discard to ignore any unsaved changes and restore the
settings that existed when the Catalyst™ Control Center was
opened or the last time Apply was used. Discard does not close the
Catalyst™ Control Center.
Clicking
Discard applies to all features of an aspect, not just the feature in
the current view.