
Operation Manual


11
Elektrische Sicherheit
Design of the connection cable according to IEC 60 245
(H 07 RN-F) with a core cross-section of at least
⇒ 3 x 1.5 mm² for a maximum cable length of up to 25 m
⇒ 3 x 2.5 mm² for cable lengths over 25m
Long and thin connection lines result in a potential drop.
The motor does not reach any longer its maximal power;
the function of the device is reduced.
Plugs and coupler outlets on connection cables must be
made of rubber, non-rigid PVC or other thermoplastic ma-
terial of same mechanical stability or be covered with this
material.
The connector of the connection cable must be splash-
proof.
When running the connection line observe that it does not
interfere, is not squeezed, bended and the plug connec-
tion does not get wet.
Wind off completely the cable when using a cable drum.
Regularly check the extension cables and replace them if
they are damaged.
Do not use any defective connection cables.
Do not set up any provisional electrical connections.
Never bypass protective devices or deactivate them.
Only hook up the machine by means of a fault-current
circuit breaker (30 mA).
The electrical connection or repairs to electrical parts of
the machine must be carried out by a certified electrician
or one of our customer service points.
Repairs to other parts of the machine must be carried
out by the manufacturer or one of his customer service
points.
Use only original spare parts. Accidents can arise for the
user through the use of other spare parts. The manufac-
turer is not liable for any damage or injury resulting from
such action.
A
A
s
s
s
s
e
e
m
m
b
b
l
l
y
y
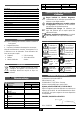
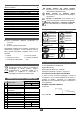
Chucking the beater:
B Screw the beater assembly (2) on the shaft (8). Secure
the beater using the spanners (9).
S
S
t
t
a
a
r
r
t
t
-
-
u
u
p
p
Check that the machine is completely and correctly as-
sembled.
Before each use, check
− Connection cables for defects (cracks, cuts, etc.).
Do not use any defective cables.
− there are no damages at the machine
(see "safe working")
− that the beater is properly secured.
L Mains connection
Compare the voltage given on the machine model plate
e.g. 230 V with the mains voltage and connect the ma-
chine to the relevant and properly earthed plug.
Connect the machine via a 30 mA fault current safety
switch.
Do not use any defective connection cables.
Use connecting or extension cables up to a length of 1.5
m featuring a core cross section of at least 25 mm²
L Main fuse: 10 A
Switching on
Do not use any device where the switch can not be
switched on and off. Damaged switches must be repaired
or replaced immediately by the customer service.
Switching on C
Press the ON/OFF button (3) on the handle. The device will
slowly start after powering up. As you press more firmly on
the button the rotational speed also increases.
Switching off
Release the ON/OFF handle button.
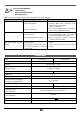
2- speed gear D
The device is equipped with a 2-speed gear.
1. speed: 150 - 300 rpm
2. speed: 300 - 650 rpm
For the speed selection turn the switch (6) by 180°.
LOnly operate this switch at standstill.
Continuous operation D
Switching on
For continuous operation press the locking knob (4) in
switched on condition.
Use the agitator only in continuous mode with the agitator
stand fitted. (Optional accessories: Agitator stand, order-no.:
372652)
Switching off
Press the ON/OFF button (3).
Speed control E
With this type, the motor's speed and thus the agitator per-
formance can be adjusted. You can continuously adjust the
speed with the speed control (4).
1. speed: 150 - 300 rpm
2. speed: 300 - 650 rpm