Wireless Multi-Function Access Point A02-AP1-W54 MANUAL A02-AP1-W54 _ME01 Where solutions begin
Where solutions begin
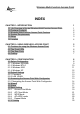
Wireless Multi-Function Access Point INDEX CHAPTER 1: INTRODUCTION 1.1 An Overview of the del Wireless Multi-Function Access Point 1.2 Package Contents 1.3 Wireless Multi-Function Access Point Features 1.4 System Requirements 1.5 Setup 1.6 Location 1 1 2 2 3 3 4 CHAPTER 2: USING WIRELESS ACCESS POINT 2.1 Cautions for using the Wireless Access Point 2.2 The Front LEDs 2.3 The Rear Ports 2.4 Cabling 5 5 6 6 7 CHAPTER 3: CONFIGURATION 3.1 Before Configuration 3.1.1 Windows 95/98/ME 3.1.2 Windows NT4.0 3.
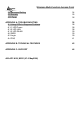
Wireless Multi-Function Access Point 3.8 Advanced Setting 3.9 Security 3.10 Tools 34 35 36 APPENDIX A: TROUBLESHOOTING A.1 Using LEDs to Diagnose Problems A.1.1 LED Power A.1.2 LED LAN A.1.3 LED WLAN A.2 WEB A.3 Login A.4 FAQ 38 38 38 38 39 39 39 41 APPENDIX B: TECHNICAL FEATURES 45 APPENDIX C: SUPPORT 46 A02-AP1-W54_ME01 (V1.
Wireless Multi-Function Access Point Copyright Statement No part of this publication may be reproduced, stored in a retrieval system, or transmitted in any form or by any means, whether electronic, mechanical, photocopying, recording or otherwise without the prior writing of the publisher. Windows™ 98SE/2000/ME/XP are trademarks of Microsoft® Corp. Pentium is trademark of Intel. All copyright reserved. The Atlantis Land logo is a registered trademark of Atlantis Land SpA.
Wireless Multi-Function Access Point CE Mark Warning This is a Class B product. In a domestic environment, this product may cause radio interference, in which case the user may be required to take adequate measures. CE in which Countries where the product may be used freely: Germany, UK, Italy, Spain, Belgium, Netherlands, Portugal, Greece, Ireland, Denmark, Luxembourg, Austria, Finland, Sweden, Norway and Iceland. France: except the channel 10 through 13, law prohibits the use of other channels.
Wireless Multi-Function Access Point 2) This device must accept any interference received, including interference that may cause undesired operation.
Wireless Multi-Function Access Point CHAPTER 1: Introduction Congratulations on your purchase of this IEEE 802.11g Wireless LAN Access Point. This manual helps to features the innovating wireless technology that can help you build a wireless network easily! This manual contains detailed instructions in operation of this product. Please keep this manual for future reference. With a WLAN (IEEE 802.11g) Access Point, a mobile computer can share data with another mobile computer in a wireless way.
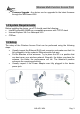
Wireless Multi-Function Access Point 1.2 Package Contents Unpack the package and check all the items carefully. If any item contained is damaged or missing, please contact your local dealer as soon as possible. Also, keep the box and packing materials in case you need to ship the unit in the future. The package should contain the following items: Wireless Multi-Function Access Point 2 dBi Antenna CDRom with online manual Quick Start Guide (English, French, Italian) AC/DC power adapter (7.
Wireless Multi-Function Access Point • Firmware Upgrade : the device can be upgraded to the latest firmware through the WEB based GUI. 1.4 System Requirements Before installing the device, your PC should meet the following: Intel® Pentium®III 600Mhz or compatible processor with TCP/IP stack Iinternet Explorer V6.0 on Netscape V6.0 CDRom 1.
Wireless Multi-Function Access Point 1.6 Location Locate an optimum location for the Wireless LAN Access Point (AP). The best place for your AP is usually the center of your wireless network, with line of sight to all of your mobile stations. Try to place the AP in a position that can best cover your wireless network. Normally, the higher you place the antenna, the better the performance will be. The antenna’s position enhances the receiving sensitivity. A02-AP1-W54 Pag.
Wireless Multi-Function Access Point CHAPTER 2: Using Wireless Access Point 2.1 Cautions for using the Wireless Access Point Do not place the Wireless Access Point under high humidity and high temperature. Do not use the same power source for Wireless Access Point with other equipment. Do not open or repair the case yourself. If the Wireless Access Point is too hot, turn off the power immediately and have a qualified serviceman repair it. Place the Wireless Access Point on a stable surface.
Wireless Multi-Function Access Point 2.2 The Front LEDs The table below shows the LED Indicator of the Wireless Access Point. LED Meaning This indicator lights green when the Access Point receives POWER power. Otherwise, it turns off. The indicator blinking green whiles the wireless LAN activity. WLAN The indicator lights green when the LAN port is connected to a LAN Ethernet network successful. Otherwise, the indicator blinking green while transmitting or receiving data on the Ethernet network. 2.
Wireless Multi-Function Access Point LAN POWER Ethernet port with 10/100Mbps Fast Ethernet connections, connect this port to switch/hub. Connect the Power Adapter DC plug to the AP’s power jack. 2.
Wireless Multi-Function Access Point CHAPTER 3: Configuration The Wireless Access Point has a Web GUI interface for the configuration. The AP can be configured through the Web Browser. A network manager can manage, control and monitor the AP from the local LAN. This section indicates how to configure the AP to enable its functions. 3.
Wireless Multi-Function Access Point 3.1.1 Windows 95/98/ME 1. Go to Start / Settings / Control Panel. In the Control Panel, double-click on Network and choose the Configuration tab. 2. Select TCP / IP -> NE2000 Compatible, or the name of any Network Interface Card (NIC) in your PC. 3. Click Properties. 4. Select the IP Address tab. In this page, click the Specify an IP address radio button (EG IP=192.168.1.2 and subnet Mask=255.255.255.0). A02-AP1-W54 Pag.
Wireless Multi-Function Access Point 3.1.2 Windows NT4.0 1. Go to Start / Settings / Control Panel. In the Control Panel, doubleclick on Network and choose the Protocols tab. 2. Select TCP/IP Protocol and click Properties. 3. Select the IP Address tab. In this page, click the Specify an IP address radio button (EG IP=192.168.1.2 and subnet Mask=255.255.255.0). A02-AP1-W54 Pag.
Wireless Multi-Function Access Point 3.1.3 Windows 2000 1. Go to Start / Settings / Control Panel. In the Control Panel, double-click on Network and Dial-up Connections. 2. Double-click LAN Area Connection. 3. In the LAN Area Connection Status window, click Properties. 4. Select Internet Protocol (TCP/IP) and click Properties. 5. Select Use the Following IP Address (EG IP=192.168.1.2 and subnet Mask=255.255.255.0). 6. Click “OK” to finish the configuration. A02-AP1-W54 Pag.
Wireless Multi-Function Access Point 3.1.4 Windows XP 1. Go to Start / Control Panel (in Classic View). In the Control Panel, doubleclick on Network Connections. 2. Double-click Local Area Connection 3. In the LAN Area Connection Status window, click Properties. 4. Select Internet Protocol (TCP/IP) and click Properties. 5. Select the Use the following IP address radio buttons IP=192.168.1.2 (EG and subnet Mask=255.255.255.0). 6. Click “OK” to finish the configuration. A02-AP1-W54 Pag.
Wireless Multi-Function Access Point 3.2 Default Settings Before configuring the Wireless AP through WLAN, make sure that the SSID, Channel and the WEP was set properly. The default setting of the Wireless AP that you will use: User: admin Password: admin IP Address: 192.168.1.1 Subnet Mask: 255.255.255.0 Wep Encryption: disable SSSID: default Channel:6 3.2.
Wireless Multi-Function Access Point When there is a screen needs to enter the User name and Password, both of the default Username and Password is “admin”. Click OK. The screen will show the station summary of the AP when you login to the AP. 3.3.1 Navigating the Access Point Web Configurator The screen will show the status of the AP when you login to the AP.
Wireless Multi-Function Access Point 3.4 Wizard Setup wizard is provided as the part of the web configuration utility. User can simply follow the step-by-step process to get Access Point configuration ready to run in 4 easy steps by clicking on the “Wizard” button on the function menu. The following screen will appear. Please click “Next” to continue. User can change the password and then click “Next” to continue. Please type the name of SSID and select the Channel. Then, click “Next” to continue.
Wireless Multi-Function Access Point If user wants to enable WEP, please click “Enabled”. Then, select the key size of WEP encryption and enter the key value in the key text box. Please click “Next” to continue. The Setup wizard is now completed. The new settings will be effective after the Access Point restarted. Please click “Restart” to reboot the Access Point. If user does not want to make any changes, please click “exit” to quit without any changes.
Wireless Multi-Function Access Point 3.5 Status This page as below shows the following information. Firmware Version: Shows the current firmware version and released date code. LAN: Shows the Mac address, IP address (default: 192.168.1.1), Subnet Mask, Gateway Address. The current LAN traffic calculated in terms of number of packets sent and received by AP through wired connection is also displayed.
Wireless Multi-Function Access Point View Log: Once clicked, the page will change to login page. The login page records every event and the time that it happens. NOTE: User may clear the entries recorded in the log by clicking the Clear Log button, and refresh the screen to show the latest log entries by clicking the Refresh button. 3.6 Basic Setting This is the page allow user to change the access point settings.
Wireless Multi-Function Access Point 3.6.1 Access Point Mode Configure the AP to Access Point mode; with this mode, WLAN clients can access LAN or other WLAN clients through this AP. Channel: The channel that AP will operate in. User can select the channel range from 1 to 11 for North America (FCC) domain, 1 to 13 for European (ETSI) domain and 1 to 14 for Japanese domain. SSID: Service Set Identifier, which is a unique name shared among all clients and nodes in a wireless network.
Wireless Multi-Function Access Point WEP is not completely secure. If possible please use WPA-PSK. WPA-PSK / WPA2-PSK: If WPA-PSK or WPA2-PSK is selected, user needs to set the key in the passphrase field as the below screen. The key length should be 8 characters at least. WPA / WPA2: If WPA or WPA2 is selected, the below screen is shown. Please set the length of the encryption key and the parameters for the RADIUS server. 1.
Wireless Multi-Function Access Point a channel that an adjacent AP is using. For example, if your region has 11 channels and an adjacent AP is using channel 1, then you need to select a channel between 6 or 11. 3.6.2 AP Client Mode Configure the AP to AP Client mode; the AP will be a wireless Ethernet adapter transforms any Ethernet-enabled devices to have the wireless function. SSID: Service Set Identifier, which is a unique name shared among all clients and nodes in a wireless network.
Wireless Multi-Function Access Point Note: When WEP security is enabled, all the wireless clients that wish to connect to the Access Point must also have WEP enabled with the identical WEP Key value entered. WPA-PSK / WPA2-PSK: If WPA-PSK or WPA2-PSK is selected, user needs to set the key in the passphrase field as the below screen. The key length should be 8 characters at least. Apply: For the changes made to any of the items above to be effective, click “Apply”.
Wireless Multi-Function Access Point 3.6.
Wireless Multi-Function Access Point A02-AP1-W54 Pag.
Wireless Multi-Function Access Point • Multiple WDS group application: When there are five APs to be join into two separated WDS group, the member of WDS group 1 is AP-A, AP-B and AP-C, and member of the WDS group 2 is AP-C, AP-D and AP-E, the AP-C will join both of WDS group 1 and WDS group 2, each WDS Group 1 will be one master and the other will be slave.
Wireless Multi-Function Access Point LAN-A. A02-AP1-W54 Pag.
Wireless Multi-Function Access Point A02-AP1-W54 Pag.
Wireless Multi-Function Access Point A02-AP1-W54 Pag.
Wireless Multi-Function Access Point 3.6.4 AP+WDS mode With WDS+AP mode, user can use wireless media to communicate two or more LANs through the AP with WDS+AP mode, all of LAN will be combined in the WDS group and WLAN client can access to the AP with AP+WDS mode. Please refer the AP mode and WDS mode for detail configuration. A02-AP1-W54 Pag.
Wireless Multi-Function Access Point A02-AP1-W54 Pag.
Wireless Multi-Function Access Point 3.6.5 Repeat Mode Configure the AP to Repeater mode; the AP will be a wireless LAN repeater that will be extended the WLAN coverage range. SSID: Service Set Identifier, which is a unique name shared among all clients and nodes in a wireless network. The SSID must be identical for each clients and nodes in the wireless network.
Wireless Multi-Function Access Point WPA-PSK / WPA2-PSK: If WPA-PSK or WPA2-PSK is selected, user needs to set the key in the passphrase field as the below screen. The key length should be 8 characters at least. Apply: For the changes made to any of the items above to be effective, click “Apply”. The new settings are now been saved to Access Point and will be effective once the Access Point restarts.
Wireless Multi-Function Access Point 3.7 IP Setting This page allows user to configure the IP and DHCP settings of the Access Point. The default IP address of this access point is 192.168.1.1 with the subnet mask of 255.255.255.0. User can type in other values for IP Address, Subnet Mask and Gateway and click “Apply” button for the changes to be effective. User can also set the Access Point to obtain the IP from a DHCP server, but it is not recommended.
Wireless Multi-Function Access Point 3.8 Advanced Setting This page contains configurations for advanced users, which the change reflects the wireless performance and operating modes. Beacon Interval: To set the period of time in milliseconds that AP sends out a beacon. Default is 100 milliseconds. RTS Threshold: To set the size of RTS/CTS packet size. Default is 2432 bytes. Fragmentation Threshold: To set the number of bytes used for the fragmentation boundary for directed messages.
Wireless Multi-Function Access Point Mode Setting: To setting the AP operation mode for 802.11g only or 802.11b/802.11g mix mode TX Rates: Select one of the wireless communications transfer rates, measured in megabytes per second, based upon the speed of wireless adapters connected to the WLAN. 3.9 Security This page is where user configures the security features supported by this Access Point. Password: Allow user to change the new login password. Here are the necessary steps: 1.
Wireless Multi-Function Access Point 2. 3. Only allow PCs with MAC listed below to access device Only deny PCs with MAC listed below to access device The maximum number of MAC addresses that can be stored is 50. User can browse through the MAC address saved by selecting the MAC Filter List. For any changes made in the security page, click “Apply” for the changes to be effective. 3.10 Tools Four functions are provided in this page, Backup, Restore Settings, Restore default settings and Firmware Upgrade.
Wireless Multi-Function Access Point the latest version. Upon selecting the firmware file, click “Upgrade” and complete the firmware upgrade process when the Access Point re-operates after it restarts. Do NOT upgrade firmware on any Atlantis Land product over a wireless connection. Failure of the device may result. Use only hard-wired network connections. After upgrading you must reset the router to factory default settings, then manually re-enter your settings. Please pay attention.
Wireless Multi-Function Access Point APPENDIX A: Troubleshooting This chapter covers potential problems and the corresponding remedies. A.1 Using LEDs to Diagnose Problems The LEDs are useful aides for finding possible problem causes. A.1.1 LED Power The PWR LED on the front panel does not light up. CORRECTIVE ACTION Steps Make sure that the Wireless Access Point’s power adaptor is 1 connected to the Access Point and plugged in to an appropriate power source. Use only the supplied power adaptor.
Wireless Multi-Function Access Point A.1.3 LED WLAN The WLAN LED on the front panel does not light up. CORRECTIVE ACTION Steps Press the “Reset” button on the rear panel of the AP, to set 1 back to factory default setting. Please unplug AC Adaptor and replug-it. 2 If these steps fail to correct the problem, contact your local 3 distributor for assistance. A.2 WEB I cannot access the web configurator.
Wireless Multi-Function Access Point seconds, the LED of the WLAN will turn off. And when the Access Point is ready, the WLAN LED will start blinking. And the other function is when the AP is locked, press the reset button to unlock it. 2 Before configurating thisWireless Multi-Function Access Point, you need to know the following default settings. Username: admin Password : admin IP Address : 192.168.1.1 Subnet Mask : 255.255.255.0 Wireless: SSSID= default, Channel=6, WEP=disable A02-AP1-W54 Pag.
Wireless Multi-Function Access Point A.4 FAQ Question Answer Question Answer Can I run an application from a remote computer over the wireless network? This will depend on whether or not the application is designed to be used over a network. Consult the application’s user guide to determine if it supports operation over a network. Can I play computer games with other members of the wireless network? Yes, as long as the game supports multiple players over a LAN (local area network).
Wireless Multi-Function Access Point techniques embedded in the radio can recover the original data without the need for retransmission. To an unintended receiver, DSSS appears as low power wideband noise and is rejected (ignored) by most narrowband receivers. Question Answer Would the information be intercepted while transmitting on air? WLAN features two-fold protection in security.
Wireless Multi-Function Access Point Question Answer What is the IEEE 802.11g standard? Approved in June, 2003 as an IEEE standard for wireless local area networks (WLANs), 802.11g offers wireless transmission over relatively short distances at up to 54 megabits per second (Mbps) compared with the 11 megabits per second of the 802.11b (Wi-Fi) standard. Like 802.11b, 802.11g operates in the 2.4 GHz range and is thus compatible with it. A02-AP1-W54 Pag.
Wireless Multi-Function Access Point A02-AP1-W54 Pag.
Wireless Multi-Function Access Point APPENDIX B: Technical Features Standards IEEE 802.11b/g IEEE 802.3u 10/100BASE-TX Fast Ethernet Signal Type: DSSS (802.11b) OFDM (802.
Wireless Multi-Function Access Point APPENDIX C: Support If you have any problems with the Wireless Access Point, please consult this manual. If you continue to have problems you should contact the dealer where you bought this device. If you have any other questions you can contact the Atlantis Land company directly at the following address: Atlantis Land SpA Viale De Gasperi 122 20017 Mazzo di Rho(MI) ITALY Tel: 039.02.93907634(help desk) Fax: 039.02.93906161 Email: info@atlantis-land.