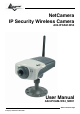
NetCamera IP Security Wireless Camera A02-IPCAM-W54 User Manual A02-IPCAM-W54_ME01 Where solutions begin Company certified ISO 9001:2000
IP Wireless Security Camera
IP Wireless Security Camera Copyright The Atlantis Land logo is a registered trademark of Atlantis Land SpA. All other names mentioned mat be trademarks or registered trademarks of their respective owners. Subject to change without notice. No liability for technical errors and/or omissions. CE Mark Warning This is a Class B product. In a domestic environment, this product may cause radio interference, in which case the user may be required to take adequate measures.
IP Wireless Security Camera TABLE OF CONTENTS CHAPTER 1...................................................................................................................................................................... 5 1.1 INTRODUCTION ........................................................................................................................................................ 5 CHAPTER 2..........................................................................................................
IP Wireless Security Camera CHAPTER 10 ................................................................................................................................................................. 16 10.1 INSTALLATION ...................................................................................................................................................... 16 CHAPTER 11 .............................................................................................................................
IP Wireless Security Camera A02-IPCAM-W54_ME01 3
IP Wireless Security Camera A02-IPCAM-W54_ME01 4
IP Wireless Security Camera Chapter 1 Introduction 1.1 Introduction Thank you for purchasing the IP Security Wireless Camera, a camera device that can be connected directly to an Ethernet or Fast Ethernet network and also supported by the wireless transmission based on the IEEE 802.11b standard.
IP Wireless Security Camera Chapter 2 System Requirement 2.1 Network: Local Area Network: 10Base-T Ethernet or 100Base TX Fast Ethernet Wireless Local Area Network: IEEE 802.11b/g Wireless LAN Recommended PC or Notebook to Access the IP Security Wireless Camera 2.2 Web Browser: System requirement: • CPU: Pentium III, 700 MHz or above • Memory Size: 64 MB (128 MB recommended) • VGA card resolution: 800x600 or above • Internet Explorer 5.
IP Wireless Security Camera Chapter 3 Features and Benefits This section describes the features and benefits of the IP Security Wireless Camera. 3.1 Simple To Use The IP Security Wireless Camera is a standalone system with built-in CPU requiring no special hardware or software such as PC frame grabber cards. The IP Security Wireless Camera supports both ActiveX mode (for Internet Explorer users) and Java mode (for Internet Explorer and Netscape Navigator users).
IP Wireless Security Camera industrial and public monitoring. The IP Security Wireless Camera can also be used for intruder detection; in addition, it can capture still images for archiving and many more applications.
IP Wireless Security Camera Chapter 4 Physical Description This section describes the externally visible features of the IP Security Wireless Camera. 4.1 Front Panel Power LED The Power LED is positioned on the right side of the IP Security Wireless Camera’s lens while facing the IP Security Wireless Camera. A steady blue light confirms that the IP Security Wireless Camera is powered on.
IP Wireless Security Camera Link LED The Link LED is positioned on the right side of the IP Security Wireless Camera’s lens while facing the IP Security Wireless Camera. It is located right of the Power LED A steady orange light confirms that the camera has good connection to LAN connectivity. Dependent on the data traffic the LED will begin to flash to indicate that the IP Security Wireless Camera is receiving/sending data from/to the network. 4.
IP Wireless Security Camera DC Power Connector The DC power input connector is located on the IP Security Wireless Camera’s rear panel, and is labeled DC 5V with a single jack socket to supply power to the IP Security Wireless Camera. Power will be generated when the power supply is connected to a wall outlet. Reset Button Reset will be initiated when the reset button is pressed once, and Power LED begins to flash.
IP Wireless Security Camera Screw Hole Located on the top panel of the IP Security Wireless Camera, the screw hole is used to connect the camera stand onto the IP Security Wireless Camera by attaching the screw head on the camera stand into the screw hole of the IP Security Wireless Camera. 4.
IP Wireless Security Camera Chapter 5 Unpacking The IP Security Wireless Camera Carefully remove all items from the package.
IP Wireless Security Camera Chapter 6 Hardware Installation This section describes the Hardware installation procedure for the IP Security Wireless Camera. 6.1 Attach Wireless Antenna From the rear panel of the IP Security Wireless Camera, screw the external Antenna that came with the IP Security Wireless Camera into the antenna connector. 6.
IP Wireless Security Camera 6.3 Attach the external power supply Attach the external power supply to the DC power input connector located on Wireless IP Security Wireless Camera’s rear panel, and then connect it to your local power supply. Confirm power source is supplied from the LED indicators label Power on the IP Security Wireless Camera is illuminated.
IP Wireless Security Camera Chapter 7 Security To ensure the highest security and prevent unauthorized usage of the IP Security Wireless Camera the Administrator has the exclusive privilege to access the System Administration for settings and control requirements to allow users the level of entry and authorize the privileges for all users.
IP Wireless Security Camera Chapter 8 Software Installation This section describes the Software installation procedure of the IP Security Wireless Camera for Web Configuration and IPView SE application. 8.1 Web Configuration The IP Security Wireless Camera must be configured through its built-in Web-based Configuration.
IP Wireless Security Camera 8.2 Main Menu Image After the default IP address is entered from the browser, the IP Security Wireless Camera Welcome screen will appear with a still image.
IP Wireless Security Camera 8.3 System Administration Click “System Administration” from the Welcome screen to access the settings required for the IP Security Wireless Camera.
IP Wireless Security Camera System Click the System item in the left column to display the device status of your camera. Device Status: The information about the camera, including the Camera Name, Location, Model, Firmware Version, MAC Address and IP Address, can be found in this field. Ethernet Status: You can monitor the networking status in this field, including the Link (network connection), Speed, and the Duplex mode.
IP Wireless Security Camera Wireless Click the Wireless item in the left column to display the information of the wireless LAN. Wireless Status: The items in this field display the information of the wireless LAN, such as the Connection Mode (Infrastructure or Ad-Hoc), Link, SSID, Channel, Transmission Rate, and WEP Encryption. Network Click the Network item in the left column to display the information of the LAN.
IP Wireless Security Camera User Click the User item in the left column to display the user(s) information. Active Users: The items in this field display the user(s) information, including the user(s) IP address, Name, and DateTime.
IP Wireless Security Camera 8.3.2 Configuration The Configuration window contains commands for settings that are required to input key details to setup the camera for operation. Click Configuration in the top menu bar and the Configuration System Click the System item in the left column to setup the basic configuration of your camera. -System Setting: In this field, you can configure the basic information of your camera. • • • Camera Name: This field is used to enter a descriptive name for the device.
IP Wireless Security Camera • and Admin Password as soon as possible to enable security option for the Wireless Internet Camera to function. LED Control: This option allows user to setup the LED illumination as desired. This feature provides the flexibility when surveillance activity is ON. There are three options as follows: Normal OFF Dummy Power - Steady On of the LED indicator. Link - Steady On of the LED indicator. When WLAN activity is present the LED indicator will flash steadily.
IP Wireless Security Camera Wireless Click the Wireless item in the left column to setup the wireless LAN configuration of your camera. -Wireless Interface • • Connection Mode: Use this option to determine the type of wireless communication for your camera. There are two choices of Infrastructure mode and Ad-Hoc mode. The default setting is Infrastructure. SSID: The SSID (Service Set Identifier) is the name assigned to the wireless network.
IP Wireless Security Camera • • sure to set the SSID of the camera to correspond with the access point’s SSID for communication. Type any string up to 32 characters long (spaces, symbols, and punctuation are not allowed) in the Network Name box. To connect the camera to an Ad-Hoc wireless workgroup, make sure to set the same wireless channel and SSID to match with the PC/Notebook’s configuration for direct wireless communication.
IP Wireless Security Camera Network Click the Network item in the left column to setup the LAN configuration of your camera. -TCP/IP: The items in this field display the information of the wireless LAN, such as the Connection Mode (Infrastructure or Ad-Hoc), Link, SSID, Channel, Transmission Rate, and WEP Encryption. • IP Address Mode: This field provides your with three options to select the IP Address Mode: Fixed IP – You can select this option and enter the IP address directly.
IP Wireless Security Camera appliances, wireless devices, and PCs of all form factors. Check the Enable option to enable the function of your camera. User Click the User item in the left column to add, edit and delete users for your camera. -User Access Control: • Access Control: The administrator has the authority to give permission for the privilege to control the device to users by selecting Enable or Disable. The default setting is No.
IP Wireless Security Camera • pull-down menu. Set Manually: Select this option to set the time manually. The system administrator must enter the date and time in the respective field manually. Upload Click the Upload item in the left column to setup configuration for FTP server, time schedule and manual operation. -FTP Server: This field contains the following six basic settings for your FTP server. • Host Address: The IP Address of the target FTP server.
IP Wireless Security Camera • name. File: Since you may not upload only one image to the FTP server, you can choose the filing rule, including Overwrite, Date/Time Suffix, and set up the Sequence Number. -Manual Operation: When you click the Upload Video button in view video screen, it will start to upload the image. The setting refers to Base File Name and File information above.
IP Wireless Security Camera 8.3.3 Tools The Tools window contains commands for restarting the camera. Click Tools in the top menu bar and the Tools window will E-mail Test Click the E-mail Test item in the left column to test your e-mail account. - Test E-mail Account: Click the Test button to test the e-mail account you provided. Reset the device off and on and saved settings are retained. If you do not want to reset the camera, exit this window without clicking YES.
IP Wireless Security Camera Factory Reset Do you really want to factory reset this device? Click the YES button from this option, and you can resume all factory default settings for the camera. If you do not want to restore the factory settings, exit this window without clicking YES. Please NOTE that you have to configure the network settings again after a Factory Reset. Firmware Upgrade When new firmware is available, you can upgrade it through this window.
IP Wireless Security Camera 8.3.4 Help The Help window provides the basic information of the camera. Click Help in the top menu bar and the Help window will appear as below: About Displays the camera’s model name and version. Once the configuration is completed, click Home to return to the Welcome screen and select the desired View Video option either through ActiveX Mode or Java Mode as described in the next section.
IP Wireless Security Camera 8.4 View Image – ActiveX Mode To view video images from the browser, click “View Image – ActiveX Mode” from the welcome screen to access the video images from Internet Explorer as illustrated below: Camera Name* Date Time*** Camera Name* - The Camera name will be display when the Camera Name field is entered in the Web Configuration setting under “System” Date/Time***- The date/time of the video server will show the date and time that come from time server or you set manually.
IP Wireless Security Camera 8.5 View Image – Java Mode Click “View Image – Java Mode” from the Welcome screen to access the video images from the Internet Explorer or Netscape browser as illustrated below: Camera Name* Date/Time*** Camera Name* - The Camera name will be display when the Camera Name field is entered in the Web Configuration setting under “System” Date/Time***- The date/time of the IP Security Wireless Camera will show the date and time that come from time server or you set manually.
IP Wireless Security Camera Chapter 9 IP Security Wireless Camera Application The IP Security Wireless Camera can be applied in wide variety of applications. With the built-in CPU, it can work as a standalone system that provides a web-based solution transmitting high quality video images and sounds for monitoring purposes. It can be managed remotely, accessed and controlled from any PC desktop over the Intranet or Internet via a web browser.
IP Wireless Security Camera 9.2 IP Security Diagrams Wireless Camera Application 9.2.1 Home Applications: SOHO Internet Camera SOHO Wireless Internet Camera 9.2.
IP Wireless Security Camera Chapter 10 IPView SE Application 10.1 Installation Insert the CD-ROM into the CD-ROM drive to initiate the auto-run program. Once completed, a menu screen will appear as below: To install the IPView SE application click the "IPView SE" button to activate the installation procedure for the application program. Once executed, you will be asked to select the desired language. Select the language you want and click “OK” to continue.
IP Wireless Security Camera The Welcome screen will appear as below. Click the “Next” button. The License Agreement window will appear as below. Read the details carefully and click the “Yes” button. In the following window, you may click “Next” to accept the recommended destination location or click “Browse” to select another location. After specifying the desired destination location, click “Next”.
IP Wireless Security Camera The following window allows you to select the folder where the IPView SE application will be located, click “Next” to continue. Please wait until one of the following two dialog boxes to appear. If the system has to restart, select “Yes, I want to restart my computer now” and click the “Finish” button to complete the installation procedure.
IP Wireless Security Camera Chapter 11 Getting Started This section describes the operation of the IPView SE application with detailed procedures for using the application. 11.1 IPView SE IPView SE is responsible for the management of preview, configuration, and searching of each camera. It is designed with a user-friendly interface for ease of control and navigation requirements as illustrated below. 11.1.
IP Wireless Security Camera 11.1.2.How to Add a Camera Add Camera Add Camera To add a new camera, click the Add Camera button. illustrated below. An Add Camera dialog box will appear as You must select the camera and click the “Add” button to add a new camera. You can select the “Input IP” button, an Input IP dialog box will appear as illustrated below. Enter the IP Address of the camera in the specified field and click the “Add” icon to add a new camera.
IP Wireless Security Camera If you are unsure of the IP Address of the camera, you can click the “Browse” button, the Browse Camera dialog box will appear with a blank screen as illustrated below. You must select the camera and click the “Add” button to add a new camera. If the Login Camera dialog box appears, make sure to enter the correct User Name and Password and click the “OK” button. Then, the camera will be added into IPView SE in list format.
IP Wireless Security Camera When the user add the IP Security Wireless Camera, four icons will appear, including: “Assign IP to Camera”, “Connect/Disconnect”, “Erase”, “Extra Information” Camera Config Assign IP to Camera Motion record Schedule record Connect / Disconnect Erase A02-IPCAM-W54_ME01 Manual record Extra Information 22
IP Wireless Security Camera 11.1.3.How to Change Camera Assign IP of New Camera To change camera, click the “Assign IP of Camera” button. An Assign IP of Camera dialog box will appear as illustrated below. You must select the camera and click the “Add” button to add a new camera.
IP Wireless Security Camera 11.1.4 How to Connect / Disconnect the Image Connect the Image Click the “Connect/Disconnect” button and the preview screen will appear with the video image. When a new camera is added, it IS connected. You can see the image right away. If you click the “Connect/ Disconnect” button, it will be in disconnecting, also, no image showed. Minimize Click to minimize the display screen of the IP Security Wireless Camera.
IP Wireless Security Camera Snapshot Click to snapshot a picture from the IP Security Wireless Camera. Rotate image Click to rotate the image of the IP Security Wireless Camera.
IP Wireless Security Camera Disconnect the Image Click the “Connect / Disconnect” button, the camera will be disconnected.
IP Wireless Security Camera 11.1.5 How to Delete a Camera Erase Camera To delete a camera, you must select the camera to delete from the IPView SE control panel. Then, click the “Erase Camera” button. After deleting the camera, the IPView SE control panel will appear as below.
IP Wireless Security Camera 11.1.6 Extra Information Extra Information The screen displays the camera’s information.
IP Wireless Security Camera 11.1.7 How to Adjust the Property Setting System Configure From the control panel, select the button and the dialog box will appear as shown below. Log Storage: 1. Single HDD Reserve Space This option permits reserved HDD space from 500 MB to 1000 MB. 2. Split Recording File From this option, you can adjust the file size for recording the video images (the default setting is 10MB).
IP Wireless Security Camera Camera Configure Click the “Camera Config” button and it will active the Camera Setting, Motion Setting and Update Firmware buttons. Camera Setting Motion Setting Update Firmware Camera Setting Please refer to the “Web Configuration” section.
IP Wireless Security Camera Motion Setting You can adjust the sensitivity level and choose the Invoke Alarm options to work with motion detection function. Besides the Alarm Beep, Send Email can be enabled when motion detected. The user can define the time interval to Send E-mail. • • • • • • • Mail Server: Mail Server IP or name. Mail From: E-Mail Address of sender. Mail To: E-Mail Address of receiver. Subject: Can be any information to high light the message.
IP Wireless Security Camera Update Firmware Enter the File Path and click the “Update” button, the firmware will be updated automatically. If you are unsure of the File path, you can click the “Browse” button, the Browse dialog box will appear as illustrated below. During firmware update process, please make sure no interruptions will occur as it might possibly cause serious damage to the IP Security Wireless Camera 11.1.
IP Wireless Security Camera Chapter 12 Setup Wizard 12.1 Wizard Setup The Setup Wizard is a convenient tool that will guide you through the installation of your camera easily and quickly. After connecting the camera to your computer, you can install the Setup Wizard and complete the configuration now. Insert the CD-ROM into the CD-ROM drive to initiate the auto-run program.
IP Wireless Security Camera Once executed, you will be asked to select the desired language. Select the language you want and click “OK” to continue. The Welcome screen will appear as below. Click the “Next” button. The License Agreement window will appear as below. Read the details carefully and click the “Yes” button. In the following window, you may click “Next” to accept the recommended destination location or click “Browse” to select another location.
IP Wireless Security Camera After successfully installing theWizard, the application program for the IP Security Wireless Camera is automatically installed to \Programs\Files directory. 12.2 How to use Wizard Setup To run the Setup Wizard, click Start -> Programs -> Setup Wizard. When you launch the Setup Wizard, the main window will appear as shown, and the connected camera will be displayed in the list.
IP Wireless Security Camera Click About to show the general information of the selected camera. Click Exit to close the Setup Wizard. Changing the Admin ID and Password By default settings, the Admin ID and Password are blank. For security purpose, you are recommended to change the Admin ID and Password immediately. Click Wizard. The dialog box as shown appears, asking you to enter the Admin ID and Password. Click OK. If required, select the Change options and enter the new Admin ID and Password.
IP Wireless Security Camera The Connection Mode depends on how your camera is connected to your network. Click Infrastructure for use with a router or Adhoc for peer-to- peer. The Network Name, Wireless Channel, and Encryption Key MUST correspond with your wireless network settings. This window displays the settings you set up. For any change, click Back to modify your settings. Otherwise, click Restart to save and apply the settings. The configuration is completed, and you will return to the main window.
IP Wireless Security Camera Software Information Click About to show the general information of the selected camera. Click OK to return to the main window.
IP Wireless Security Camera Appendix A Frequently Asked Questions Question Answer What is an IP Security The IP Security Wireless Camera is a standalone system Wireless Camera? connecting directly to an Ethernet or Fast Ethernet network and supported by the wireless transmission based on the IEEE 802.11b standard.
IP Wireless Security Camera Question Answer What is the wireless transmission range for the IP Security Wireless Camera? Generally the wireless distance can go up to 100 meters indoors and up to 300 meters outdoors. The range is limited by the number of walls, ceilings, or other objects that the wireless signals must pass through.
IP Wireless Security Camera Appendix B Trouble Shooting Question Answer I cannot access the IP Security Wireless Camera from a web browser. The possible cause might be the IP Address for the IP Security Wireless Camera is already being used by another device. To correct the possible problem, you need to first disconnect the IP Security Wireless Camera from the network. Then run the PING utility (follow the instructions in Appendix B - PING Your IP Address).
IP Wireless Security Camera I cannot access the IP Security Wireless Camera from a web browser. Other possible problems might be due to the network cable. Try replacing your network cable. Test the network interface of the product by connecting a local computer to the unit, utilizing a standard Crossover (hub to hub) Cable. If the problem is not solved the IP Security Wireless Camera might be faulty. Question Answer Why does the Power The power supply used might be at fault.
IP Wireless Security Camera Question Answer Why does a series of broad vertical white line appears through out the image? A likely issue is that the CMOS sensor becomes overloaded when the light source is too bright such as direct exposure to sunlight or halogen light. You need to reposition the IP Security Wireless Camera into a more shaded area immediately as this will damage the CMOS sensor.
IP Wireless Security Camera Question Noisy images occur how can I solve the problem? Answer • • Question The video images might be noisy if the IP Security Wireless Camera is used is a very low light environment. To solve this issue you need more lighting. There might be wireless transmission interference make sure there are no other wireless devices on the network that will affect the wireless transmission. Answer There are no images The ActiveX might be disabled.
IP Wireless Security Camera Appendix C Xplug Control Installation Installation To Web Server It is highly recommended to install the Xplug Control application to the Web Server for IE 5.0. It must be installed to a Public Domain with Fixed IP address. 1. Installation: Copy the “xplug.ocx” file to any WEB Server table. 2. Setting (Configuration): From the Web Configuration menu select “System” and under the “Loading ActiveX From” input web server location (http://www.web server location.com/).
IP Wireless Security Camera The License Agreement prompt will appear as below. Read the details carefully and click the “Yes” button to continue with the installation procedure. Click the “Finish” button to complete Setup of the Xplug Control Utility program for the IP Security Wireless Camera.
IP Wireless Security Camera Appendix D Adjust IP Security Wireless Camera Focus To adjust the focus of the lens, you need to turn the lens slowly in either clockwise or anti-clockwise direction until the desired image appears. DO NOT over turn the lens in either of the directions as it will be out of focus. You can further adjust the IP Security Wireless Camera's image quality through System Administration – Image of Web Configuration. Please refer to Web Configuration section for further details.
IP Wireless Security Camera Appendix E Specification Video specification: Resolution: Sensor: Gain control: Exposure: White Balance: Focal Length: Aperture: Focus Extent: Lens mounting: 640 x 480 pixel color CMOS sensor Automatic Automatic Automatic 6.0 mm F=1.
IP Wireless Security Camera Browser Support System requirement: CPU: Pentium III, 700 MHz or above Memory Size: 64 MB (128 MB recommended) VGA card resolution: 800x600 or above Internet Explorer 5.0 or above (ActiveX Mode –View Image supports Internet Explorer under Windows OS) Netscape 6.
IP Wireless Security Camera APPENDIX F Support If you have any problems with the IP Security Wireless Camera, please consult this manual. If you have any other questions you can contact the Atlantis Land company directly at the following address: Atlantis Land SpA Viale De Gasperi, 122 20017 Mazzo di Rho(MI) Tel: +39. 02.93906085, +39. 02.93907634(help desk) Fax: +39. 02.93906161 Email: info@atlantis-land.com or tecnici@atlantis-land.com WWW: http://www.atlantis-land.