
NetServer Pro Wireless USB 2.0 Print Server MULTILANGUAGE Quick Start Guide


ENGLISH
27
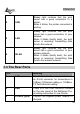
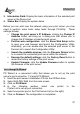
3. Information Field: Display the basic information of the selected print
server in the Device List.
4. Status Bar: Display the system status.
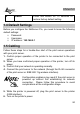
Before you can print over the network using your print server, you may
need to perform some basic setup tasks through PS-Utility. These
settings include:
Change the print server’s IP Address: clicking the Change IP
Address button will bring up a dialog box that allows you to
change the IP Address of selected print server.
Perform web configuration: click the Show Web Setup button
to open your web browser and launch the Configuration Utility;
alternately, you can double-click the selected print server in the
Device List to launch the Configuration Utility.
Search the available devices: click the Discover Device button
to re-search the connected print server within the network.
Resume the default settings: click the Factory Reset button to
reload the factory settings of the print server.
Update Firmware: click the Update Firmware button to update
the firmware of the print server.
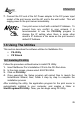
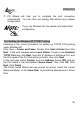
1.6.3 Using PS Wizard
PS Wizard is a convenient utility that allows you to set up the print
server’s port connection. To launch PS Wizard:
1. Insert the print server’s Installation CD into the CDRom drive.
2. Select A02-PSU-W54 from the main screen.
3. Click on PS Wizard.
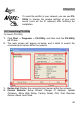
4. In the following window, select one printer in the
Printer List to set up port connection.
5. Select one printer port in the Print Server List (on the right).
6. Click on Connect. The configuration is completed.