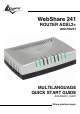
WebShare 241 ROUTER ADSL2+ A02-RA241 MULTILANGUAGE QUICK START GUIDE A02-RA241_GX01 Where solutions begin Company certified ISO 9001:2000
ITALIANO Questo prodotto è coperto da garanzia Atlantis Land Fast Swap della durata di 3 anni. Per maggiori dettagli in merito o per accedere alla documentazione completa in Italiano fare riferimento al sito www.atlantis-land.com. ENGLISH This product is covered by Atlantis Land 3 years Fast Swap warranty. For more detailed informations please refer to the web site www.atlantis-land.com. For more detailed instructions on configuring and using this device, please refer to the online manual.
The award of the information is facultative, but its lack will prevent ATLANTIS LAND® from starting the Guarantee process requested. R R g o u p o d u Reeeg giiisssttteeerrr yyyo ou urrr p prrro od du ucccttt!!! w w w w n n d o m ww ww w...aaatttlllaaan ntttiiisss---lllaaan nd d...ccco om m Registration on the web site www.atlantis-land.
MULTILANGUAGE QUICK START GUIDE ITALIANO 1.1 Contenuto della confezione ............................... 9 1.2 I LED frontali......................................................... 9 1.3 Le porte posteriori.............................................. 10 1.4 Cablaggio ............................................................ 11 1.5 Settaggi di Default ............................................. 12 1.6 Configurazione di IE .......................................... 12 1.7 Configurazione del PC ......
MULTILANGUAGE QUICK START GUIDE FRANCAIS 1.1 Contenu de la boîte ........................................... 38 1.2 Face avant .......................................................... 39 1.3 Face arrière ........................................................ 40 1.4 Câblage ............................................................... 41 1.5 Configuration initiale.......................................... 41 1.6 Configuration du TCP/IP...................................
MULTILANGUAGE QUICK START GUIDE ESPANOL 1.1 Contenido de la caja ......................................... 67 1.2 Los LED frontales .............................................. 67 1.3 Las puertas posteriores .................................... 68 1.4 Cablaje ................................................................ 69 1.5 Configuraciones por Defecto ........................... 70 1.6 Configuracciòn de IE......................................... 70 1.7 Configuracciòn del PC .......................
MULTILANGUAGE QUICK START GUIDE A02-RA241_GX01(V1.
ITALIANO Questo manuale è inteso come una guida rapida, pertanto per ulteriori dettagli sulla configurazione fare riferimento alla presentazione multimediale interattiva o al manuale esteso presenti sul CDRom allegato. 1.1 Contenuto della confezione Atlantis Land WebShare 241 Router ADSL2+, CD-Rom contenente il manuale e la guida interattiva, Guida di Quick Start, cavo RJ-11 ADSL, cavo CAT-5 LAN , Alimentatore (12V, 1A). 1.
ITALIANO SYS LAN ADSL PPP Acceso verde fisso quando il sistema è pronto. Acceso quando connesso ad un dispositivo Ethernet Verde= connessione a 100Mbps Arancio= connessione a 10Mbps Lampeggiante quando vi è trasmissione/ricezione. Acceso quando connesso in modalità ADSL DSLAM. Lampeggiante durante la fase di allineamento. Acceso verde fisso quando è attiva una sessione PPP. 1.
ITALIANO LAN(RJ-45) Reset POWER (jack) Connettere con un cavo UTP. Dopo che il dispositivo è acceso, premere per effettuare il reset sino a che il lampeggio intermittente dei LED anteriori si esaurisce. Effettuare a questo punto un riavvio del dispositivo (tramite il tasto Power On/Off). Connettere l’alimentatore a questo jack. 1.
ITALIANO presa su cui è collegato un telefono analogico. Esistono opportuni filtri che dispongono di 2 uscite (una PSTN ed una ADSL) e consentono di utilizzare sulla stessa presa sia un telefono analogico che il WebShare 241 Router ADSL2+. Tale filtro non è incluso nella confezione e va acquistato separatamente. Atlantis Land raccomanda di utilizzare apparati certificati per il tipo di linee e consiglia la scelta dei codici A01-AF1 (filtro ADSL tripolare su specifiche Telecom Italia) o A01-AF2. 1.
ITALIANO • Usa connessione remota se non è disponibile una connessione di rete 1.7 Configurazione del PC Configurazione del PC in Windows 95/98/ME 1. Andare in Start/Settings/Control Panel. Cliccare 2 volte su Network e scegliere Configuration. 2. Selezionare TCP/IP->NIC F/E, o qualsiasi Network Interface Card (NIC) del PC. 3. Cliccare su Properties. 4. Selezionare l’opzione Obtain an IP address automatically (dopo aver scelto IP Address). 5. Andare su DNS Configuration. 6.
ITALIANO Configurazione del PC in Windows 2000 1. Andare su Start/Settings/Control Panel. Cliccare due volte su Network and Dial-up Connections. 2. Cliccare due volte su Local Area Connection. 3. In Local Area Connection Status cliccare Properties. 4. Selezionare Internet Protocol (TCP/IP) e cliccare su Properties. 5. Selezionare l’opzione Obtain an IP address automatically e successivamente Obtain DNS server address automatically. 6. Premere su OK per terminare la configurazione.
ITALIANO 4. Selezionare Internet Protocol (TCP/IP) e cliccare su Properties. 5. Selezionare l’opzione Obtain an IP address automatically e successivamente Obtain DNS server address automatically. 6. Premere su OK per terminare la configurazione.
ITALIANO 1.8 Configurazione Router Digitare nel browser web il seguente indirizzo http://192.168.1.254 e premere il tasto invio. IP: Utilizzare admin (come nome utente) e atlantis (come password). Premere OK per continuare.
ITALIANO Apparirà a questo punto il Menù Principale, nella cui parte sinistra è possibile accedere (come se si stessero vedendo i links in una homepage) a tutte le sezioni disponibili: • • • • Status (ARP Table, Routing Table, DHCP Table, System Log, Security Log) Quick Start Configuration (LAN, WAN, System, Firewall, QoS, Virtual Server, Advanced) Save Config Cliccando sulla sezione desiderata, nello spazio della homepage appariranno tutti i settaggi relativi alla configurazione della sezione scelta, o
ITALIANO Prima di iniziare la configurazione della parte WAN del WebShare 241 Router ADSL2+ è opportuno conoscere il protocollo utilizzato dall’ISP (PPPoE, PPPoA, RFC1483 Routed) per veicolare l’ADSL.
ITALIANO PPPoE routed/PPPoA routed PPPoE/PPPoA sono connessioni ADSL conosciute come dial-up DSL. Sono state concepite per integrare servizi a banda larga con un’attenzione particolare alla facilità di configurazione. L’utente può beneficiare di una grande velocità di accesso senza cambiare l’idea di funzionamento, condividere lo stesso account con l’ISP.
ITALIANO • • • • • • • • Service Name (solo in PPPoe): introdurre solo se espressamente richiesto dall’ISP. IP Adress: 0.0.0.0 Authentication Protocol: Auto Connection: Scegliere Always On per mantenere attiva sempre la sessione PPPoE/PPPoA. Scegliere Connect On-Demand (solo in PPPoE) per far costruire la connessione solo in caso di traffico.
ITALIANO consumo (non FLAT) o da una errata configurazione dell’apparato. In caso di dubbio contattare preventivamente l’assistenza tecnica. RFC1483 routed / IpoA routed Controllare che i parametri siano come in figura: • VPI:8 (se non diversamente specificato dall’ISP) • VCI:35 (se non diversamente specificato dall’ISP) • NAT:Enable • Encapsulation: Scegliere l’incapsulamento 1483 Routed IP LLC (più raramente 1483 Routed VC-Mux) in caso di RFC 1483.
ITALIANO Premere Apply per terminare. Il Led ADSL prima lampeggerà e poi diventerà fisso indicando l’avvenuto allineamento. A questo punto accedendo alla sezione Status è possibile controllare l’avvenuta connessione e quindi cominciare la navigazione. Per ogni altro problema si invita alla consultazione del manuale completo o guida rapida multimediale presenti sul CDRom allegato al prodotto. Cliccare Save Config to Flash per rendere permanente la configurazione.
ENGLISH For more detailed instructions on configuring and using the WebShare 241 Router ADSL2+, please refer to the online manual. Before beginning the configuration of the Router you have to know the parameters of your subscription ADSL. There are four ways PPPoE, PPPoA, RFC1483 routed, RFC1483 Bridge for the device to have a public IP address and then to access Internet. You have to check with your ISP about which way is adopted.
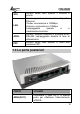
ENGLISH RFC1483 Routed IPoA VPI/VCI VC-based / LLC-based multiplexing IP address Subnet mask Default Gateway (IP address) IP address (DNS) VPI/VCI IP address Subnet mask Default Gateway (IP address) IP address (DNS) 1.1 Package contents Atlantis Land WebShare 241 Router ADSL2+, CD-Rom with manual, Quick Start Guide, cable RJ-11 ADSL, cable CAT5 LAN, Power Adapter AC-DC (12V, 1A).
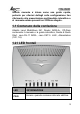
ENGLISH 1.2 The Front Panel LEDs LED MEANING PWR Lit when power ON. SYS Lit steady when system is ready. LAN ADSL PPP Lit when connected to Ethernet device Green for 100Mbps; Orange for 10Mbps Blinking when data transmit/received. Lit when successfully connected to an ADSL DSLAM. Lit steady when there is a PPPoA / PPPoE connection.
ENGLISH 1.3 The Rear Ports PORT MEANING Line (RJ11) Connect the supplied RJ-11 cable to this port when connecting to the ADSL/telephone network. LAN( RJ-45) Reset POWER (jack) Connect an UTP Ethernet cable to one of the four LAN ports when connecting to a PC or an office/home network of 10Mbps or 100Mbps. After the device has turned on, press it to reset the device or restore to factory default settings.
ENGLISH to this jack. 1.4 Cabling First you must connect the product to the ADSL line through the RJ11 cable you have in equipment (in the port ADSL), then connect to the RJ45 ports the PCs of your Lan or others Switch. In the end. Once you’ve checked all the connections, connect the AC Adapter to the WebShare 241 Router ADSL2+ and then to the socket. The product will carry on immediately a diagnosis (60 seconds).
ENGLISH 255.255.255.0. The best and easy way is to configure the PC to get an IP address from the WebShare 241 Router ADSL2+ (DHCP client). Please follow the steps below for PC’s network environment installation. First of all, please check your PC’s network components. The TCP/IP protocol stack and Ethernet network adapter must be installed. If not, please refer to MS Windows relative manuals.
ENGLISH 3. Click Properties. 4. Select the IP Address tab. In this page, click the Obtain an IP address automatically radio button. 5. Then select the DNS Configuration tab. 6. Select the Disable DNS radio button and click “OK” to finish the configuration. Configuring PC (Windows NT4.0) 1. Go to Start / Settings / Control Panel. In the Control Panel, double-click on Network and choose the Protocols tab. 2. Select TCP/IP Protocol and click Properties. 3.
ENGLISH 5. Select the Obtain an IP address automatically and the Obtain DNS server address automatically radio buttons. 6. Click OK to finish the configuration. Configuring PC (WindowsXP) 1. Go to Start / Control Panel (in Classic View). In the Control Panel, double-click on Network Connections. 2. Double-click Local Area Connection. 3. In the LAN Area Connection Status window, click Properties.
ENGLISH 4. Select Internet Properties. Protocol (TCP/IP) and click 5. Select the Obtain an IP address automatically and the Obtain DNS server address automatically radio buttons.
ENGLISH 6. Click OK to finish the configuration 1.8 Browser configuration Open the web browser, enter the local port IP address of this WebShare 241 Router ADSL2+, which default at 192.168.1.254, and click “Go” to get the login page. The default username is admin, password atlantis and click “OK” to continue.
ENGLISH At the configuration homepage, the left navigation pane where bookmarks are provided links you directly to the desired setup page, including: • • • • Status (ARP Table, Routing Table, DHCP Table, System Log, Security Log) Quick Start Configuration (WAN, LAN, System, Firewall, QoS, Virtual Server, Advanced) Save Config Click on the desired item to expand the page with all settings in the main navigation pane.
ENGLISH Click on Next to continue. PPPoE routed/PPPoA routed PPPoA/PPPoE is known as a dial-up DSL or cable service. It is designed to integrate the broadband services into the current widely deployed, easy-to-use, and low-cost dial-upaccess networking infrastructure. Therefore, users can get greater access speed without changing the operation concept, sharing the same ISP account and paying for one access account.
• • • • • ENGLISH Virtual Circuit: Enable VPI: 0 or 1 (check with your ISP) VCI: 38 or 50 (check with your ISP) NAT: Enable Username: Enter the username provided by your ISP(case sensitive). • Password: Enter the password provided by your ISP (case sensitive). • Service Name: This item is for identification purposes. If it is required, your ISP will provide you the information. • IP Adress:0.0.0.0 • Authentication Protocol Type: Default is Chap (Auto). Your ISP will advise you whether to use Chap or Pap.
ENGLISH RFC1483 routed / IpoA routed These are configuration parameters: • VPI: 0 or 1 (check with your ISP) • VCI: 38 or 50 (check with your ISP) • NAT:Enable • Encapsulation: please use LLC Routed. If You have problem You have to check with your ISP about which Encapsulation Method is adopted. Select Use the following IP address • IP Adress: Insert your Public IP • Subnet Mask: Insert Netmask provided by ISP • Gateway: Insert router Default Gateway Press Apply and then click on Save Config to Flash.
FRANCAIS Ce guide d’installation rapide vous permet d’installer et de configurer le WebShare 241 Router ADSL2+ suivant des paramètres standards. Pour plus de précisions, tant sur les méthodes de configuration que sur le paramétrage avancé, reportez-vous au Manuel sous format électronique (PDF) ou à la Multimedia Guide disponible sur le CD Rom fourni.
FRANCAIS RFC1483 Routed IPoA VPI/VCI VC-based ou LLC-based multiplexing Adresse IP Masque de sous-réseau Adresse IP du Default Gateway Adresses IP des serveurs DNS VPI/VCI VC-based ou LLC-based multiplexing Adresse IP Masque de sous-réseau Adresse IP du Default Gateway Adresses IP des serveur DNS 1.
FRANCAIS 1.2 Face avant LED SIGNIFICATION PWR Allumé quand le WebShare 241 Router ADSL2+ est sous tension. SYS LAN ADSL PPP Allumé pour indiquer que le système est actif. Allumé quand le LAN (réseau) est connecté Vert= connexion à 100Mbps Orange= connexion à 10Mbps Il clignote lors des transferts de données. Si allumé fixe vert il indique une connexion correcte, s'il clignote il est en train de se connecter. Allumé fixe quand il y a une connexion PPPoE / PPPoA.
FRANCAIS construire une connexion PPP. 1.3 Face arrière PORT ADSL(RJ11) LAN (RJ-45) Reset (remise à zéro) POWER (jack) USAGE Connectez le câble (fourni) RJ11 au filtre ADSL (optionnel) et enfin à la prise téléphonique. Relier directement avec un câble Ethernet standard ou croisé aux PC ou à un port uplink (Hub/Switch). Dispositif allumé, presser pour effectuer le reset ou le restore. Pressez le reset jusqu’à les LEDs n'arrêtent pas de clignoter, à ce stade éteindre et reallumer le dispositif.
FRANCAIS 1.4 Câblage Après avoir terminé le câblage, raccordez l’alimentation pour mettre le WebShare 241 Router ADSL2+ sous tension. Assurez-vous que les LEDs sont correctement allumés. Connectez un câble réseau standard ou croisé pour relier le Router à un Hub/Switch ou aux PC. Une fois toutes les liaisons effectuées le WebShare 241 Router ADSL2+ effectuera un diagnostique (d'une soixantaine de secondes).
FRANCAIS 1.6 Configuration du TCP/IP Configuration sous Windows 95/98/ME 1. Allez dans Panneau de Configuration. Doublecliquez sur Réseau.et enfin affichez l’onglet Configuration. 2. Sélectionnez le protocole TCP/IP -> NIC carte, ou quelconque carte réseau Ethernet dans le PC. 3. Cliquez sur Propriétés 4. Dans l’onglet Adresse IP Sélectionnez l’option « obtenir automatiquement une adresse IP ». 5. Sélectionnez l’onglet DNS. 6.
FRANCAIS Configuration sous Windows 2000 1. Allez au Panneau de Configuration. Double-cliquez sur Connexions Réseau et accès à distance.. 2. Double-cliquez sur connexion au réseau local. 3. Dans Connexion au réseau local cliquez sur Propriétés. 4. Sélectionnez Internet Protocol (TCP/IP) et cliquez sur Propriétés. 5. Sous l’onglet Général, sélectionnez l’onglet Obtenir une adresse IP automatiquement et après Obtenir les adresses des serveurs DNS automatiquement 6.
FRANCAIS 3. Cliquez Propriétés. 4. Sélectionnez Internet Protocol (TCP/IP) et cliquez sur Properties. 5. Sélectionnez Obtenir une adresse IP automatiquement et après Obtenir les adresses des serveurs DNS automatiquement.
FRANCAIS 6. Cliquez sur OK pour terminer la configuration. 1.7 Vérification Pour vérifier le succès de la configuration (après avoir redémarré le PC, opération nécessaire sous Win98, SE, ME) utiliser le PING. Dans la fenêtre Dos écrivez: PING 192.168.1.254. Si le message suivant apparaît: Pinging 192.168.1.254 with 32 bytes of date: Reply from 192.168.1.254: bytes=32 times <10ms TTL=64 Reply from 192.168.1.
FRANCAIS Reply from 192.168.1.254: bytes=32 times <10ms TTL=64 Vous pouvez procéder en allant au point suivant (1.8 Configuration). Si par contre le message suivant apparaît: Pinging 192.168.1.254 with 32 bytes of date: Request timed out. Request timed out. Request timed out. Vérifiez que le Led LAN est bien allumé. Vérifiez l'adresse de votre PC en écrivant WINIPCFG (pour, Win95,98,ME) ou IPCONFIG (pour Win2000, XP) et éventuellement réinstallez le stack TCP/IP. 1.
FRANCAIS Il apparaîtra à ce point le Menu Principal (pour accéder à l'interface en français cliquer sur Langage et sélectionner French).
FRANCAIS • • Démarrage rapide Configuration (WAN, LAN, Système, Pare Feu, QoS, Serveur Virtuel, Avancé) • Sauvegarde en mémoire En suivant les indications ci-dessous il est possible de rendre opérationnel le WebShare 241 Router ADSL2+ en peu de temps à condition d'utiliser les PC du réseau comme client DHCP. Pour une configuration personnalisée du réseau et du Router faire référence au manuel complet dans le CD Rom. Vous trouverez dans le tableau ci-dessous les valeurs possibles de VPI/VCI.
FRANCAIS PPPoE Routed /PPPoA Routed Le protocole PPPoE (Point to Point Protocol over Ethernet) est l’une des méthodes utilisées en France. Il a été conçu (comme le PPPoA) pour compléter le service ADSL avec une attention spéciale pour facilité la configuration. L'utilisateur peut bénéficier d'une grande vitesse d'accès sans changer la façon de fonctionnement et en même temps partager entre tous les utilisateurs de votre entreprise un compte Internet unique (avec le FAI).
• • • • • • • • FRANCAIS Mot de Passe (Password): Mot de passe (case sensitive). Nom du Service (Service Name): Est un identificateur peut être demandé par le FAI (seulement avec le protocol PPPoE). Adresse IP (IP Adress):0.0.0.0 Protocole d’Authentication (Authentication Protocol): (Méthode d’authentification de l’utilisateur : Auto – PAP – CHAP). Ce choix dépend de votre FAI, laisser par défaut sur Auto, le routeur se chargera du choix en fonction de la ligne.
FRANCAIS l’assistance technique d‘ Atlantis-Land. Atlantis Land ne pourra pas être considérée responsable en cas d’erronée ou mauvaise configuration de l’appareil. Il ne faut pas utiliser le dispositif avec des abonnements non Forfait (non Flat). RFC1483 routed / IpoA routed • • • • VPI: 8 ou 8 ou 2 (contacter le FAI) VCI: 67 ou 35 ou 32 (contacter le FAI) NAT: Valide Enable) Méthode d'encapsulation (Encapsulation): LLC Routed (contacter le FAI).
• FRANCAIS Passerelle(Gateway)= remplissez les champs suivants avec les caractéristiques de votre abonnement ADSL (l’adresse IP du Default Gateway). • RIP : Invalide (No RIP) En pressant Appliquer (Apply), le WebShare 241 Routeur ADSL2+ fera un reboot automatique [ADSL doit être Allumée fixe], votre PC sera prêt pour la navigation. Presser sur Sauvegarde en mémoire (Save Config to Flash) et Appliquer pour terminer.
DEUTSCH Das ist ein Handbuch,das wie eine kurze Anleitung ausgedacht wird, deshalb nehmen Sie Bezug auf das vollig Hanbuch, das im CD ist,wenn Sie weitere Einzelheiten uber die Konfiguration brauchen. 1.1 Inhalt der Verpackung Atlantis Land WebShare 241 Router ADSL2+, CD-ROM,der das Handbuch enthalt, Quick Start Anleitung, Kabel RJ-11 ADSL, Kabel CAT-5 LAN , Speiseleitung (12V, 1A). 1.
DEUTSCH LAN ADSL PPP Es ist eingeschaltet,wenn es zu einer Ethernet Vorrichtung verbunden ist Grun= Verbindung zu 100Mbps Orangengelb= Verbindung zu 10Mbps Es blitzt, wenn es Ubersendung/Empfang gibt. Es ist fest eingeschaltet,wenn es in ADSL DSLAM weise verbunden ist. Es blitzt wahrend des Ausrichtenzeit. Es fest eingeschaltet, wenn das PPP fertig ist 1.3 Die Hinterturen TUREN ADSL(RJ11) LAN (RJ45) BENUTZUNG Verbinden Sie den RJ-11 Kabel zu diesem Tur,um den Anschluss zum ADSL durchzufuhren.
DEUTSCH Reset POWER (jack) Nachdem die Vorrichtung eingeschaltet ist,drucken Sie auf die Taste,um der reset oder der restore zu machen. Verbinden Sie den Speiser mit diesem jack. 1.4 Verdrahtung Zunächst müssen Sie das Produkt dem ADSL Linie durch das gegebenen RJ11 Kabel (in die LINE Tur), verbinden, dann verbinden Sie die PC Ihrer Lan oder die Switch den Türen RJ45.
DEUTSCH Die Konfigurationen des Default des Atlantis WebShare 241 Router ADSL2+ sind: • Username:admin • Password:atlantis • Adresse IP (192.168.1.254), Subnet Mask (255.255.255.0) • DHCP Server staatlich 1.6 Die IE Konfiguration Jeztz ist es notwendig,IE einzufuhren, in Menu Instrument zu gehen, dann der tab Verbindungen wahlen und eine der folgende Stimmen zu wahlen: • Benutzen Sie nie remote Verbindung • Benutzen Sie remote Verbindung, wenn es keine netz Verbindung disponibel ist. 1.
DEUTSCH 5. Gehen Sie auf DNS Configuration. 6. Wahlen Sie die Option Disable DNS und drucken Sie auf OK, um die Konfiguration zu enden. Leiten Sie wieder den PC,damit die Anderung geschehen. Konfiguration des PC in Windows NT4.0 1. Gehen Sie auf Start/Settings/ Control Panel. Drucken Sie zweimal auf Network und dann auf Protocols . 2. Wahlen Sie TCP/IP Protocol dann drucken Sie auf Properties. 3.
DEUTSCH Konfiguration des PC in Windows XP 1. Gehen Sie auf Start dann auf Control Panel. Drucken Sie zweimal auf Network (in Classic View) Connections. 2. Drucken Sie zweimal auf Local Area Connection. 3. In Local Area Connection Status drucken Sie auf Properties.
DEUTSCH 4. Wahlen Sie Internet Protocol (TCP/IP) und drucken Sie auf Properties. 5. Wahlen Sie die Option Obtain an IP address automatically und spater Obtain DNS server address automatically . 6. Drucken Sie auf OK,um die Konfiguration zu enden..
DEUTSCH 60
DEUTSCH 1.8 Konfiguration des Router Mit dem browser web, kommen Sie in den folgenden IP Adresse (wo man den URL steckt)dessen default ist: 192.168.1.254,und drucken Sie die Taste Ubersendung. Benutzen Sie admin (als user name) und atlantis (als password). Drucken Sie OK, um weiter zu gehen.
DEUTSCH Konfiguration sehen,oder eine Reihe von Abschnitte wird offnen,und Sie kann unter sie wahlen,bevor Sie in den wahre Konfigurationen kommen. Wenn Sie die nachste Schnitten folgen,konnen Sie in kurze Zeit den WebShare 241 ADSL Lan Router operativ machen,unter der Bedingung,dass Sie die als client DHCP eingestellten Lan Maschinen benutzen.Wie ublich,nehmen Sie Bezug auf den Handbuch im CD fur eine personlich gemacht Konfiguration.
DEUTSCH PPPoE routed/PPPoA routed PPPoE/PPPoA sind ADSL Verbindungen,und sie sind als dial-up DSL bekannt.Sie sind ausgedacht werden,um Weitstreifen Verbindungen zu erganzen,.mit einer besonders Aufmerksamkeit der Leichtigkeit des Konfiguration. Der Benutzer kann eine grosse Zugriffschnelligkeit geniessen, ohne die Arbeitsweise zu andern,und derselbe account mit ISP teilen.
• • • • • • DEUTSCH IP Adress:0.0.0.0 Authentication Protocol: Auto Connection : Always On Idle Timeout : RIP: No RIP MUT : 1492(PPPoE), 1500(PPPoA) Drucken Sie auf Apply, um die neue Konfiguration operativ zu machen.Wenn Sie die Konfiguration beendet haben,drucken Sie auf Save Config to Flash,um die Einstellung dauernd zu machen. Jetzt,wenn Sie in die Sektion Status kommen, konnen Sie die geschehene Verbindung kontrollieren und die Schutzstand zu beginnen.
DEUTSCH RFC1483 routed / IpoA routed Sehen wir den Paremeter, die man darstellen muss: • VPI: 8 (ISP) • VCI: 35 (ISP) • NAT: Enable • Encapsulation Method: LLC Routed Wahlen Sie die Einkapselungmethode Ihres provider. • IP Adress: Stecken Sie Ihren offentlich IP. • Subnet Mask: Stecken Sie die von ISP gegebene Netmask. • Gateway: Stecken Sie den Default Gateway des Router. • RIP: No RIP Drucken Sie auf Apply,um die neue Konfiguration operativ zu machen.
DEUTSCH Problemen,befragen Sie das vollstandige Handbuch,das sich anliegend im CDRom befindet.
ESPAÑOL Este manual ha sido creado como guía rápida, para más detalles relativos a la configuración acude al manual extenso que está en el CD. 1.1 Contenido de la caja Atlantis Land WebShare 241 Router ADSL2+, CD-Rom contenente el manual, Guía rápida, cable RJ-11 ADSL, cable CAT-5 LAN , Alimentador (12V, 1A). 1.2 Los LED frontales LED PWR SYS INFORMACION El encendido verde fijo cuando está conectado a la red eléctrica.
ESPAÑOL ADSL El encendido verde indica el correcto funcionamiento del link a 100Mb/s el encendido amarillo indica el correcto funcionamiento del link a 10Mbps. Si brilla indica transferencia de datos, si está apagado indica que un link no funciona. El encendido verde fijo indica la correcta alineación, si brilla está alineándose. PPP El encendido verde cuando son transferidos datos en la WAN (PPPoA/PPPoE). LAN 1.
ESPAÑOL Reset POWER Luego de haber encendido el dispositivo, aprieta delicadamente durante 6 segundos. El Router efectuará un reboot y volver a las condicciones de default. Jack al que conexionar el alimentador 1.4 Cablaje Primero tienes que conectar el produco a la linea ADSL por medio del cable RJ11 suministrado (en la puerta LINE), luego conecta a las puertas RJ45 los PC de tu Lan o los Switch. Finalmente conecta el alimentador al WebShare Router ADSL2+ y luego a la toma eléctrica.
ESPAÑOL Router ADSL tambièn. Esto filtro no es includo en el producto y tiene que ser adquirido separadamente. 1.5 Configuraciones por Defecto Antes de empezar la configuración del WebShare Router ADSL2+ es necesario conocer cuales son las configuraciones por defecto.
ESPAÑOL 1.7 Configuracciòn del PC Configuracciòn del PC en Windows 95/98/ME 1. Ve a Start/Settings/Control Panel. Cliccare 2 veces Network y elege Configuration. 2. Elege TCP/IP -> NE2000 Compatible, o cualquiera Network Interface Card (NIC) del PC. 3. Cliccare Properties 4. Elege la opciòn Obtain an IP address automatically (despues de haber elegido IP Address). 5. Ve a DNS Configuration. 6. Elege la opciòn Disable DNS Y apreta OK para concluir la configuraccion.
ESPAÑOL Configuración del PC en Windows 2000 1. Ve a Start/Settings/Control Panel. pulsa 2 veces Network and Dial-up Connections. 2. Pulsa 2 veces Local Area Connection. 3. En Local Area Connection Status pulsa Properties. 4. Elige Internet Protocol (TCP/IP) y pulsa Properties. 5. Elige la opción Obtain an IP address automatically y luego Obtain DNS server address automatically. 6. Aprieta OK para concluir la configuración. Configuración del PC en Windows XP 1. Ve a Start y luego a Control Panel.
ESPAÑOL 4. Elige Internet Protocol (TCP/IP) y pulsa Properties. 5. Elige la opcion Obtain an IP address automatically y luego Obtain DNS server address automatically . 6. Aprieta OK para concluir configuración. 1.8 Configuracciòn Router Entrar por medio del browser web a la siguiente direcciòn IP (donde se inserta el URL) que por defecto es: 192.168.1.254, y aprieta el timbre envío.
ESPAÑOL Utiliza admin (como nombre usuario) y atlantis (como password). Aprieta OK para seguir.
ESPAÑOL de la Lan y del Router hacer referencia al manual sobre el CD. Elege el protocolo idòneo o apreta Quick Start para efectuar una configuracciòn automàtica. Picar sobre Configuration, WAN y luego ISP(Change). Aparecerá la siguiente imagen en que es posible elegir el protocolo utilizado por el ADSL.
ESPAÑOL up DSL. Han sido creadas para integrar servicios de banda ancha con una atención particular a la facilidad de configuración. El usuario puede beneficiarse de una gran velocidad de acceso sin cambiar la idea de funcionamiento y compartir la misma cuenta con el ISP. No es necesario ningun software suplementario. Esta configuración es valida en caso de suscripción con 1 IP estático y por lo tanto NAT (SUA) activo (para la gestión de la clase pública hacer referencia al manual contenido en el CD).
ESPAÑOL RFC1483 routed / IpoA routed Vemos los parametros de configurar: • VPI: 8 • VCI: 35 • NAT: Enable • Encapsulation: Inserte el protocolo suministrato por vuestro ISP (LLC Routed) Seleccionar Use the Following IP Address • IP address: deja esto parametro con el valor correcto. • NetMask: deja esto parametro con el valor correcto. • Gateway: deja esto parametro con el valor correcto. • RIP: No RIP Apreta Apply para hacer operativa la nueva configuracciòn.
Atlantis Land S.p.A. Viale De Gasperi, 122 Mazzo di Rho – MI – Italy info@atlantis-land.com sales@atlantis-land.