
User Manual

AT-OME-ST31
13
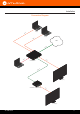
Installation
Auto IP Mode
If the AT-OME-ST31 is unable to detect a DHCP server within 15 seconds, then the unit will use a self-assigned
IP address within the range of 169.254.xxx.xxx. If this occurs, connect the AT-OME-ST31 to a computer running
Microsoft Windows® and follow the procedure below.
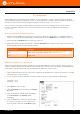
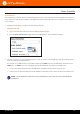
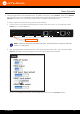
1. Click Start > Settings > Control Panel > Network and Sharing Center.
2. Click Change adapter settings.
3. Right-click on the adapter that is used to establish a wired connection to the network, and select Properties
from the context menu.
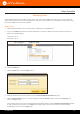
4. Under the Ethernet Properties dialog box, select Internet Protocol Version 4 and then click the Properties
button.
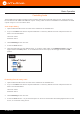
5. Click the Use the following IP address radio button.
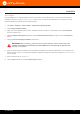
IMPORTANT: Before continuing, write down the current IP settings in order to restore them, later.
If Obtain an IP address automatically and Obtain DNS server automatically are selected, then
this step is not required.
6. Enter the desired static IP address or the IP address provided by the network administrator. If the PC does not
require Internet access or if a statically-assigned IP address is being used, then an IP address of 169.254.xxx.xxx
can be entered.
7. Set the subnet mask to 255.255.0.0.
8. Click the OK button then close all Control Panel windows.