
User Manual


Installation Guide
4
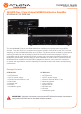
AT-RON-442 / AT-RON-444
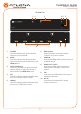
1. Connect an HDMI cable from the UHD/HD source to the HDMI IN port on the AT-RON-442/
AT-RON-444.
2. Connect display/sink devices to the AT-RON-442/AT-RON-444 to the HDMI OUT ports.
The AT-RON-442 supports up to two outputs. The AT-RON-444 supports up to four
outputs.
3. Connect the included power supply to the DC 5V Phoenix connector.
The AT-RON-442 and AT-RON-444 each include two mounting brackets, which can be used to
attach the unit to any at surface.
Installation
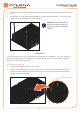
Power Connector
Locate the included orange Phoenix terminal block, and wire the included power supply to the
block as shown below. Do not use high-torque devices, when securing the wires, as this may
damage the screws and/or connector block.
Black
White
5V DC
power supply
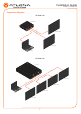
Mounting Instructions
1. Using a small Phillips screwdriver, remove the two screws from the left side of the
enclosure.
2. Position one of the mounting brackets, as shown below, aligning the holes on the side of the
enclosure with one set of holes on the mounting bracket.
3. Use the enclosure screws to secure the mounting bracket to the enclosure.
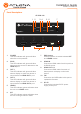
HDMI IN
1 2
HDMI OUT FW DC 5V
AT-RON-442
+
HDMI IN
1 2
HDMI OUT FW DC 5V
AT-RON-442
+
AT-RON-442