
User Manual


Installation Guide
6
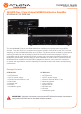
AT-RON-442 / AT-RON-444
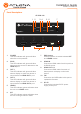
AT-RON-444
+
RONDO
POWER SYNC
INT1 2 3 4
LEARN
EDID
TM
RONDO
POWER SYNC
INT1 2 3 4
LEARN
EDID
TM
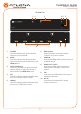
AT-RON-444
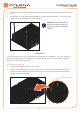
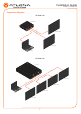
3. Turn the attached units over and
install the included rack ears to one
side of each enclosure using the
included screws.
Single-unit rack installation only
1. Attach the small rack ear to one
side of the AT-RON-444, using the
included screws.
2. Attach the longer rack ear to the
opposite side of the AT-RON-444
using the included screws.
AT-RON-444
+
RONDO
POWER SYNC
INT1 2 3 4
LEARN
EDID
TM
The AT-RON-442 and AT-RON-444 provide two EDID modes: internal (INT) and LEARN. Internal
mode selects the highest common resolution and audio between the source and all displays.
LEARN mode will copy the EDID information of the display/sink connected to the HDMI OUT 1
port.
To switch between internal and learn modes, press and hold the EDID button. While EDID is
being learned, the LEARN LED will blink. EDID learn is complete when the LEARN LED goes
solid.
EDID
NOTE: 4K, 3D, and multichannel audio may not be available when using INT
(internal) EDID mode. When using this mode, the AT-RON-442 / AT-RON-444
will build an EDID, based on the capabilities of each display that is connected.