
User`s guide


www.uTasker.com
µ
Tasker – AT91SAM7X Tutorial
V1.4
uTaskerV1.4_SAM7X.doc/0.03 28/36 31.07.2009
8. Developing – Testing - Debugging
The demo project is designed to demonstrate a typical use of the operating system and
TCP/IP stack. It is useful in itself as a starting point for many applications and this section
looks at the support for developing, testing and debugging your own applications.
Until now you haven’t actually had to develop anything since the project is delivered fully
functional. To develop your own project it will be necessary to make configuration changes to
suit your own use, to modify existing code and add new code of your own. To learn more
about these aspects it is possible to study the documentation about the µTasker operating
system and protocol stack. A more hands on approach is also possible by letting the demo
project run and walking through the code parts which you are interested in – we did this
briefly at the start of the demo but didn’t linger to discuss any details. Here we will check out
the advantages of the simulator by looking in more depth at a rather more complicated
debugging session.
Debugging is performed for a number of reasons. It is a natural consequence of the test
phase where unexpected program behaviour is experienced and the causes and reasons
need to be understood before correcting the code. It is often also an integral part of the test
phase itself when code reviews are performed, exception handling is to be exercised or
software validation is required. The simulator allows a high degree of tests to be performed in
comfort before going to the target testing phase, where such reviews would be rather more
complicated.
So let’s test something in the demo project. We’ll test the simple PING ECHO utility which we
already used once and we’ll see how we can get to know the software in a very convenient
and efficient manner. We will see how we can manipulate the operation to test and validate
special cases and to make corrections in the code (and verify them too). First we will work
ON LINE with the simulator, meaning that the simulator will be running effectively in real time
and we will capture and analyse events. Afterwards we will see how to do the same OFF
LINE, using a recording of the first case (which could also be a recording made when using a
real target).
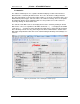
Introducing Wireshark
If you are using the µTasker then you will certainly be wanting to make use of its network
capabilities and a tool to monitor network activity is essential. These are often called Network
Sniffers since they can monitor, record and analyse network activity by watching what
happens on the local Ethernet connection. The µTasker was designed with and around
Wireshark (previously called Ethereal), a free and powerful network Sniffer. You can
download this from http://www.wireshark.org/
If you haven’t this program then don’t delay – download it and install it and then we will get
down to some work.