We strive to ensure that our products are of the highest quality and free of manufacturing defects or missing parts. Howeve r, if you have any problems with your new product, DO NOT RETURN IT TO THE STORE, please contact us toll free @: 1-888-996-2729 FAX: 1-866-873-3531 gameroom@escaladesports.com Or write to: Escalade Sports Customer Service Department P.O. Box 889 Evansville IN 47706 Please have your model number when inquiring about parts.
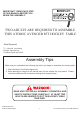
IMPORTANT! READ EACH STEP IN THIS MANUAL BEFORE YOU BEGIN THE ASSEMBLY. TWO ADULTS ARE REQUIRED TO ASSEMBLE THIS ATOMIC AVENGER 8FT HOCKEY TABLE Tools Required: T1 - Wrench (Included) Phillips Screwdriver Furniture Polish and Cloth Assembly Tips Make sure you understand the following tips before you begin to assemble your hockey table. 1. Start all bolts by hand before tightening. 2. Some drawings or images in this manual may not look exactly like your product.
HARDWARE IDENTIFIER ( To Scale) H1 - 8mm x 57mm Hex Bolt (12 pcs) H4 - 6mm x 19mm Flat Washer (16 pcs) H2 - 8mm x 19mm Flat Washer (12 pcs) H3 - 6mm x 50mm Hex Bolt (8 pcs) H5 - Barrel Nut (8 pcs) H6 - 6mm x 25mm Hex Bolt (8 pcs) (Not to Scale) T1 - Wrench (1 pc) H7 - 3mm x 15mm Phillips Washer Head Screw (4 pcs) ACCESSORY IDENTIFIER (Not to Scale) A A1 - Striker (2 pcs) ! All Rights Reserved.
PARTS IDENTIFIER ( Not to Scale) P1 - Hockey Table Cabinet (1 pc) P4 - End Leg Panel (2 pcs) P8 - Leg Panel Support Block (4 pcs) P2 - Right Leg (2 pcs) P3 - Left Leg (2 pcs) P6 - Right Cover Leg Panel (2 pcs) P5 - Side Leg Panel (2 pcs) P7 - Left Cover Leg Panel (2 pcs) P9 - Leg Leveler (4 pcs) NOTE: Packed with Hardware Kit ! All Rights Reserved. © 2012 Escalade Sports WARNING: CHOCKING HAZARD Small parts. Not for children under 3 yrs.
PARTS REQUIRED: 12 pcs - H1 Hex Bolt 12 pcs - H2 Flat Washer 1 pc - P1 Hockey Table Cabinet 2 pcs - P2 Right Leg 2 pcs - P3 Left Leg 1 pc - T1 Wrench STEP 1: To assemble this table, leave P1 Hockey Table Cabinet face down in the carton lid. Attach P2 Right Legs and P3 Left Legs using H1 Hex Bolts with H2 Flat Washers as shown in FIGURE 1. Do not tighten H1 Bolts until completion of STEP 4.
PARTS REQUIRED: 8 pcs - H3 Hex Bolt 8 pcs - H4 Flat Washer 8 pcs - H5 Barrel Nut 2 pcs - P4 End Leg Panel 2 pcs - P6 Right Cover Leg Panel 2 pcs - P7 Left Cover Leg Panel 1 pc - T1 Wrench STEP 2: Attach P4 End Leg Panels between two legs of P2 Right Legs and P3 Left Legs using H3 Hex Bolts with H4 Flat Washers and H5 Barrel Nuts as shown in FIGURE 2. Use T1 Wrench to tighten all bolts. Important Note: Tighten, but do not over tighten H3 Bolts.
PARTS REQUIRED: 8 pcs - H6 Hex Bolt 8 pcs - H4 Flat Washer 4 pcs - H7 Screw 2 pcs - P5 Side Leg Panel 4 pcs - P8 Leg Panel Support Block 4 pcs - P9 Leg Leveler 1 pc - T1 Wrench STEP 4: Attach P5 Side Leg Panels between P2 Right Legs and P3 Left Legs using H6 Hex Bolts with H4 Flat Washers as shown in FIGURE 4. Use T1 Wrench to tighten all bolts. Remember to tighten all H1 Leg Bolts from STEP 1. P3 P2 NOTE: Small wooden tab on end of P5 Side Panel must face the leg.
STEP 6: Peel the backing off A3 Felt Pad and attach to A1 Striker as shown in FIGURE 6. A3 FIGURE 6 NOTE: A3 Felt Pads may already be attached to A1 Strikers. A1 Congratulations! You have now assembled your Atomic Hockey Table. Please note the instructions below to ensure many years of trouble free use of your Atomic Hockey Table. CARE AND USE OF YOUR ATOMIC HOCKEY TABLE 1. Use only a suitable 120v AC household outlet, and insure the cord is not a trip hazard. 2.
HOCKEY GAME RULES: 1. This game is designed to be played with two (2) players, one at each end, or with four (4) players, two at each end of the game table. See Page 10 about ordering information of additional strikers and pucks. 2. Flip a coin to determine who will begin play, or a face-off can be held at the center of the table. 3. Play begins when the puck is placed on the playing surface. Players must hit the puck with the strikers and attempt to shoot into the opponent’s goal. 4.
PRODUCT PARTS LIST FOR MODEL # G04864W New Version Key # H1 H2 H3 H4 H5 H6 H7 T1 A1 A2 A3 P1 P2 P3 P4 P5 P6 P7 P8 P9 C1R C3S C3L C4S C4L C5 C6 C7 C8 K1 M1 Part # 04864WJH1 04864WJH2 04864WJH3 04864WJH4 04864WJH5 04864WJH6 04864WJH7 04864WJT1 04864WJA1 04864WJA2 04864WJA3 04864WJP1 04864WJP2 04864WJP3 04864WJP4 04864WJP5 04864WJP6 04864WJP7 04864WJP8 04864WJP9 04864WJC1R 04864WJC3S 04864WJC3L 04864WJC4S 04864WJC4L 04864WJC5 04864WJC6 04864WJC7 04864WJC8 04864WJK1 04864WJM1 Qty.
90 DAY LIMITED WARRANTY This consumer warranty extends to the original consumer purchase of any ESCALADESPORTS Product (hereinafter referred as the "Product"). WARRANTY DURATION: This Product is warranted to the original consumer purchase of a period of 90 days from the original purchase.
Nosotros tratamos de asegurarnos que nuestros productos sean de la más alta calidad y libre de problemas, como defectos de fabricación ó partes incompletas. Sin embargo, Si usted tiene algún problema con su producto, por favor NO LO REGRESE A LA TIENDA pongase en contacto con nosotros llamando gratis al: 1-888 -996-2729 FAX : 1-866-873-3531 gameroom@escaladesports.com O escriba a: Escalade Sports Departamento de Atención al Cliente P.O.
IMPORTANTE! LEA TODOS LOS PASOS DE ESTE MANUAL ANTES DE COMENZAR A ARMAR. IMPORTANTE! LOS DIBUJOS DE ESTE MANUAL PUEDEN HABERSE EXAGERADO O MODIFICADO PARA MOSTRAR LOS DETALLES. SE REQUIEREN DOS ADULTOS PARA ENSAMBLAR ESTA MESA “ATOMIC AVENGER”. Herramientas Necesarias: T1 - Llave Allen (Incluida) Desarmador Phillips Abrillantador para muebles y un paño Consejos de ensamblamiento Asegúrese de que comprende los siguientes consejos antes de comenzar a armar la mesa. 1.
IDENTIFICADOR DE TORNILLOS (A Escala) H1 - 8mm x 57mm Tornillo (12 pzas.) H4 - 6mm x 19mm Rondana (16 pzas.) H2 - 8mm x 19mm Rondana (12 pzas.) H3 - 6mm x 50mm Tornillo (8 pzas.) H5 - Tuerca del Barril (8 pzas.) H6 - 6mm x 25mm Tornillo (8 pzas.) (No a Escala) T1 - Llave (1 pza.) H7 - 3mm x 15mm Tornillo Phillips (cabeza tipo arandela) (4 pzas.) IDENTIFICADOR DE ACCESORIOS (No a Escala) A A1 - Mazo (2 pzas.) A2 - Disco (2 pzas.) A3 - Fieltro para el Mazo (2 pzas.
IDENTIFICADOR DE LAS PARTES (No a Escala) P1 - Mesa de hockey de aire (1 pza.) P4 - Tabla del extremo para las patas (2 pzas.) P8 - Soporte para la Cubierta de la Pata (4 pzas.) P2 - Pata (Derecha) (2 pzas.) P5 - Tabla lateral para las patas (2 pzas.) P3 - Pata (Izquierda) (2 pzas.) P6 - Cubierta de la Pata (Derecha) (2 pzas.) P7 - Cubierta de la Pata (Izquierda) (2 pzas.) P9 - Nivelador de las patas (4 pzas.) NOTA: Empacado con el Conjunto de Tornillos y Tuercas ! Todos los derechos reservados.
PARTES REQUERIDAS: 12 pzas. - H1 Tornillo 2 pzas. - P2 Pata (Derecha) 12 pzas. - H2 Rondana 2 pzas. - P3 Pata (Izquierda) 1 pza. - P1 Mesa de hockey de aire 1 pza. - T1 Llave PASO 1: Para ensamblar esta mesa, coloque la Mesa de Hockey de aire P1 boca abajo sobre el cartón. Coloque las Patas derechas P2 y las patas izquierdas P3 utilizando los Tornillos H1 con las Rondanas H2 como se muestra en la FIGURA 1. No apriete los tornillos H1 hasta completar el PASO 4.
PARTES REQUERIDAS: 8 pzas. - H3 Tornillo 8 pzas. - H5 Tuerca del Barril 2 pzas. - P6 Cubierta de la Pata (Derecha) 8 pzas. - H4 Rondana 2 pzas. - P4 Tabla del extremo para las patas 1 pza. - T1 Llave 2 pzas. - P7 Cubierta de la Pata (Izquierda) PASO 2: Coloque las Tablas del extremo para las patas P4 entre las dos patas derechas P2 y las izquierdas P3 utilizando los Tornillos H3 con las Rondanas H4 y las Tuercas de Barril H5 como se muestra en la FIGURA 2.
PARTES REQUERIDAS: 8 pzas. - H6 Tornillo 4 pzas. - H7 Screw 4 pzas. - P8 Soporte para la Cubierta de la Pata 8 pzas. - H4 Rondana 2 pzas. - P5 Tabla lateral para las patas 1 pza. - T1 Llave 4 pzas. - P9 Nivelador de las patas PASO 4: Coloque las Tablas laterales para las patas P5 entre las Patas derechas P2 y las Patas izquierdas P3 utilizando los Tornillos H6 con las Rondanas H4 como se muestra en la FIGURA 4. Utilice la Llave T1 para apretar todos los tornillos.
PASO 6: Despegue la protección del pegamento del Fieltro A3 y colóquela al Mazo A1 como se muestra en la FIGURA 6. A3 FIGURA 6 NOTA: Fieltro A3 puede venir ya pegado en los mazos A1. A1 Felicidades! Ahora ya ha terminado de ensamblar su mesa. Por favor, Siga las instrucciones del uso y el cuidado de su mesa abajo mencionadas, para garantizar muchos años sin problemas el juego de su mesa. INSTRUCIONES DEL CUIDADO Y USO DE SU MESA ATOMIC 1.
REGLAS DEL JUEGO HOCKEY DE AIRE: 1. Este juego está diseñado para ser jugado con dos (2) jugadores, uno en cada extremo, o con cuatro (4) jugadores, dos en cada extremo de la mesa de juego. Vea la página 10 para información de cómo ordenar piezas adicionales como Mazos A1 y Discos A2. 2. Lance una moneda para determinar quien comenzará el juego, o una cara a cara rotando la moneda en el centro de la mesa. 3. El juego se inicia cuando el disco se coloca sobre la superficie de juego.
LISTA DE PARTES PARA EL MODELO # G04864W Nueva Versión Clave H1 H2 H3 H4 H5 H6 H7 T1 A1 A2 A3 P1 P2 P3 P4 P5 P6 P7 P8 P9 C1R C3S C3L C4S C4L C5 C6 C7 C8 K1 M1 N.º de Parte 04864WJH1 04864WJH2 04864WJH3 04864WJH4 04864WJH5 04864WJH6 04864WJH7 04864WJT1 04864WJA1 04864WJA2 04864WJA3 04864WJP1 04864WJP2 04864WJP3 04864WJP4 04864WJP5 04864WJP6 04864WJP7 04864WJP8 04864WJP9 04864WJC1R 04864WJC3S 04864WJC3L 04864WJC4S 04864WJC4L 04864WJC5 04864WJC6 04864WJC7 04864WJC8 04864WJK1 04864WJM1 Cant.