
User Manual

Atomos Ninja V – User Manual Edition 1: November 2018 10
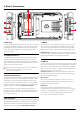
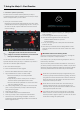
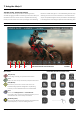
6. AtomX SSDmini, Master Caddy II and Screw Mounts
Flexible mounting options
The Ninja V is designed for versatility – including multiple mounting options.
The unit includes both 3/8”-16 and 1/4”-20 screw mounts top and bottom,
along with ARRI’s anti-rotational pin system, ensuring it is secure on
gimbals, and compatible with the latest mounting solutions.
The1/4”adaptoriseasilyremovedformountingon3/8”xtures.Todo
souseaatheadscrewdrivertogentlyloosentheadaptorandstoreyour
adaptors in a safe location.
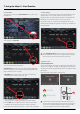
Top view
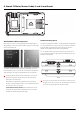
Bottom
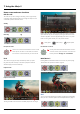
AtomX SSDmini / Master Caddy II Slot
On the rear of the unit is a 2.5” slot designed for Master Disk Caddy II or
AtomX SSDmini. To insert your caddy or SSDmini, gently push until it stops
as the end of the drive slot.
The SSDmini and Master Caddy II are both hot-swappable, so you can
do this at almost any time – even while the unit is turned on. But don’t do it
whilerecordingoryouwillgetacorruptedlethatmaybeunplayable.
The Ninja V disk slot does NOT have a release latch - it is friction-t.
Simply pull the SSDmini / Master Caddy II out using the top and
bottom tabs on the caddy itself.
AtomX SSDmini is backwards compatible with previous Atomos
recorders. The original Master Caddy 1 is not compatible with Ninja V
as the keyways are on one side only.
AtomX SSDmini Handle available. Attach to SSDmini for use with
existing Atomos Master Caddy II compatible devices, and reduce
handling and potential damage to disk casing.
Ensure you do not over tighten the screw mounts as this may cause
damage. Do not insert a 1/4-20” or 3/8”-16 thread longer than 5mm or
you will risk causing damage to the aluminium chassis.