
User Manual

Atomos Ninja V – User Manual Edition 1: November 2018 12
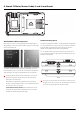
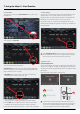
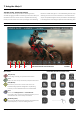
a. Format Media (HDD/SSD)
Make sure your drive is correctly inserted and all data from previous shoots
has been securely backed-up. Touching the Storage Capacity Indicator
on the home screen will take you to the Media Menu.
This menu provides information on the drive currently inserted. To format
the drive touch the Format button (below).
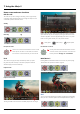
Aconrmationscreenwillgiveyouthechoicetocontinueorcancel
the process.
If you do not see your hard drive information, there may be a
problem with the connection or drive. Try removing the drive and
reattaching the drive. Ensure correct alignment of Master Caddy II
or SSDmini.
The Ninja V uses the exFAT le system for broadest compatibility.
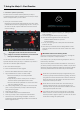
Secure Erase Format
For drives that carry the Atomos Logo such as the G-Technology 4K SSD,
Angelbird 4KRAW, AtomX SSDmini by Angelbird and Sony, an option for
secure erase is presented. This allows for the entire drive including the
drive cache to be formatted. This will erase ALL content on the drive
meaningnotingcanberecovered.Thebenetofthisistooptimise
performance. It will wipe all data off the drive (which may also be useful as
a addtional security measure) and reset it back as close as possible to
factory conditions.
When you rst insert a drive you may be presented with “Invalid
media”. This display means that the drive has not yet been formatted
and you simply need to follow the process to format your drive
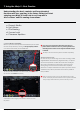
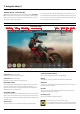
Understanding the basic controls and ‘housekeeping’
functions will save you time in the future. Before you start
enjoying your Ninja V it will help to set it up with a
‘device name’ and file naming conventions.
a. Format Media
b. Unit Name
c. File Naming
d. Screen Lock
e. Firmware Updates
7. Using the Ninja V - Best Practice