
User Manual

Atomos Ninja V – User Manual Edition 1: November 2018 26
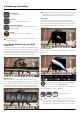
Monitoring Features
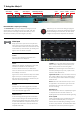
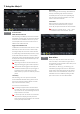
At the bottom of the Monitoring screen are the Monitoring Features,
accessible by toggling the MON icon. Monitoring Features do not affect
yourrecordedleandcanbeturnedonandoff,oradjustedwhilst
recording.NotallMonitoringfeaturesareavailableatrstglance.
To reveal all Monitoring features, SWIPE MONITORING FEATURE ICONS
TO THE LEFT. The icons will behave in a carousel like manner and you can
swipe left and right to access any of the features. At the bottom right is the
settings button. Press Settings to adjust behaviours of Monitoring Tools.
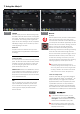
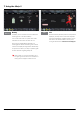
Monitor Mode / Features
Monitoring Features Activation Icons
AtomOS 10 features a new and improved layout of Monitoring tools.
These can be toggled on and off simply by touching the large yellow
MON icon. When Monitoring tools are displayed, swipe left to reveal
more icons. Tapping on the icons will enable each features. Many of
tools can be used simultaneously to assist with focus, exposure, framing
and more. Here is a quick guide to what each icon represents.
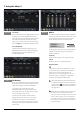
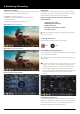
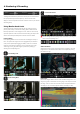
Luma Waveform
A great way to visualize the dynamic range of your image.
Focus Peaking
Ensure your recordings are always in focus.
Zebra Pattern
Use Zebra to check exposure and set exposure levels.
False Color
A visualization of exposure across the image.
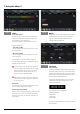
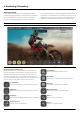
Blue Only Exposure
Observe the noise content of a video image.
Zoom 1:1
Punch in and check critical focus.
Zoom 2:1
Toggle 2:1 to magnify the screen.
RGB Parade
Monitor the level of red, green and blue from an input source.
Vectorscope
This is useful for checking if an image is under or over saturated.
Vectorscope Zoom
8x of the center of the vectorscope.
8. Monitoring & Recording