GB Welcome FR Thank you for choosing AUDICA Audica AV products have been designed and engineered to the highest standards, combining style with functionality and ergonomics. To extract the best from your system, please refer closely to this manual. It may also be necessary for you to refer to other components’ user guides to prevent any damage or loss in performance which may occur from incorrect installation. IT Enjoy...
Important Safety Information 1. GENERAL INFORMATION The AUDICA AVR-1 DVD/Receiver includes four system components in one box - a DVD player, FM/AM radio, surround sound decoder and 6 channel amplifier. In addition to the AVR-1 you will need a TV and a speaker system with between two and six channels. A full six channel speaker system is recommended to deliver the most realistic surround-sound experience. 2.
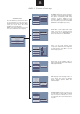
GB Connecting a TV and speakers CONNECTING THE AVR-1 TO A TV The highest quality connection is at the top, the lowest at the bottom. Your TV will probably have several connection options for picture (video) input. For the best quality picture, check which connections are available on your TV and use the one nearest the top of the list. There are 5 video output connections to take the picture to your TV. These are 1. HDMI digital output (picture and sound) 2. PrPbY component (picture only) 3.
Optional connections CONNECTING TV SOUND AND OTHER SOURCES TO THE AVR-1 Both TV Audio and AUX inputs are available on the AVR-1 for the connection of other signal sources. If your TV is connected with a SCART cable, then no further connection is necessary to listen to TV sound through your AVR-1. If your TV is not using the SCART connector and has a stereo audio output, we recommend that you connect it to the TV AUDIO in connections of the AVR-1.
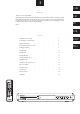
GB Front Panel and Handset Controls SOURCE ab c d e f g h FRONT PANEL KEYS a b c d HEADPHONE SOCKET. Connect your headphones here. The speakers will switch off when headphones are connected. e f DISC UNLOAD. Press this key to remove a disc. Volume controls. These keys control the volume of speakers or headphones connected to the AVR-1. NOTE:- these keys will not change the TV volume. PLAY/PAUSE. This key will play a DVD or CD disc. Press again to pause disc play. g h STOP.
AVR-1 General set-up GENERAL PAGE AUTO PIC MODE FILM AUDIO OUT GENERAL SETUP Press the SETUP key on the handset. There are 4 set-up options. Use the cursor key to navigate the menu options and press OK to select your chosen menu. The menus available are shown at the right. NOTE:- Video setup and Preferences menus are not accessible when a disc is playing. D.R.C. VIDEO ANGLE MARK SMART OSD LANGUAGE SUPER SMART SCREEN SAVER PIC MODE optimises the video performance of the AVR-1.
GB AVR-1 Speaker Setup SETUP MENU MAIN PAGE GENERAL SETUP SPEAKER SETUP Select the SPEAKER SETUP menu to set your AVR-1 to correctly match your system speakers and your room.
AVR-1 Video Setup SETUP MENU MAIN PAGE GENERAL SETUP SPEAKER SETUP VIDEO SETUP PREFERENCES EXIT SETUP Select the VIDEO SETUP menu to set up your AVR-1 to correctly match your TV. NOTE:- This menu can only be selected when the disc is stopped.
GB AVR-1 Preferences PREFERENCES AUDIO ENGLISH SUBTITLE GERMAN DISC MENU FRENCH PARENTAL SPANISH PASSWORD ITALIAN AUDIO selects the preferred language for dialogue. DEFAULTS SETUP MENU MAIN PAGE MAIN PAGE GENERAL SETUP SPEAKER SETUP VIDEO SETUP PREFERENCES EXIT SETUP SUBTITLE selects the preferred language for subtitles.
Playing a DVD PLAYING A DVD-VIDEO DISC Switch on the AVR-1 and your TV. Select the correct AV input of your TV (if you are using SCART connection the input may select automatically). Load your DVD disc into the front panel loading slot. The disc menu will appear on your TV screen. Use the cursor keys to navigate the on-screen menu and play the movie or press the key. Press the GOTO key. Enter the title or chapter numbers with the NUMBER keys.
Viewing JPG Digital Photos on a CD-R or DVD-R VIEWING JPG DIGITAL PHOTOS You can view a CD-R or DVD-R disc of your digital photos or other JPG files with the AVR-1. Switch on the AVR-1 and your TV. Select DVD with the SOURCE key. Load your disc into the front panel loading slot. FINDING YOUR PHOTOS ON THE DISC You can navigate the disc on the TV screen. The screen will show a map of the disc folders, Press OK to select a folder and display sub-folders or files on the disc.
AVR-1 On-Screen Toolbar The on-screen TOOLBAR gives quick access to certain features while a movie is playing. SWITCHING ON THE TOOLBAR Press the TOOLS key to switch on the on-screen toolbar. SWITCHING OFF THE TOOLBAR Press the TOOLS key again to switch off the toolbar when you are finished. SELECTING ATOOLBAR SYMBOL You can choose a Toolbar symbol with the CURSOR keys. CHANGING ATOOLBAR SETTING The CURSOR key changes toolbar settings.
Troubleshooting NO PICTURE ON THE TV Make sure that you have selected the correct AV input channel on your TV for the video connection that you have used. DISTORTED, UNSTABLE TV PICTURE The TV TYPE or RESOLUTION settings may be incorrect for your TV. To reset resolution to factory settings, press OPEN/CLOSE, then the NEXT key. WRONG REGION MESSAGE ON THE TV SCREEN WHEN PLAYING A DVD The disc you are playing was purchased in another DVD region.
Bienvenue FR Merci d'avoir choisi AUDICA Les produits Audica AV ont été conçus et mis au point avec les normes les plus élevées pour conjuguer style, fonctionnalité et ergonomie. Pour profiter au mieux de votre système, veuillez suivre attentivement les conseils de ce manuel. Vous devrez peut-être consulter les guides d'utilisation des autres éléments de votre système pour éviter tout dommage ou perte de performance qui pourraient résulter d'une installation incorrecte. Passez un bon moment...
Informations importantes relatives à la sécurité 1. INFORMATIONS GÉNÉRALES Le récepteur AUDICA AVR-1 DVD comprend quatre composants en un seul appareil : un lecteur DVD, une radio AM/FM, un décodeur de son surround et un amplificateur à 6 canaux. En plus de l'AVR-1 vous aurez besoin d'un téléviseur et d'un système de haut-parleurs comprenant 2 à 6 canaux. Il est recommandé d'utiliser un système à 6 canaux pour obtenir l'expérience de son surround la plus réaliste. 2.
Brancher un téléviseur et des enceintes BRANCHER LE AVR-1 À UN TÉLÉVISEUR La meilleure qualité de connexion est en haut de la liste, la moins bonne est en bas. Votre téléviseur possède sans doute plusieurs options de connexion pour l'entrée de l'image (vidéo). Pour la meilleure qualité d'image, regardez quelles sont les connexions de votre téléviseur, puis choisissez celle qui apparaît en premier dans la liste.
Branchements facultatifs BRANCHEMENT DU SON TV ET D'AUTRES SOURCES AU AVR-1 Des entrées TV audio et AUX sont à votre disposition sur l'AVR-1 pour permettre le branchement d'autres sources. Si votre téléviseur est connecté avec un câble SCART, vous n'avez pas besoin d'effectuer d'autres branchements pour écouter le son de la télévision via votre AVR-1.
Panneau avant et télécommande FR SOURCE ab c d e f g h TOUCHES DU PANNEAU FRONTAL a b c d e PRISE CASQUE. Branchez-y un casque. Les enceintes s'éteignent lorsqu'un casque est connecté. présélectionnée si elle est pressée deux fois. f ÉJECTION DU DISQUE. Appuyez sur cette touche pour retirer un disque. CONTRÔLES DU VOLUME Ces touches contrôlent le volume des enceintes ou du casque branché à l'AVR-1. REMARQUE :- ces touches ne changent pas le volume du téléviseur. LECTURE/PAUSE.
Configuration générale DE L'AVR-1 PAGE GÉNÉRALE AUTO MODE D'IMAGE FILM SORTIE AUDIO Configuration générale DE L' Appuyez sur la touche SETUP de la télécommande. Vous avez 4 options de configuration. Utilisez les touches fléchées pour naviguer dans les options de menu et appuyez sur OK pour sélectionner le menu de votre choix Les menus disponibles sont visibles à droite. REMARQUE: les menus Configuration vidéo et Préférences ne sont pas accessibles lors de la lecture d'un disque. D.R.C.
Configuration des enceintes de l' AVR-1 PAGE PRINCIPALE DU MENU DE CONFIGURATION CONFIGURATION GÉNÉRALE CONFIGURATION DES ENCEINTES CONFIGURATION VIDÉO FR Sélectionnez le menu CONFIGURATION DES ENCEINTES pour que votre AVR-1 s'adapte correctement à votre système d'enceintes et à votre pièce.
AVR-1 Configuration vidéo PAGE PRINCIPALE DU MENU DE CONFIGURATION CONFIGURATION GÉNÉRALE CONFIGURATION DES ENCEINTES CONFIGURATION VIDÉO PRÉFÉRENCES QUITTER LA CONFIGURATION Sélectionnez le menu CONFIGURATION VIDÉO p o u r q u e v o t r e AV R - 1 s'adapte correctement à votre téléviseur. REMARQUE : ce menu ne peut être sélectionné que lorsque le disque est arrêté.
Préférences AVR-1 PRÉFÉRENCES AUDIO ANGLAIS SOUS-TITRES ALLEMAND MENU DISQUE FRANÇAIS CONTRÔLE PARENTAL ESPAGNOL MOT DE PASSE ITALIEN VALEURS PAR DÉFAUT FR AUDIO permet de choisir la langue des dialogues. PAGE PRINCIPALE DU MENU DE CONFIGURATION PAGE PRINCIPALE CONFIGURATION GÉNÉRALE CONFIGURATION DES ENCEINTES CONFIGURATION VIDÉO PRÉFÉRENCES QUITTER LA CONFIGURATION SOUS-TITRES permet de choisir la langue des sous-titres.
Lire un DVD LIRE UN DVD Allumez votre AVR-1 et votre téléviseur. Sélectionnez la bonne entrée AV de votre téléviseur (si vous utilisez une connexion SCART, l'entrée peut être sélectionnée automatiquement). Insérez votre DVD dans la fente du panneau frontal. Le menu du disque apparaît sur l'écran de votre téléviseur. Utilisez les touches fléchées pour naviguer dans le menu et lancer la lecture du film, ou appuyez sur la touche . Appuyez sur la touche GOTO.
Regarder des photos numériques JPG sur CD-R ou DVD-R REGARDER DES PHOTOS NUMERIQUES Vous pouvez regarder des photos numériques ou d'autres images au format JPG enregistrées sur un CD-R ou un DVD-R grâce à votre AVR-1. Allumez l'AVR-1 et votre téléviseur. Sélectionnez DVD à l'aide de la touche SOURCE. Insérez votre disque dans la fente du panneau avant. TROUVER VOS PHOTOS SUR LE DISQUE Vous pouvez parcourir le disque depuis l'écran de votre téléviseur.
Outils à l'écran de l'AVR-1 La barre d'outils (TOOLBAR) à l'écran offre un accès rapide à certaines fonctions pendant la lecture d'un film. ACTIVER LA BARRE D'OUTILS Appuyez sur la touche TOOLS pour afficher la barre d'outils à l'écran. DESACTIVER LA BARRE D'OUTILS Appuyez à nouveau sur la touche TOOLS pour masquer la barre d'outils lorsque vous avez terminé. SELECTIONNER UNE ICONE DE LA BARRE D'OUTILS Vous pouvez sélectionner une icône de la barre d'outils à l'aide des touches fléchées et .
Résolution des problèmes PAS D'IMAGE SUR LE TÉLÉVISEUR. Vérifiez que vous avez sélectionné le bon canal d'entrée AV sur votre téléviseur pour la connexion vidéo que vous utilisez. Un disque est peut-être en cours de lecture. Ces menus ne sont accessibles que si le disque est arrêté complètement (et non suspendu). IMAGE DISTORDUE OU INSTABLE Le TYPE DE TÉLÉVISEUR et/ou la RÉSOLUTION que vous avez indiqués ne correspondent peut-être pas à votre téléviseur.
Benvenuti Grazie per aver scelto AUDICA I prodotti AV Audica sono stati studiati e progettati per soddisfare gli standard più elevati e uniscono stile a funzionalità ed ergonomicità. Per ottenere il meglio dal sistema, consultare attentamente il presente manuale. Per evitare danni o una diminuzione delle prestazioni del sistema a causa di un'installazione incorretta, è necessario consultare i manuali dell'utente per tutti gli altri componenti. IT Divertitevi...
Importanti informazioni di sicurezza 1. INFORMAZIONI GENERALI Il ricevitore DVD AUDICA AVR-1 racchiude in un unico sistema quattro componenti: lettore DVD, radio FM/AM, decodificatore surround sound ed amplificatore a 6 canali. In aggiunta a AVR-1 è necessario disporre di un televisore e di un sistema di speaker compresi tra due e sei canali. Si consiglia un sistema di speaker a sei canali per avere un'esperienza surround sound più vicina alla realtà. 2.
Collegamento del televisore e degli speaker COLLEGAMENTO DI AVR-1 AL TELEVISORE Esistono 5 connessioni in uscita per trasmettere l'immagine sul televisore. E sono le seguenti: 1. uscita digitale HDMI (immagine e suono) 2. componente PrPbY (solo immagine) 3. SCART(immagine e suono) 4. S-Video (solo immagine) 5. video composito CVBS (solo immagine) Il collegamento di ottima qualità si trova in alto mentre quello di bassa qualità più in basso.
Collegamenti opzionali COLLEGAMENTO DEL SUONO DEL TELEVISORE E ALTRE FONTI A AVR-1 Entrambi gli ingressi TV AUDIO e AUX sono disponibili sull'apparecchio AVR-1 per il collegamento con altre fonti di segnale. Se il televisore è collegato ad un cavo SCART, allora non saranno necessari ulteriori collegamenti per ascoltare il suono del televisore attraverso AVR-1.
Pannello anteriore e controlli del ricevitore SOURCE ab c d e f g h TASTI PANNELLO ANTERIORE a b c d e PRESA CUFFIA. Collegare le cuffie nella presa. Gli speaker si spengono quando le cuffie sono collegate. FM/AM. f ESTRAZIONE DISCO. Premere il tasto per estrarre il disco. Controllo volume. I tasti controllano il volume degli speaker o delle cuffie collegate a AVR-1. NOTA:- i tasti non modificano il volume del televisore. PLAY/PAUSE. Il tasto avvia il DVD o il CD.
Risoluzione dei problemi NESSUNA IMMAGINE SUL TELEVISORE Assicurarsi di aver selezionato il corretto canale d'ingresso AV sul televisore per la connessione video utilizzata. IMMAGINE DISTORTA O MOSSA Le impostazioni TV TYPE o RESOLUTION (TIPO TV o RISOLUZIONE) possono non essere corrette per il televisore. Per reimpostare le impostazioni di fabbrica, premere OPEN/CLOSE (APRI/CHIUDI), poi il tasto NEXT (SUCCESSIVO).
Willkommen Vielen Dank, dass Sie sich für AUDICA entschieden haben! Die Audica AV-Produkte werden nach den höchsten Standards entwickelt und produziert und kombinieren Stil mit hoher Funktionalität und Ergonomie. Um Ihr System optimal nutzen zu können, lesen Sie diese Anleitung bitte sorgfältig. Möglicherweise müssen Sie auch auf Benutzerhandbücher anderer Komponenten zurückgreifen, um Beschädigungen oder Leistungsverluste zu verhindern.
Wichtige Sicherheitsinformationen 1. ALLGEMEINE INFORMATIONEN Der AUDICA AVR-1 DVD Receiver umfasst vier Systemkomponenten in einem Gerät - einen DVD Player, ein UKW/MW Radio, einen Surroundsound-Decoder und einen 6-Kanal Verstärker. Zusätzlich zum AVR-1 benötigen Sie ein TV-Gerät und ein Lautsprechersystem mit 2 bis 6 Kanälen. Ein vollständiges 6-Kanal Lautsprechersystem wird empfohlen, um das bestmögliche realistischste Surroundsound-Erlebnis bieten zu können. 2.
Anschluss des TV-Gerätes und der Lautsprecher ANSCHLUSS DES AVR-1 AM TV-GERÄT Die qualitative hochwertigste Verbindung ist die erste in der Liste, die niedrigste ist die unterste Ihr TV hat wahrscheinlich mehrere Anschlussmöglichkeiten für Bild (Video). Für das qualitativ beste Bild prüfen Sie, welche Anschlüsse an Ihrem Fernseher vorhanden sind und verwenden Sie den, der in der Liste am weitesten oben steht. Es gibt 5 Videoausgänge, um das Bild an Ihren Fernseher zu übertragen. Diese sind: 1.
Optionale Anschlüsse ANSCHLUSS VON TV SOUND UND ANDEREN QUELLEN AM AVR-1 Sowohl TV Audio als auch AUX-Eingänge sind für den Anschluss anderer Signalquellen am AVR-1 vorhanden. Wenn Ihr TV-Gerät mit einem SCART Kabel angeschlossen ist, ist keine weitere Verkabelung notwendig, um den TV Ton mit Ihrem AVR-1 zu hören. Wenn Ihr TV-Gerät nicht über den SCART Anschluss verbunden ist und einen Stereo Audioausgang hat, empfehlen wir Ihnen, diesen mit den TV AUDIO Anschlüssen des AVR-1 zu verbinden.
Steuerung am Gerät und mit der Fernbedienung SOURCE ab c d e f g h TASTEN AM GERÄT a b c d KOPFHÖRERANSCHLUSS. Schließen Sie hier Ihre Kopfhörer an. Die Lautsprecher schalten sich aus, wenn Kopfhörer angeschlossen sind. DISC AUSWERFEN. Drücken Sie diese Taste, um eine Disc zu entfernen. Lautstärkekontrolle. Diese Tasten steuern die Lautstärke, der mit dem AVR-1 verbundenen Lautsprecher bzw. des Kopfhörers. HINWEIS: Diese Tasten ändern nicht die TV Lautstärke. PLAY/PAUSE.
Problemlösung KEIN BILD AM TV-GERÄT Achten Sie darauf, dass Sie den korrekten AV Eingang an Ihrem TV gewählt haben, entsprechend der Videoverbindung, die Sie verwenden. KEIN TON AUS DEM MITTLEREN ODER DEN RÜCKWÄRTIGEN LAUTSPRECHERN Prüfen Sie, ob die Lautsprecher nicht im SPEAKER SETUP Menü ausgeschaltet wurden. GESTÖRTES, INSTABILES TV BILD Die Einstellungen TV TYPE (TV TYP) oder AUFLÖSUNG (RESOLUTION) können für Ihr TV-Gerät nicht geeignet sein.
Bienvenidos Gracias por elegir AUDICA. Los productos audiovisuales Audica han sido diseñados y fabricados en función de los más altos niveles de calidad y presentan una combinación perfecta de estilo, prestaciones y ergonomía. Para sacar el máximo partido del sistema, lea detenidamente el presente manual. También puede que necesite consultar las guías del usuario de otros componentes a fin de evitar daños o pérdidas de rendimiento debido a una instalación incorrecta.
Información importante de seguridad 1. INFORMACIÓN GENERAL El DVD/receptor AVR-1 de AUDICA incluye cuatro componentes del sistema: un reproductor de DVD, una radio FM/AM, un descodificador de sonido envolvente y un amplificador de 6 canales. Además del AVR-1, necesitará un receptor de televisión y un sistema de altavoces de entre 2 y 6 canales. Se recomienda un sistema de altavoces completo de 6 canales a fin de obtener una experiencia de sonido envolvente lo más realista posible. 2.
Conexión del televisor y los altavoces CONEXIÓN DEL AVR-1 A UN RECEPTOR DE TELEVISIÓN La conexión de mayor calidad está en la parte superior y, la de menor calidad, en la parte inferior. El receptor de televisión contará probablemente con diversas opciones de conexión para la entrada de imágenes (vídeo). A fin de obtener imágenes de la mejor calidad, compruebe de qué conexiones dispone el receptor de televisión y utilice la situada más cerca del principio de la lista.
Conexiones optativas CONEXIÓN DEL SONIDO DEL TELEVISOR Y OTRAS FUENTES AL AVR-1 El AVR-1 dispone de las entradas de sonido TV y AUX para la conexión de otras fuentes de señales. Si su televisor está conectado mediante un cable SCART, no es necesario realizar otras conexiones para escuchar el sonido de la televisión a través del AVR-1.
Controles del panel frontal y el mando a distancia SOURCE ab c d e f g h BOTONES DEL PANEL FRONTAL a b c d CONECTOR PARA AURICULARES. Conecte aquí sus auriculares. Los altavoces se desactivarán al conectar los auriculares. EXPULSIÓN DE DISCO. Pulse este botón para extraer un disco. Controles de volumen. Estos botones controlan el volumen de los altavoces o los auriculares conectados al AVR-1. NOTA: estos botones no actúan sobre el volumen del televisor. REPRODUCCIÓN/PAUSA.
Solución de problemas NO APARECEN IMÁGENES EN EL TELEVISOR Asegúrese de haber seleccionado el canal de entrada AV correcto en el televisor para la conexión de vídeo utilizada. IMÁGENES DISTORSIONADAS O INESTABLES EN EL TELEVISOR Puede que la configuración de tipo de televisión o resolución no sea correcta para el receptor de televisión. A fin de restablecer la resolución a los valores de fábrica, pulse el botón de apertura/cierre y, a continuación, el botón SIGUIENTE.
info@audica.co.
www.audica.co.