AT-LP120XBT-USB User Manual Wireless Direct-Drive Turntable
Introduction Thank you for purchasing this Audio-Technica product. Before using the product, read through this user manual to ensure that you will use the product correctly. Please keep this manual for future reference. This product can be used only in the countries where the product is sold. Make sure that the operating voltage and the plug of AC adapter of the product are correct for the country you live in.
Safety precautions Safety precautions Although this product was designed to be used safely, failing to use it correctly may result in an accident. To ensure safety, observe all warnings and cautions while using the product. RF Exposure Statement: This transmitter must not be co-located or operated in conjunction with any other antenna or transmitter used in other systems.
Part names and functions Top view diagram 18 18 17 1 2 16 3 15 14 4 13 5 12 6 11 7 8 1 9 45-RPM adapter (shown in receptacle) 10 Quartz button Adapts 7" records with large center holes to fixed center spindle. 2 Turns the pitch function on and off. When the quartz is activated the platter will hold the RPMs at 0% pitch, regardless of the pitch slider position.
Part names and functions Front and rear view diagram 1 2 1 Dust cover 2 Feet 3 2 Adjust the level of the product. 3 Pre-amplifier selector switch If using an amplifier with a PHONO input jack, set this switch to the PHONO position. If connecting to the AUX jack of an amplifier, set this switch to the LINE position. 4 Stereo output terminals Connect the RCA audio cable. Connect it to either the amplifier's PHONO input jack or its line input jack.
Part names and functions Tonearm 1 Counterweight 1 Balances the tonearm and adjusts to provide the proper tracking force. 2 2 Tracking force gauge ring Use to adjust the tracking force. 3 5 Tonearm lift Moves the tonearm vertically to and from the face of the record. 4 3 Tonearm rest with clamp 6 Use the clamp to secure the tonearm so that it does not move. 5 4 Anti-skate control dial While the record is playing, a force acts on the stylus tip to pull it inward.
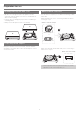
Preparation for use Leveling the turntable Placing the platter 1. After positioning the product where you want to use it, adjust the feet so that the product is level. This product requires some assembly before using it for the first time. Do not connect the AC adapter until assembly is complete. • Use a level (sold separately) as needed to ensure that the product is level. 1. Set the platter on the spindle.
Preparation for use Tonearm balance and tracking force Setting tracking force In order for the cartridge to pick up sound correctly from the record’s grooves, the tonearm’s balance and tracking force must be adjusted to fit the specifications of the cartridge. If the tonearm’s balance and tracking force are not properly adjusted, the record or the cartridge’s stylus may become damaged. 1.
Preparation for use Installing/removing the dust cover Wireless/wired connection • The dust cover is designed to protect the product's sensitive components when the product is not in use. It should remain off while records are playing. • Using the dust cover during play may result in record damage or sound degradation. • Always remove and replace the dust cover carefully. You can connect to a speaker, etc. via Bluetooth technology or RCA audio cable.
Preparation for use 3. When pairing is complete, the indicator LED lights in blue. Connecting via Bluetooth wireless technology The product supports Bluetooth wireless connection. It can be connected with Bluetooth-compatible headphones, active speakers and wireless stereo speakers (hereinafter referred to as Bluetooth receiver devices). Blue About pairing When connecting a new Bluetooth receiver device, you need to pair it with the product.
Preparation for use • The RCA audio cable's red jack is for the right (R) channel, and the white jack is for the left (L) channel. Setting pre-amplifier selector switch This product has a built-in phono equalizer function. You can use the product, even if you do not have a phono amplifier or connectable equipment with a built-in phono amplifier, by connecting an active speaker, etc. Use the pre-amplifier selector switch to set the output, as shown below.
Preparation for use Connecting to computers with USB input Follow the settings for the pre-amplifier selector switch to connect the included USB cable to the USB input of your computer. • The included USB cable connects the product to your computer without need for special drivers. • Audacity (refer to http://www.audacityteam.org for details) and other compatible third-party recording software packages are available, allowing you to record from the product to your computer.
Playing a record Before playing a record Playing a record Lower the volume of the amplifier, speakers, etc., sufficiently. 1. Remove the cartridge's protector. 1. Press the START/STOP button. • If the tonearm is fixed to the tonearm rest, unlatch the clamp. • The platter begins to rotate. Protector 2. Turn the power dial to the ON position. • The power dial, power indicator LED and platter speed buttons will light up. 3.
Playing a record 4. Lower the tonearm by moving the tonearm lift control lever to the DOWN position. The tonearm descends slowly onto the record and play begins. Stopping the record 1. Lower the volume of the amplifier, speakers, etc. sufficiently. • Alternatively, you can skip steps 2 to 4, and use your fingers to lift the headshell, move the tonearm over the desired location on the record, and then place the headshell down to begin playing the record.
Playing a record Replacing the stylus How to use with Bluetooth connection Removing the stylus • To connect for the first time, pair the product and your device via Bluetooth wireless technology. • Read the user manual for the Bluetooth receiver device. • Note that Audio-Technica cannot guarantee the operation of displays, such as the battery level display, or applications via Bluetooth devices.
Replacing a cartridge When the turntable is moved Refer to the user manual for the cartridge that you will be using if you are replacing the cartridge (AT-VM95E) included with this product with another, commercially available cartridge. After you replace the old cartridge with a new one, you must readjust the overhang and the tonearm’s balance and tracking force. Using the product's original packing materials, wrap the turntable in the reverse order from when you unwrapped it.
Troubleshooting Problem Solution The platter does not spin. • Is the AC adapter connected to the outlet? Connect AC adapter to the outlet. • Has the AC adapter's plug come off? Check whether or not the plug is properly attached to the AC adapter. The platter spins, but there is no sound or the volume is not loud enough. • Is the cartridge's protector still in place? Remove the cartridge's protector. • Is the tonearm in the lift position? Lower the tonearm.
Dimensions 352.0 141.6 452.
Specifications Communication specifications USB function Communication system Bluetooth version 5.0 A/D, D/A Maximum RF output 10 mW EIRP 16 bit 44.1 kHz or 48 kHz USB selectable Maximum communication range Line of sight - approx. 10 m (33') Computer interface USB 1.1 Compliant Windows 8 or above, or MAC OSX or above Frequency band 2.402 GHz to 2.
Audio-Technica Corporation 2-46-1 Nishi-naruse, Machida, Tokyo 194-8666, Japan ©2020 Audio-Technica Corporation Global Support Contact: www.at-globalsupport.com 162501910-01-01 ver.1 2020.02.