
User Manual
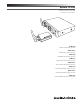


System 10 PRO Installation and Operation
8
System Operation
level before starting up the wireless system. Do not switch on the
transmitter yet.
Receiver on...
Plug the power supply into an AC power source, then turn on the power
switch. The blue System ID Display will illuminate.
Transmitter on...
When the transmitter is switched on, Receiver A's green Pairing
Indicator lights along with two indicators on the transmitter: the green
Power/Battery/Mute status indicator and the blue System ID. The blue
System ID display on the transmitter turns off after 30 seconds to
conserve battery power; the transmitter Power/Battery/Mute status
indicator will remain illuminated, indicating transmitter status.
To re-illuminate System ID display, press the Power/Mute switch. Note:
this will alter the transmitter mute status. A slight touch of the power
switch toggles between muted and unmuted operation.
The transmitter’s Power/Battery/Mute status indicator glows red when
transmitter is muted, or green to indicate unmuted status. In a low-
battery situation, the Power/Battery/Mute status indicator blinks.
The transmitters have a soft-touch power switch. When the switch is
set to “Mute” (red indicator LED), the transmitter produces RF with
no audio signal. When the switch is “On” (green indicator LED) the
transmitter produces both RF and audio. Excessive audio input to the
transmitter will cause the receiver’s Audio Indicator to light red.
Receiver Volume
Under typical operating conditions, the receiver’s volume control should
be turned all the way up, with overall system audio gain adjusted at the
Input Level Adjustment
Input trimmer controls in the transmitters enable you to maximize
performance for a particular microphone or guitar sensitivity, or to
adjust for different acoustic input levels.
Adjusting Input Level — UniPak
®
Transmitter
Slide the battery cover off the transmitter and remove the screwdriver
from its clip. Using the screwdriver, gently turn the “VOL” (Volume –
Microphone/Instrument Level) all the way up (clockwise, toward “H”).
Check for excessive gain by speaking/singing into the microphone
at typically loud levels while watching the receiver’s Audio Indicator.
If the Audio Indicator lights red, turn the “VOL” control slightly
counterclockwise until the Audio Indicator lights green or yellow with
maximum audio input to the transmitter.
Adjusting Input Level — Handheld Transmitter
Unscrew the lower body cover and slide it off, exposing the screwdriver
and "LEVEL" (Gain Trimmer) control. Remove the screwdriver from its
clip. Gently turn the "LEVEL" all the way up (clockwise, toward "H").
Check for excessive gain by speaking/singing into the microphone
at typically loud levels while watching the receiver’s Audio Indicator.
If the Audio Indicator lights red, turn the "LEVEL" control slightly
counterclockwise until the Audio Indicator lights green or yellow with
maximum audio input to the mic/transmitter.
Return the screwdriver to its clip and close and secure the lower body.
No further transmitter gain adjustments should be needed, as long as
CAUTION! The small trimmer controls are delicate; use only the
supplied screwdriver. Do not force the trimmers beyond their normal
190° range of rotation.
Setting System ID Number & Pairing your Transmitter and Receiver
other pairing setup required; it will work out of the box. That is, your
receivers and transmitters are already digital pairs, with each transmitter
sharing a System ID number with one of the receivers.
it necessary to change system ID numbers in multiple-system
NOTE: System ID is an identical number assigned to a paired
The System ID
number is not related to transmitting frequency. Due to the dynamic
nature of System 10's automatic frequency selection, the actual
transmitting frequencies may change during power-up or performance.
These frequency changes are seamless and imperceptible to the ear.
Pairing Receivers with Transmitters
Note: Up to ten transmitters may be paired with any one receiver, and
up to ten channels may be used simultaneously when multiple chassis
are linked. (See “Linking Systems” on page 9.)
1. Turn on the receiver chassis and transmitter.
2. Press the System ID button on the chassis that corresponds to
the receiver you wish to pair. The ID number will blink on the display.
Continue to press the System ID button until the display shows the
number from 0 to 9 that you want.
Note: When pairing a receiver that is mounted out of range (typically
beyond 100') of the chassis or in another room, you will need to
insert another receiver unit into the pairing receiver’s empty dock.
Follow the directions below, then eject the substitute receiver once
pairing is complete.
3. Within 15 seconds, press and hold the Pair button on the receiver
chassis for about one second. The receiver’s Pairing Indicator will
begin to blink green. Your receiver is now in Pair Mode.
Note: If the receiver’s Pair button is not pressed within 15 seconds,
the System ID number will revert to its previous setting.
4. Open your transmitter and press and hold its Pair button within 30
seconds of entering Pair Mode. The transmitter display will now
show the System ID number you have chosen on the receiver.
The receiver’s Pairing Indicator will glow steady, indicating you have
successfully paired your system.
5.
transmitter by pressing and holding its Power/Mute button. Turn the
second transmitter on and follow instructions 2-4 above, making
sure to assign a different System ID number to the new transmitter.
6. Repeat for each additional transmitter you wish to pair with this
receiver. Remember to switch off all transmitters already paired
before adding a new one and to use a unique ID number for each
transmitter.
Note: With all transmitters turned off, the receiver’s System ID
Display will cycle through all currently paired ID numbers. Turn
on a transmitter to activate its pairing with the receiver. The receiver
recognizes only one transmitter at a time. That transmitter must be
turned off before the receiver will recognize another paired
transmitter. If that transmitter is turned off out of range, the receiver
will not recognize another paired transmitter until the receiver is
powered off and turned on again.