User guide for the En2 PTX plug-on transmitter
Installing and removing batteries To open the battery compartment, slide the battery compartment catch away from the edge. This will unlock it and the batteries can be placed inside with the positive end outermost (see Fig.1. below). To close the battery compartment, gently push down the flap until you hear a clicking sound. The transmitter is now ready to use. Fig.1 OLED display On/Off Button Locking ring Navigation switch Battery compartment catch Fig.2.
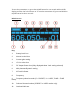
To turn the transmitter on, press the On/Off button for one second and the OLED display and blue ‘On’ led will turn on. To turn the transmitter off, press and hold the On/Off button for three seconds.
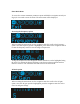
Enter Main Menu To access the various transmitter parameters press and hold the navigation switch (see Fig.2) for 2 seconds to enter the menu. The main menu will be displayed. Accessing the Frequency option After accessing the main menu, use the navigation switch to scroll to the Frequency option. Once the frequency option is highlighted, press down on the navigation switch to enter the frequency menu to view the range of frequencies.
Use the navigation switch to highlight the desired AF Gain option. To confirm this choice press navigation switch and the transmitter will save the setting and return to the main menu. LF Cut option After accessing the main menu, use the navigation switch to scroll to the LF Cut option. Select the required filter setting. Options After accessing the main menu, use the navigation switch to scroll to the Options menu. When the Options icon is highlighted, press the navigation switch.
In selecting the frequency mode the user can select one of three frequency modes, Factory set Preset, User, or manual Tune. Preset In Tune mode the user can select any frequency within the switching bandwidth of the frequency table in 25kHz steps and then save them to the User memory. The User memory is initially programmed with a copy of the Preset frequencies until the user selects and saves a frequency in Tune mode.
Frequency tables Units which are programmed with multiple tables will show frequency table selection on the menu. Entering the frequency table selection screen will show the frequency table number. The user can select any one of up to 10 tables. Sub-options menu RF Power In selecting the RF Power from the Sub-options menu the user can select High or Low power settings. In selecting the low power setting the user will extend the battery life of the transmitter.
Selecting this option allows the user to turn the blue ‘On’ indicator LED, on or off. The default setting is on. AF Mute setting Selecting this option allows the user to configure the On/Off button as a momentary mute button. This might prove useful in an interview situation where the presenter wants to keep the transmitter on, but wishes to turn the audio off momentarily.
Screensaver The OLED display can be placed into screen saver mode to extend battery life and also reduce light emission from the transmitter. There are 4 settings available :– X - display on all the time 5 - screen enters screen saver after 5 seconds 20- screen enters screen saver after 20 seconds 60 - screen enters screen saver after 60 seconds Left/Right hand setting The PTX can be setup to allow right-handed or left-handed operation by the user.
If for any reason, the user wants to restore the transmitter to the original factory supplied settings then the user can use the restore function. Please note this will overwrite any user memory settings and gain settings. Information option From the top level menu the Info provides the serial number, Firmware revision and frequency table information. After accessing the main menu, use the navigation switch to scroll to the Info option.
transmitter back to the Main Menu. Lock option After accessing the main menu, use the navigation switch to scroll to the Lock option. Once the Lock option is highlighted, press the middle part of the navigation switch to view the options: To lock the transmitter, scroll using the navigation switch to the Yes option. The transmitter will then return to the main menu, with an unlock symbol to replace the lock symbol.
Batteries Upon finishing with any used batteries please dispose of them as special waste. In order to protect the environment, only dispose of exhausted batteries. Recommendation to minimize RF exposure In order to avoid the possibility of exceeding the FCC RF exposure limits, it is recommended that the transmitter or attached microphone is kept at a minimum distance of 13mm (0.5 inch) away from the head or body during normal operation.
Technical Specifications [US Model] Frequency Range (MHz) Switching Bandwidth Number of frequency tables Number of Factory Pre-set Frequencies Number of User Selectable Frequencies Modulation Mode Emission designator Frequency Tolerance Frequency Stability Audio Frequency Response Signal-to-Noise Ratio Total Harmonic Distortion Output Power Audio Gain control LF Cut Input connector Display Control Battery Type Battery Life +48V Phantom Power Operating Temperature Range Weight Dimensions 470-608, 614-698 Up