
Operation Manual


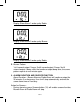

PROJECTION UNIT :
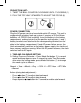
1. TWIST THE BALL COUNTER-CLOCKWISE UNTIL IT LOOSENS (1)
2. PULL THE TOP HALF UPWARDS TO ADJUST THE FOCUS (6)
POWER CONNECTION
Plug the AC power cord to a household outlet AC source. This unit is
equipped with a battery back up system, it requires a 3V flat lithium
batteries x 3 CR2025 (not included). Insert the battery in the battery
compartment, making certain that the positive and negative (+ and -)
battery terminals are attached to the corresponding terminals on the
plate in the battery compartment. If and AC power failure occurs, the
clock automatically switches to the battery power supply, the clock and
timer memory continue running. When the AC power resumes, the clock
switches back to AC again.
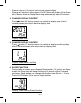
1. TIME AND CALENDAR SETTING
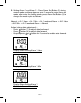
A. Setting Time and Calendar – Press Mode Set button (1) in normal
mode and keep depress over 2 seconds to enter Time Set mode,
after enter the setting mode, press Mode Set button (1) to change
the mode cycle as follows :
Normal g Year g Month g Day g 12/24 H g RTC Hour g RTC Min
g Normal
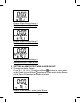
Action (during data adjustment) :
- Press button (7) to adjust data backward
- Press button (8) to adjust data forward
- Keep depress or button for 2 second to enable auto forward.
GB-2