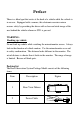
Rear Observation System Package Model RVMPKG3 Installation Manual 1 Features: • Rearview Mirror with 4” LCD • 2 Built in Speakers • Rearview Camera Input • Auxiliary Video Input 2
TABLE OF CONTENTS Cautions!…………………………………………. .……… 3 Preface………………………………………….……..…… 4 WARNING…………………………………….….…….. 4 Backing up vehicle……………………………….….….. 4 Packing list………………………………………….… 4 1. Installation Instructions ….….…………………..…5 2. Signal Inputs…………………………………….… 6 3. Controls and Indicators ……………………………6 SW1 and SW2…………………………………….……8 Specifications………………………………………………. 8 General……………………………………………….. 8 Maintenance………………………………………………... 9 Troubleshooting…………………………………………….
Cautions! The product is intended to assist in safe driving and to allow the driver to have a broader rearview while the vehicle is in reverse. You, as the driver, are solely responsible for the safe operation of your vehicle and the safety of your passengers according to the country and their local traffic regulations. Do not use any features of this system to the extent it distracts you from safe driving. Your first priority while driving should always be the safe operation of your vehicle.
Preface There is a blind spot that exists at the back of a vehicle while the vehicle is in reverse. Equipped with a camera, this electronic rearview mirror ensures safety by providing the driver with a clear and wide image of the area behind the vehicle whenever SW1 is pressed. WARNING: Backing up vehicle Do not back up vehicle while watching the mirror/monitor screen. Always look in the direction of vehicle motion. Use the mirror/monitor as an aid in safety confirmation.
3 Adapter 4 Fastening Belts 5 Rearview Camera 6 Camera Cable 1. Installation Instructions (1) Mount the mirror/monitor onto the existing rearview mirror. a) Take the two belts and slide them into the slots on the top rear of the mirror with grooved side of the belt facing down.. Figure 1 b) Take the buckles and slide them into the lower slots on the rear of the mirror with the buckle facing down toward the strap.
the rearview mirror onto the existing mirror from one side with one fixed belt. Then fasten the other belt on the other side of the mirror. To prevent the mirror from falling off, tighten the belts until secure to the factory rearview mirror on both sides. Figure 3 d) Cut off excess part of straps . (2) Wiring the System. 1.
end of the Main Cable . (2) Audio/Video Input Plugs (RCA) are located at the end of the Main Cable. By connecting video and audio signals with these plugs, the user can enjoy watching video, only while the parking brake is on. Figure 5 3.
Figure 6 illustrates the controls and indicators of the (RVMPKG3) rear view mirror : A: Rearview mirror B: 4” LCD panel C: Brightness Control knob D: Power indicator (Red when power is on) E: Volume Control Knob F: Switch 1 (see below) G: Switch 2 (see below) H: Speakers SW1 and SW2: SW1: Used to turn the LCD on/off . SW2: Used to toggle display image between rearview camera and DVD/VCR.
Contrast ratio LCD Viewing Angle Resolution Video Format Display Format 150:1 Top-10°, Bottom 30° , Left 45°, Right 45° 480×234 NTSC 4:3 Maintenance Your rearview mirror requires little care, however to maintain it in optimum condition follow the procedures below: 1. Keep your system away from excessive moisture, extreme heat or cold and magnetic fields. 2. Keep liquids away from the display. 3. Do not place external devices or other objects on the top of the mirror.
No video signal appears while reversing the car? 1. 2. 3. 4. Video image is not sharp enough? Check the LCD Contrast (Brightness) control knob whether the contrast knob is set too low. Check the rearview Camera lens. Check the rearview Camera wiring and connection. Check the cable from the rearview mirror is connected properly . Clean the lens of the camera.
Figure 7
© 2003 Audiovox Electronics Corp., 150 Marcus Blvd., Hauppauge, N.Y.