MODEL AVP-7380 Video Cassette Player and Built-in TV Tuner with Voice Status Annunciator Owner’s Instruction Manual 128-6163 1 of 24
THIS PAGE INTENTIONALLY LEFT BLANK 2 128-6163 2 of 24
Contents Thank You ................................................................................... 3 Safety Precautions ...................................................................... 3 Cautions and Warnings ............................................................. 5 Important Safeguards ................................................................. 6 Service ........................................................................................ 7 Features ................................
5. Cleaning - Unplug or turn off vehicle power to the Video Cassette Player before cleaning. Do not use liquid cleaners or aerosol cleaners. Use only a damp cloth for cleaning. 6. Attachments - Do not use attachments not recommended by the Video Cassette Player manufacturer as they may cause hazards. 7. Water and Moisture - Do not use this video product near water; for example, near a bath tub, kitchen sink, near a swimming pool or other wet locations. 8.
C. Cautions and Warnings 1. Cleaning Video Head Use only good quality VHS tapes and discard worn out tapes to prevent video head clogging. If the heads get dirty over a period of time during normal operation of the VCP, the picture will be snowy and the auto-tracking will not adjust the snow out of the picture. We recommend using cleaning cartridges sparingly to restore normal picture. 2.
. Cleaning Unit Made sure unit is unplugged from power source. Do not use liquid cleaners or aerosol cleaners. Use a cloth lightly dampened with water for cleaning the exterior of the set. 7. Power This unit should be operated only from the type of power source indicated on the marking label. Use only the supplied power cable matching this set to avoid electric hazards. When the unit is left unattended and unused for long periods of time, unplug it from the power source.
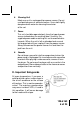
When moving the VCP from a cold place to heated place. Or the temperature of surroundings goes up due to vehicle heating switched on. Or moving the VCP suddenly from air conditioned room to a place of high temperature or humidity in summer may cause the dew indicator to appear on video monitor display. When the moisture condensation occurs inside of the VCP, NEVER insert the cassette into the cassette compartment. Remove the cassette, if loaded, by pressing the STOP/EJECT key.
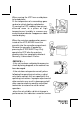
Servicing- Do not attempt to service the set yourself as opening or removing covers may expose you to dangerous voltage or other hazards. Refer all servicing to qualified service personnel. Replacement of Parts - When replacement of parts is required, be sure the service technician has used replacement parts specified by the manufacturer that have the same characteristics as the original parts. Unauthorized substitutions may result in fire, electric shock, or other hazards.
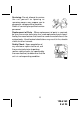
E. Features CONGRATULATIONS on your purchase of the Audiovox Model AVP-7380 Video Cassette Player. This unit is designed to satisfy all your VHS tape playback needs and with proper use and care, will offer many years of viewing enjoyment. The features of the Model AVP-7380 Video Cassette Player include: • DIGITAL AUTO TRACKING This VCP plays clear pictures without special operations. In the Auto Tracking Mode.
Features (Continued) • 3 MONITOR OUTPUT PORTS • FRONT AND REAR A/V INPUTS • BUILT-IN 69 CHANNEL TV TUNER • BUILT-IN VCP STATUS ANNUNCIATOR • FULL FUNCTION REMOTE F. Front Panel Operation POWER Button (1) When pressed this button alternately turns the VCP on and off. When power is turned on, the annunciator says “Power On”; the power indicator lights red and the other function buttons light green. When power is turned off, the annunciator says “Power Off”.
STOP/EJECT Button (4) When pressed once, the annunciator says “Stop” and the tape is stopped. When pressed again the tape is ejected. REW/Review Button (5) If this button is pressed in the PLAYBACK mode, the VCP enters the reverse picture search mode. If pressed in STOP mode, the annunciator says “Rewind” and the tape will rewind at high speed. PLAY Button (6) Press this key to play back a recorded tape. In the playback mode, the annunciator says “Play” and the playback indicator lights.
G. Rear Panel Connections DC 12V INPUT Jack (1) When using a DC power source, connect this jack to 12 Vdc TV ANT. Connector (2) Connect the TV antenna to this connector. MONITOR PORT 1 Connector (3) Connects to external Monitor for remote viewing purposes. MONITOR PORT 2 Connector (4) Connects to external monitor for remote viewing purposes. MONITOR PORT 3 Connector (5) Connects to external monitor for remote viewing purposes.
EXTERNAL SPEAKER 1. Voice High/Low/Off Switch 2. Plug of Speaker H. Remote Control Operation TV/VIDEO Button (1) Pressing this button selects from TV (external antenna connected to the Antenna jack), VIDEO 1 (internal VCP) or VIDEO 2 (front or rear A/V inputs). NOTE: Plugging into the front panel A/V inputs overides all other inputs. Keypad Buttons (2) These buttons provide direct access to TV channels. The channel number chosen will be displayed on the screen for 4 seconds. 1. TV/VIDEO Key 2.
ERASE/WRITE Button (4) This button is used to add or erase channels from memory. To erase a channel, use the keypad buttons to select the desired channel and press the ERASE/WRITE button; ERASED will appear on the screen. To add a channel to memory, use the keypad buttons to select the desired channel and press the ERASE/WRITE button; ADD will appear on the screen.
PLAY Button (11) Press this key to play back a recorded tape. In the playback mode, the annunciator says “Play” and the playback indicator lights. STOP Button (12) When pressed once, the annunciator says “Stop” and the tape is stopped. When pressed again the tape is ejected. I. Getting Started VCP TO VEHICLE CONNECTION • Connect the unit to a 12 Vdc source only. • The unit should be connected to the vehicle only after verifying the polarity of the Power Source (12 Vdc with negative ground).
• If the polarity is reversed, the unit will not operate. • Use of this VCP is not recommended in excessive heat. If the inside temperature of the vehicle is over 100 F, do not use the VCP. Allow the VCP to cool before use. MAKING VCP CONNECTIONS 1. Powering the Unit: Insert one end of the power connector into the 4 PIN DC 12V jack on the back of the unit; connect the other end to an ACC (switched) power source of the vehicle. 2.
the built-in voice annunciator to the Speaker. Use the LOW/ MED/HI switch to adjust the volume. 6. Control the Unit Remotely: Plug REMIR into this jack and extend the sensor of the REMIR to where the driver can control the unit conveniently with the Remote Control pointing to the sensor. 7. Secure the VCP to the vehicle using the supplied mounting brackets to ensure safe operation. J. Basic Operation 1. POWER Plug in the unit, and the power lamp will turn on.
b. Unloading the Cassette: If the VCP is in the playback mode, press the STOP/ EJECT button twice; the first press will stop tape play, and the second press will eject the tape. NOTE: The cassette will be ejected even if VCP power is off, as long as the unit is connected to the power source. 4. AUTO MEMORY Press the AUTO MEMORY key for searching and storing automatically the TV channels with on-screen display, the unit will start to play the first channel automatically. 5. SKIP SEARCH a.
8. ERASE/WRITE To erase a TV channel, press the ERASE/WRITE key until MANUAL MEMORY has “erase” displayed on the screen. To store a TV channel, press this key until MANUAL MEMORY has “add” displayed on the screen. 9. VCP AUTO START After plugging the DC power cord, push the cassette into the cassette compartment gently, the VCP automatically powers on if it was off, and goes into the play mode. Select VIDEO 1. 10. STOP/EJECT Press the STOP/EJECT key to stop tape; the voice annunciator will say “STOP”.
b. Press the REWIND key in the stop mode, the voice annunciator will say “REWIND” , and the tape will rewind at a very high speed without any picture or sound. The rewind indicator lamp will blink very quickly. 13. PLAYBACK Press the PLAYBACK key in the stop mode to playback a tape, and the voice annunciator will say “PLAY”. You can also press this key to release special operations such as the search mode. 14. FAST FORWARD/SCAN a.
K. Specifications System Remote Control Antenna Channels NTSC Infrared External Antenna Jack 2-6 (VHF low), 7-13 (VHF high), 14-69 (UHF) 1 track 12.7mm 33.
L.
36 MONTH LIMITED WARRANTY Applies to Audiovox Mobile Video Products AUDIOVOX ELECTRONICS CORP. (the Company) warrants to the original retail purchaser of this product that should this product or any part thereof, under normal use and conditions, be proven defective in material or workmanship within 36 months from the date of original purchase, such defect(s) will be repaired or replaced with reconditioned product (at the Company's option) without charge for parts and repair labor.
© 2001 Audiovox Electronics Corp.