WELCOME Thank you for choosing the up-to-date CDM8615VW, our new model, developed by top researchers to support the CDMA2000 1X system through Qualcomm-manufactured MSM6050 chips and CDMA technologies. This product allows for communication services and a GUI animation menu. T9 input mode makes it much easier to enter text, while VR (Voice Recognition) makes the CDM8615VW more user friendly. Other proven technologies include: Full graphic display of 9 text input lines and 1 icon line with variable font size.
TABLE OF CONTENTS MSG. GROUP ........................................................................................................42 ADD NEW MSG. GROUP ...................................................................................42 CHANGE MSG. GROUP NAME..........................................................................42 SEND TEXT MSG. GROUP .................................................................................43 ERASE MSG. GROUP...................................................
TABLE OF CONTENT REMIND ...............................................................................................................106 EDIT SIGNATURE................................................................................................106 DIRECT VIEW.......................................................................................................107 ENTRY MODE......................................................................................................107 BLOCK OR UNBLOCK ........
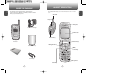
HANDSET DESCRIPTION INSIDE THE PACKAGE C H 1 This package should include all items pictured below. If any are missing or different, immediately contact the retailer where you purchased the phone. The CDM8615VW weighs 3.7oz. The dimensions are 1.83” x 4.48” x 0.97”.
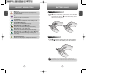
HANDSET DESCRIPTION HANDSET DESCRIPTION C H Display Indicators 1 Text & Graphic area Signal Strength - Current signal strength: the more lines, the stronger the signal. Soft Key Indicators Roaming Phone is out of home area. See page 9 for a list of icons. Shows the functions currently assigned to each soft key and displays some icons. Contacts Menu C H DISPLAY INDICATORS Service Indicator Indicates call is in progress, indicates the phone cannot receive a signal from the system.
HANDSET DESCRIPTION C H 1 GPS Icon Indicates the Location Service of your phone is disabled/enabled. 1X Phone is in the 1x service area. BATTERY USAGE BATTERY INSTALLATION 1 u Place the battery on the back of the handset and slide into place. v Push the battery down until it locks into place. Scratch Pad Displays when scratchpad is in use during a call. Unread Web Message Phone has new Web Alert message. Web Message + Text Message Phone has new Web Alert Msg and Text Msg.
BATTERY USAGE C H BATTERY CHARGING 1 POWER CONNECTION 1 Plug the AC Charger into a standard outlet. 2 Plug the other end of the AC Charger into the bottom of your phone. The battery must be installed onto the phone. BATTERY USAGE BATTERY TALK TIME C H The operating time is subject to your handset usage and configuration.
BATTERY HANDLING INFORMATION C H 1 DOs l Only use the battery and charger approved by the manufacturer. l Only use the battery for its original purpose. l Try to keep batteries in a temperature between 41ºF l l l l l (5ºC ) and 95ºF (35ºC). If the battery is stored in temperatures above or below the recommended range, give it time to warm up or cool down before using. Completely drain the battery before recharging. It may take one to four days to completely drain.
TURNING THE PHONE ON / OFF TURNING THE PHONE ON ACCESSING THE MENU Your phone can be customized via the menu. Each function can be accessed by scrolling with the Navigation Key or by pressing the number that corresponds with the menu item. 1 Press and hold until your “Power On” logo appears and the tone sounds. C H 2 • To select a logo, refer to page 61 for more details. (Settings>Display>Graphics) for more detail. • If “Password” appears on the display enter your 4-digit password to unlock your phone.
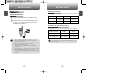
MENU SUMMARY 1. Phone Book C H 2. Recent Calls 2 MENU SUMMARY 6. Media Gallery 1. Find 2. Add New 3. Group 4. Speed Dial 5. Msg. Group 6. My Phone # 1. Images 1. Graphics 2. Animations 2. Tones 7. Settings 1. Sounds 1. Ringer Type 2. Volume 1. All Calls 2. Missed Calls 3. Received Calls 4. Dialed Calls 5. Call Timers 3. Alert 1. Last Call 2. All Calls 3. Home Calls 4. Roam Calls 5. Cumulative Calls 6. 1X Packet Counter 1. Received 2. Transmitted 3. Total 4. Roam Ringer 5. Tone Length 6.
MENU SUMMARY 6. System 7. Phone Info C H 8. Tools 1. Voice Memo 2 2. Voice Dial 3. Train Words 4. Voice Setting 9. Utilities 1. Schedule 2. Alarm 3. Memo Pad 1. Set Mode 2. Nam Setting 3. PRL ID 4. ERI Banner 1. S/W Version 2. H/W Version 3. Get It Now Version 1. Record 2. Play 3. Play Speaker 4. Erase All 1. Record 2. Play 3. Play Speaker 4. Erase All 1. Yes 2. No 3. Wake-Up 4. Undo Train All Set Active HFK Mode 1. Add New Plan 2. View Plan 1. Alarm 1 2. Alarm 2 3. Alarm 3 1. Add Memo 2.
BASIC FUNCTIONS BASIC FUNCTIONS SPEAKER PHONE ANSWERING A CALL The speaker phone feature lets you hear audio through the speaker and talk without holding the phone. 1 To answer a call, press any key except or C H 1 To activate the speaker phone in idle, answering or calling modes, press and hold . 2 2 The phone returns to normal (Speaker phone off) after ending a call or when the phone is turned off and back on. , l By pressing , you can select either “Any Key” or “Send Key” to answer a call.
BASIC FUNCTIONS CALLER ID FUNCTION ETIQUETTE Identifies caller by displaying their phone number. If the caller’s name and number are already stored in your phone book, they both will appear. C H BASIC FUNCTIONS Mutes key tones and activates the vibration mode to alert you of an incoming call or message. 1 To turn etiquette mode on/off, press and hold will be displayed to indicate etiquette mode is active and an audible tone sounds when etiquette mode is turned off.
DURING A CALL To display menu options during a call, press DURING A CALL [MENU]. MESSAGING Enables you to send a message (SMS) during a call. C H 1 Press MY PHONE # Displays your phone number. [MENU] 1 Press [MENU] . C H . VOICE PRIVACY 2 MUTE (UNMUTE) The caller cannot hear you or any sounds from your side but you can still hear them. 1 Press 2 Increases security during a call. [MENU] 1 Press [MENU] . . l To deactivate, press [MENU] .
MAKING AN EMERGENCY CALL The 911 feature puts the phone in the Emergency Call Mode when you dial the preprogrammed emergency number, 911. It also operates in the lock mode and out of the service area. 911 IN LOCK MODE C H 2 The 911 call service is available even in the lock mode. 1 Enter “911” then press . Chapter 3 2 The call connects. 3 The phone exits the Lock Mode for 5 minutes. MEMORY FUNCTION l When the call ends, the phone returns to the Lock Mode.
STORING A PHONE NUMBER The phone book stores up to 300 entries. 1 Enter phone # then press [SAVE]. 2 Choose “New Contact” or “Existing Contact”. Press [OK] to select. 3 The Phone # will appear above a list of icons. C H . 3 ENTERING LETTERS, NUMBERS & SYMBOLS The input mode (Alpha editor) will automatically be activated when necessary to enter letters and numbers.
ENTERING LETTERS, NUMBERS & SYMBOLS STANDARD INPUT MODE T9 INPUT MODE Use the digit keys to enter letters, numbers and characters. The T9 input mode incorporates a built-in-dictionary to determine a word based on the entered characters. A word can be entered more quickly by pressing a key once per character. 1 Enter letters using the key pad as follows: Key Pad C H 3 1 Time ENTERING LETTERS, NUMBERS & SYMBOLS Repetitions Repetitions Repetitions Repetitions 2 times 3 times 4 times 5 times 1 1 .
ENTERING LETTERS, NUMBERS & SYMBOLS NUMERIC MODE ONE-TOUCH/TWO-TOUCH DIALING Ideal for frequently dialed numbers, this feature allows phone book entries to be dialed via the keypad with only one or two key presses. Allows you to enter numbers. 1 Press ONE-TOUCH DIALING: 2 To enter a number, press a digit key. 1-9 : Press and hold the corresponding memory number for more than 1 second. [Abc] and scroll to the input mode to changes to “NUM (Numeric mode)”.
MEMO Chapter 4 C H MENU FUNCTION 3 C H 4 This chapter addresses accessing the menu and using its functions and features to customize your phone.
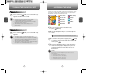
PHONE BOOK PHONE BOOK Stores up to 300 entries, each of which can be assigned to a group. Entries can be retrieved by name or group. ADD NEW Adds a new entry. FIND Retrieves an entry by name and calls by simply pressing . You can review all the entries stored in your phone book list or quickly find an entry by entering a name or its character string. 1 To add a new entry to the phone book, press [MENU] . 2 To enter a name or number, use the Navigation 1 Press [MENU] .
PHONE BOOK PHONE BOOK CHANGE GROUP NAME 1 Press SPEED DIAL [MENU] . 2 Select an existing group name that you have added with the Navigation Key. 3 To select “Rename”, press [MENU]. C H 4 1 Press [MENU] . 2 To assign a phone number to a location, select the location then press 4 Input a new group name. 5 To save it, press In idle mode, calls can be placed to numbers stored in speed dial by pressing & holding the location number on the key pad.
PHONE BOOK PHONE BOOK SEND TEXT MSG. GROUP MSG. GROUP Allows the user to group up to 10 phone number. The user can add, change, and delete Msg.Group. 1 Press ADD NEW MSG. GROUP [MENU] . 2 Select an existing group name with the 1 To add a new group, press [MENU] A maximum of five groups is allowed. 2 To select “Add Group”, press [MENU]. . Navigation Key. 3 To select “Send Text Msg.”, press [MENU]. 4 Input a “Message”, “Default CB#”, “Priority”, and “Insert Signature”.
PHONE BOOK RECENT CALLS In idle mode, you can access recent calls by pressing MY PHONE # [MENU] Displays information about the most recent incoming, outgoing and missed calls. . 2 To return to the previous page, press [OK]. 1 To see a list of the 60 most recent incoming, outgoing and missed calls, press [MENU] . If the number is already stored in your phone book, only the name appears. If the number is not stored, only the phone number appears. 2 To view details, press C H .
RECENT CALLS RECENT CALLS MISSED CALLS RECEIVED CALLS Displays information about the 20 most recently missed calls. Place a call to a missed call number by simply pressing . 1 To see a list of the 20 most recently missed calls, press [MENU] . If the number is already stored in your phone book, only the name appears. If the number is not stored, only the phone number appears. 2 To view missed call details, press [OK]. Call details include date, time and phone number.
RECENT CALLS RECENT CALLS DIALED CALLS CALL TIMERS Displays information about the 20 most recently dialed numbers. Place a call to a dialed call by simply pressing . 1 To see a list of the 20 most recently dialed numbers, press [MENU] . If the number is already stored in your phone book, only the name appears. If the number is not stored, only the phone number appears. 2 To view dialed call details, press Checks the usage time and manages your calls within the limit you set.
RECENT CALLS RECENT CALLS ROAM CALLS 1X PACKET COUNTER Displays usage time of roaming calls. 1 Press [MENU] Checks the log of all kilobyte data transmissions. . RECEIVED To show the received kilobyte usage on a user definable interval: 2 View the time of the following items: 1 Press l Voice Call l Data Call [MENU] . 2 To reset the counter, press [RESET]. To return to the previous page, press [OK]. 3 To reset the timer, press [RESET]. To return to the previous page, press [OK].
GET IT NOW GET IT NOW Your phone provides a unique feature -Get It Now- that enables you to download ringtones, wallpapers, games and more from your network to your phone. Please contact your service provider for the availability of these services. APPLYING MELODIES/WALLPAPERS Downloaded ringtones applies to several functions including the incoming call alert, new text message alert, alarm clock and scheduler alarm. Downloaded wallpapers apply to the standby mode.
MEDIA GALLERY MEDIA GALLERY IMAGES TONES GRAPHICS 1 Press [MENU] . This menu displays the list of downloaded still images. 1 Press Press [MENU] 2 Scroll to the saved voice memo you want to send . then press 2 Scroll through the captured pictures to display the picture you want to send then press [SEND]. 3 Enter your picture message. C H 4 [SEND]. [MENU] to select 1.Erase, 2.Erase All, 3.Change Title. 4 4.1 To send the pix message, press then select “Send” then press 4.
SETTINGS SETTINGS Customizes your phone and optimizes performance through a variety of settings. VOLUME Controls the Ringer, Key tone, Voice Call and Speaker Phone volume. SOUNDS RINGER Sets Ringer Type, Volume, Alert, Roam Ringer, Tone Length and Etiquette. RINGER TYPE 1 Press To select a ringer type for incoming calls: 1 Press [MENU] . 2 Select your desired ringer type. Left or Right key : Select “Ring Tones”, “Music Bells” or 4 [MENU] .
SETTINGS SETTINGS SPEAKER PHONE FADE To adjust speaker phone volume: Sounds an alert when entering an area where calls cannot be made due to weak signal strength. 1 Press [MENU] . 1 Press [MENU] . 2 Adjust the speaker phone volume using the Navigation Key. Level 1 - 5 (Min- 3 To save, press 2 Select “Off” or “On” with the Navigation Key then , Max- press ) [OK]. [OK] to save it. ON/OFF TONES Allows you to activate/deactivate the power on/off tones. ALERT 1 Press [MENU] .
SETTINGS SETTINGS ETIQUETTE DISPLAY To place the phone in Etiquette Mode so all phone sounds are muted: 1 Press [MENU] . 2 Select “On” or “Off” with the Navigation Key, then press [OK] to save it. l On : Etiquette Mode on. l Off : Etiquette Mode off. Allows you to customize the display. MENU STYLE To select a display menu style: 1 Press [MENU] . 2 Select “Fold”, “Grid” or “List” with the Navigation Key then press [OK] to save it.
SETTINGS SETTINGS POWER OFF 1 Press SCREEN SAVER [MENU] Sets the time of Screen Saver and selects the images to be displayed on the LCD. . 2 Select Default to choose a pre-installed display, or Downloads to choose a display you have downloaded to your phone. 1 Press [MENU] . 2 Select “Time Setting” or “Screen Saver” with the Navigation Key. 3 Select a display from the Animation and the Graphic list using the Navigation Key and press [SELECT] to save it. RECEIVED C H 4 1 Press [MENU] .
SETTINGS SETTINGS GREETING MESSAGE BACKLIGHT To input a personal greeting: 1 Press Backlights the display and key pad and activates dimming for easy viewing in dark places. [MENU] . 2 The msg field will be highlighted. Press the C H 4 Navigation Key left or right to choose between on and off. Press the Navigation Key down to move to the next field, font. Press the Navigation Key left or right to choose a font color. Press the Navigation Key down to move to the next field, Bg.
SETTINGS SETTINGS RECENT CALLS SECURITY Prevents unauthorized use of your phone. The following settings can be restricted: Blocks access to Recent Call List. 1 Press [MENU] then enter your password. PHONE LOCK Prevents the phone from being used without entering the password first. 1 Press [MENU] 2 Press 4 then select “Lock Now”, “Lock On Power Up” or “Unlock”. l Lock Now : Lock the phone now. l Lock On Power Up : Not locked, but it is automatically locked when power is recycled.
SETTINGS SETTINGS LONG DISTANCE SPECIAL #’S Restricts calling long distance numbers – the phone is limited to calling numbers within the area. Stores 3 phone numbers that can be called even in the lock mode. 1 Press [MENU] then enter your password. 2 Press then select “Allow” or “Restrict” with the Navigation Key. l Allow : Allows a long distance call. l Restrict : Restricts a long distance call. 1 Press then enter your password. 2 Press then select a location with the Navigation Key.
SETTINGS SETTINGS RESET PHONE OTHERS Resets phone to default settings. 1 Press [MENU] 2 Press . ANSWER OPTIONS then enter your password. CALL ANSWER To select an answer mode: 1 Press 3 Select “Yes” or “No” with the Navigation Key. Press [OK]. [MENU] . 2 Select “Any Key” or “Send Key” with the Navigation Key. When you select “Yes” and [OK], you will see “Reset Phone! this will reset to default settings” on the display. C H 4 To reset the phone, press [OK].
SETTINGS SETTINGS AUTO ANSWER LANGUAGE Automatically answers a call after a preset amount of time. Auto Answer only works when the phone is open. Selects the language in which letters are displayed on the screen. 1 Press [MENU] . 2 Select one of the following with the Navigation Key. l Off/5 Secs/10 Secs/18 Secs. 3 To save, press [MENU] . 2 Select either “English” or “Spanish” with the Navigation Key.
SETTINGS SETTINGS TTY MODE SYSTEM Your phone is able to operate with a TTY (Teletypewriter) device in both analog and digital modes. This feature is system dependent and may not be available in all areas. 1 Press [MENU] . 2 Select one of the following options (TTY Off / TTY+TALK / TTY+HEAR / TTY Full) with the Navigation Key then press [OK]. LOCATION C H 4 To determine whether or not the network system can detect your position: 1 Press [MENU] .
SETTINGS SETTINGS CHANGE NAM PHONE INFO. Changes the NAM used by the phone when you have multiple registrations. 1 Press [MENU] S/W VERSION . 2 Select “NAM1-VERIZON” or “NAM2-VERIZON” then press Displays the version of your phone: [OK] to save it. 1 Press [MENU] . 2 The software version appears. PRL ID 3 Press Displays the phone’s PRL (Preferred Roaming List). 1 Press C H [MENU] . 2 To return to the previous page, press H/W VERSION [OK]. 4 1 Press [MENU] .
UTILITIES UTILITIES SCHEDULE 4 Press [SAVE] to save it or return to the calendar. Sets an event and reminds you of that event. ADD NEW PLAN 1 Press [CLR] to 5 The date of the event will be marked on your [MENU] calendar. . VIEW PLAN 2 Move the Navigation Key left, right, up or down to choose a date in the calendar then press [OK]. 1 To view the Event List, press 3 C H The date field is highlighted. Press the Navigation Key down to set the alarm options.
UTILITIES UTILITIES DATE SETTING Use the keypad to change or enter the date for the alarm then press [OK]. If weekly is chosen for setting, date field becomes day of the week field. Once: Enter a date. Daily: Select a time. Weekly: To select “Monday”, “Tuesday”, “Wednesday”, “Thursday”, “Friday”, “Saturday”, “Sunday”. Monthly: Select 1 – 31. Off C H 4 TIME SETTING Use the keypad to set a time for the event and to select “AM” or “PM”, then press [OK].
UTILITIES UTILITIES CALCULATOR STOP WATCH Simultaneously times up to six different events. To operate the stop watch: To access the calculator: 1 Press [MENU] . 1 Press [MENU] . 2 Follow the instructions below to calculate 2 To measure a time period. 8*6 4-2.5= 9.5 C H 4 1. To start the stop watch, press [START]. 2. To pause it, press [STOP]. 3. To resume it, press . To reset it, press [RESET]. To return to the previous page, press [EXIT]. Input 8. Move the Navigation Key rightward.
MEMO Chapter 5 VOICE SERVICE C H 4 This chapter addresses Voice Service, an advanced feature that allows you to place calls using your voice. With Voice Memo (VM) you can record voice messages and set the Answering Machine.
VOICE TOOLS MENU VOICE TOOLS MENU VOICE MEMO VOICE DIAL Voice Memo allows you to record a reminder message that can be up to 60 seconds. To record a memo: 1 To start Tools menu, press 2 To enter a voice memo, press [MENU] . 3 1.1. To record a voice memo, press . Instructions will be displayed and you will hear “Please record at the tone”. C H 5 1 To start Voice Tools menu, press 2 To enter a voice dial, press . 1.2. To stop recording a memo, press or [PAUSE/RESUME].
VOICE TOOLS MENU VOICE TOOLS MENU WAKE-UP TRAIN WORDS Train allows you to use Control words to make a call without using the keypad. Use to train or untrain the Voice Recognition with the control word, “Wake-Up”. 1 Press YES Use to train or untrain the Voice Recognition with the control word, “Yes”. 1 Press [MENU] . 2 “Please listen closely to hear instructions” will be displayed and you will hear “Now training control words. Please say the word yes”. 3 Say “Yes”. You will hear “Again”.
VOICE TOOLS MENU VOICE RECOGNITION MODE Voice Recognition (VR) enables you to place calls using your voice and to record voice memos. Only phone numbers with saved voice tags can be called in VR mode. See page 87 for more on creating voice tags. VOICE SETTING SET ACTIVE Allows the user to activate or deactivate voice dial service. 1 Press [MENU] . 2 Select “Active Flip” or “Send Key” by pressing the Navigation Key left or right.
MEMO Chapter 6 VOICE MAIL AND TXT MESSAGING This chapter addresses Voice Mail and TXT Messaging functions including: C H 5 WHEN A NEW MESSAGE ARRIVES VOICE MAIL NEW TXT MSG INBOX C H OUTBOX 6 WEB ALERTS SAVED QUICK TEXT ERASE ALL SETTINGS 92 93
WHEN A NEW MESSAGE ARRIVES NEW TXT MSG To send a new message: 1 The following display appears 1 Press when a new message arrives. [MENU] or . 2 Under “Send To”, input the phone number and press 2 To display the message, press [OK]. By pressing [MENU], you can choose from the following: 1. Find : Search the phone number which is stored in the phone book. 2. Save : Stores the phone number the message was sent to. 3. Msg. Group : Select all the phone numbers in a group. [READ].
INBOX INBOX The Inbox manages received TXT messages. To access: 1 Press [MENU] or . FORWARD 1 To forward the TXT message: : Urgent New Msg (not read) 2 Input the phone number of the person you are : Urgent Read Msg sending the message, then press : New Msg (not read) [OK]. 3 Input any text message to go along with the : Old Msg (already read) forwarded message, then press : Lock (already read and locked) [OK]. SAVE MEDIA 2 Select a message then press [OK]. The message is displayed.
OUTBOX OUTBOX Manages sent text messages or messages waiting to be sent. CHECKING SENT TXT MESSAGES 1 Press [MENU] SAVE TO CONTACT 1 Select to save number to contacts. or . SAVE TO SAVED : Auto resend : Delivered 1 Select to save the TXT message to your phone. : Fail : Not Sent LOCK & UNLOCK : Read : Sent 1 To lock or unlock the TXT message: 2 2.1. Select a message, then press [OK]. The text message is displayed. 2.2.
WEB ALERTS SAVED WEB ALERTS SAVED Manages saved messages from the Inbox/Outbox. 1 Press [MENU] or . 1 Press 2 To select GoTo, press . To select Erase Message, press . 3 The Web Alerts message will be displayed. [ V ] : Read Message. [ ] : Unread Message. [ ] : Displays the remaining text. GoTo : Connecting to Selected Site. [MENU] or . 2 2.1. Select a TXT message then press [OK]. The TXT message is displayed. 2.2. To erase message, press 3 Press [ERASE]. [MENU].
QUICK TEXT ERASE ALL QUICK TEXT ERASE MESSAGES To edit the Quick Text message you have saved: 1 Press 1 Press [MENU] or [MENU] or . . 2 1. To erase all the inbox messages, press 2 2.1. Select a message from the list. Press Old Inbox : To erase all messages already read. (However, the locked Message(s) will not be deleted). Entire Inbox : To erase all messages. [MENU]. 2.2. To add a new Quick Text message, press [ADD NEW]. To edit the Quick Text message you have selected, press [EDIT]. . 2.
SETTINGS SETTINGS Manages messaging features through various features. DEFAULT CALLBACK Edits a default callback number so that the recipient can callback or reply. SAVE SENT MSG 1 Press [MENU] or 1 Press . or . 2 Press . Input a callback number, then press 2 Press . Select either “Off”, “On” or “Prompt” with the Navigation Key. 3 Press [MENU] [OK]. You can look it up from the phone book by pressing [FIND]. [OK].
SETTINGS SETTINGS REMIND 1 Press DIRECT VIEW [MENU] or . 2 Press . Select “On” or “Off” with the Navigation Key. 3 Press If the Direct View is set to on, the user will be able to view the message by pressing the read key. If the Direct View is set to off, the user can view the message by entering SMS Menu-> Inbox. 1 Press [MENU] or . 2 Press . Select “On” or “Off” with the Navigation Key. [OK]. ON : Set to read msg without entering inbox in SMS menu.
SETTINGS BLOCK OR UNBLOCK 1 Press [MENU] or . 2 Then press . Select “Block”, “Unblock” or “View List of Blocked Addresses” with the Navigation Key. BLOCK : Enter the address to block. UNBLOCK : Enter the address to remove from block. VIEW LIST OF BLOCKED ADDRESSES : Display the blocked list on LCD. 3 Press Chapter 7 SAFETY AND WARRANTY [OK]. This chapter addresses the safety guidelines and precautions to follow when operating your phone.
SAFETY INFORMATION FOR WIRELESS HANDHELD PHONES Read This Information Before Using Your Handheld Portable Cellular Telephone EXPOSURE TO RADIO FREQUENCY SIGNALS SAFETY INFORMATION FOR WIRELESS HANDHELD PHONES DRIVING SAFETY Talking on the phone while driving is extremely dangerous and is illegal in some states. Remember, safety comes first. Check the laws and regulations on the use of phones in the areas where you drive. Always obey them.
SAFETY INFORMATION FOR WIRELESS HANDHELD PHONES ELECTRONIC DEVICES Most modern electronic equipment is shielded from RF energy. However, certain electronic equipment may not be shielded against the RF signals from your wireless phone. PACEMAKERS The Health Industry Manufacturers Association recommends that a minimum separation of six (6”) inches be maintained between a handheld wireless phone and a pacemaker to avoid potential interference with the pacemaker.
SAFETY INFORMATION FOR WIRELESS HANDHELD PHONES PRECAUTIONS SAFETY INFORMATION FOR FCC RF EXPOSURE WARNING! Read this Information before using Your Handheld Portable Telephone is a high quality piece of equipment. Before operating, read all instructions and cautionary markings on (1) AC Adaptor (2) Battery and (3) Product Using Battery. DO NOT use this equipment in an extreme environment where high temperature or high humidity exists. DO NOT abuse the equipment. Avoid striking, shaking or shocking.
SAR INFORMATION THIS MODEL PHONE MEETS THE GOVERNMENT’S REQUIREMENTS FOR EXPOSURE TO RADIO WAVES. Your wireless phone is a radio transmitter and receiver. It is designed and manufactured not to exceed the emission limits for exposure to radiofrequency (RF) energy set by the Federal Communications Commission of the U.S. Government. These limits are part of comprehensive guidelines and establish permitted levels of RF energy for the general population.
FDA CONSUMER UPDATE U.S. Food and Drug Administration -Center for Devices and Radiological Health Consumer Update on Wireless Phones 1. Do wireless phones pose a health hazard? The available scientific evidence does not show that any health problems are associated with using wireless phones. There is no proof, however, that wireless phones are absolutely safe. Wireless phones emit low levels of radiofrequency energy (RF) in the microwave range while being used.
FDA CONSUMER UPDATE FDA CONSUMER UPDATE The Project has also helped develop a series of public information documents on EMF issues. FDA and the Cellular Telecommunications & Internet Asso-ciation (CTIA) have a formal Cooperative Research and De-velopment Agreement (CRADA) to do research on wireless phone safety. FDA provides the scientific oversight, obtaining input from experts in government, industry, and academic organizations.
PROTECT YOUR WARRANTY 12 MONTH LIMITED WARRANTY Read your Warranty carefully, with the special consideration to paragraph seven of the Limited Warranty for your unit. Audiovox Communications Corp.
12 MONTH LIMITED WARRANTY MEMO In addition, for reference to an authorized Warranty station in your area, you may telephone in the United States (800) 229-1235, and in Canada (800) 465-9672 (in Ontario call 905-712-9299). THE EXTENT OF THE COMPANY’S LIABILITY UNDER THIS WARRANTY IS LIMITED TO THE REPAIR OR REPLACEMENT PROVIDED ABOVE AND, IN NO EVENT, SHALL THE COMPANY’S LAIBILITY EXCEED THE PURCHASE PRICE PAID BY PURCHASER FOR THE PRODUCT.
Guía del usuario CDM8615VW
BIENVENIDO Gracias por preferir el CDM-8615 actualizado, nuestro nuevo modelo desarrollado por investigadores de alto nivel como apoyo del sistema CDMA2000 1X mediante chips MSM6050 fabricados por Qualcomm y tecnologías CDMA. Este producto permite servicios de comunicación y un menú de animación GUI (Interfaz gráfica para el usuario). El modo de entrada T9 facilita mucho el ingreso de texto, mientras que el VR (Reconocimiento de Voz) hace que el CDM-8615 sea más fácil de usar.
TABLA DE CONTENIDO GRUPO DE MENSAJES ......................................................................................................................42 AGREGAR NUEVO GRUPO DE MENSAJES..................................................................................42 CAMBIAR NOMBRE DE GRUPO DE MENSAJES.........................................................................42 ENVIAR MENSAJE DE TEXTO GRUPO..........................................................................................
TABLA DE CONTENIDO RECORDATORIO................................................................................................................................106 EDITAR FIRMA ...................................................................................................................................106 VISTA DIRECTA..................................................................................................................................107 MODO DE ENTRADA ......................................
DESCRIPCIÓN DEL TELÉFONO DENTRO DEL PAQUETE C H 1 Este paquete debe incluir todos los elementos representados a continuación. Si cualquiera de ellos falta o es diferente, comuníquese de inmediato con el minorista donde compró el teléfono. El CDM-8615 pesa 3,7 onzas (105 grs.). Las dimensiones son 1,83” x 4,48” x 0,97” (4,6 cm x 9,0 cm x 2,3 cm).
DESCRIPCIÓN DEL TELÉFONO C H Indicadores de la pantalla Vea la página 9 para obtener una lista de iconos. 1 Menú DESCRIPCIÓN DEL TELÉFONO C H INDICADORES DE LA PANTALLA Área de texto y gráficos Potencia de la señal - Potencia de la señal actual: mientras más líneas, más potente será la señal. Indicadores de las teclas programables Roaming El teléfono se encuentra fuera del área local. Indican las funciones actualmente asignadas a cada tecla programable y muestra algunos iconos.
DESCRIPCIÓN DEL TELÉFONO C H 1 Icono GPS Indica que el servicio de ubicación de su teléfono está desactivado/activado. 1X El teléfono se encuentra en el área de servicio 1x. USO DE LA BATERÍA INSTALACIÓN DE LA BATERÍA 1 u Coloque la batería en la parte posterior del teléfono y deslícela en su lugar. v Presione hacia abajo la batería hasta que se fije en su lugar. Bloc de apuntes Aparece cuando se usa el bloc de apuntes durante una llamada.
USO DE LA BATERÍA C H 1 CARGA DE LA BATERÍA CONEXIÓN ELÉCTRICA 1 Conecte el cargador de CA a un tomacorriente estándar. 2 Conecte el otro extremo del cargador de CA a la parte inferior de su teléfono. La batería debe estar instalada en el teléfono. USO DE LA BATERÍA PCS Y LOS TIEMPOS DE LA BATERÍA DE 1X C H El tiempo de funcionamiento depende del uso y configuración de su teléfono.
INFORMACIÓN SOBRE MANIPULACIÓN DE LA BATERÍA C H 1 LO QUE SE DEBE HACER l Sólo use la batería y el cargador aprobados por el fabricante. l Sólo use la batería para su propósito original. l Trate de mantener las baterías a una temperatura entre 41ºF (5ºC ) y C H 95ºF (35ºC). l Si la batería se guarda a temperaturas sobre o bajo el margen l l l l recomendado, espere un tiempo para que se caliente o enfríe antes de usarla. Espere a que la batería se agote por completo antes de recargarla.
ENCENDIDO/APAGADO DEL TELÉFONO ACCESO AL MENÚ Su teléfono se puede personalizar a través del menú. Se puede acceder a cada función desplazándose con la tecla de navegación o presionando el número que corresponde al elemento de menú. ENCENDIDO DEL TELÉFONO 1 Mantenga presionada la tecla , hasta que aparezca el logotipo “Power On” (“Encendido”) y suene el tono. C H 2 • Para seleccionar un logotipo, consulte la página 61 para obtener más detalles.
RESUMEN DEL MENÚ 1. Directorio telefónico C H 2. Llamadas recientes 2 6. Galería de medios 1. Buscar 2. Agregar nuevo 3. Grupo 4. Marcado rápido 5. Grupo de mensajes 6. Mi número de teléfono 5. Web móvil 1. Conectar al Web 1. Tipo de timbre 3. Alerta 1. Recibida 2. Transmitida 3. Total 3. Guardado 1. Guardar mensaje enviado 2. Borrado automático 3. Devolución de llamada predeterminada 4. Editar devolución de llamada de voz 5. Recordatorio 6. Editar firma 7. Vista directa 8. Modo de entrada 9.
RESUMEN DEL MENÚ 6. Sistema 3. ID de Lista de Roaming Preferida 4. Título ERI 7. Información sobre el 1. Versión de software 2. Versión de hardware teléfono 3. Versión de Get It Now C H 2 1. Definir modo 2. Configuración NAM 8. Herramientas 9. Utilitarios 1. Grabar 2. Reproducir 3. Reproducir altavoz 4. Borrar todo 1. Grabar 2. Marcado de voz 2. Reproducir 3. Reproducir altavoz 4. Borrar todo 1. Sí 3. Entrenar palabras 2. No 3. Despertar 4. Deshacer entrenar todo 4.
FUNCIONES BÁSICAS FUNCIONES BÁSICAS TELÉFONO DE ALTAVOZ CONTESTACIÓN DE UNA LLAMADA La función de teléfono de altavoz le permite escuchar audio a través del altavoz y hablar sin sostener el teléfono. 1 Para contestar una llamada, presione cualquier tecla excepto , C H 1 Para activar el teléfono de altavoz en los modos de reposo, contestación o llamada, mantenga presionada la tecla .
FUNCIONES BÁSICAS FUNCIÓN DE IDENTIFICACIÓN DE LLAMADA Identifica a la persona que llama indicando su número de teléfono. Si el nombre y el número de la persona que llama ya están almacenados en el directorio telefónico, aparecerán ambos. C H FUNCIONES BÁSICAS ETIQUETA Silencia los tonos de las teclas y activa el modo de vibración para avisarle de una llamada o mensaje entrantes. 1 Para activar/desactivar el modo de etiqueta, mantenga La identificación de llamada se almacena en el historial de llamadas.
DURANTE UNA LLAMADA Para ver las opciones de menú durante una llamada, presione [MENÚ]. MENSAJERÍA 1 Presione MI NÚMERO DE TELÉFONO Muestra su número telefónico. Le permite enviar un mensaje (SMS) (Servicio de mensajes cortos) durante una llamada. C H DURANTE UNA LLAMADA [MENÚ] 1 Presione [MENÚ] . C H . PRIVACIDAD DE VOZ 2 SILENCIO (MICRÓFONO ACTIVO) La persona que llama no puede escucharlo a usted ni ningún sonido de su lado, pero usted aún puede oírla.
REALIZACIÓN DE LLAMADAS DE EMERGENCIA La función 911 coloca el teléfono en el Modo de llamada de emergencia cuando usted marca el número de emergencia previamente programado, 911. También funciona en el modo de bloqueo y fuera del área de servicio. 911 EN MODO DE BLOQUEO C H 2 El servicio de llamadas al 911 está disponible incluso en el modo de bloqueo. 1 Ingrese “911” y luego presione . Capítulo 3 2 Se conectará la llamada. 3 El teléfono saldrá del Modo de bloqueo por 5 minutos.
ALMACENAMIENTO DE UN NÚMERO DE TELÉFONO El directorio telefónico almacena hasta 300 entradas. 1 Ingrese el número de teléfono y luego presione [GUARDAR]. 2 Seleccione “New Contact” (Nuevo contacto) o “Existing Contact” (Contacto existente). Presione [OK] para seleccionar. INGRESO DE LETRAS, NÚMEROS Y SÍMBOLOS El modo de entrada (Alpha editor) se activará automáticamente cuando sea necesario ingresar letras y números.
INGRESO DE LETRAS, NÚMEROS Y SÍMBOLOS MODO DE ENTRADA ESTÁNDAR MODO DE ENTRADA T9 Use las teclas de dígitos para ingresar letras, números y caracteres. El modo de entrada T9 incluye un diccionario incorporado para determinar una palabra basándose en los caracteres ingresados. Se puede ingresar una palabra con mayor rapidez presionando una tecla una vez por cada carácter.
INGRESO DE LETRAS, NÚMEROS Y SÍMBOLOS MODO NUMÉRICO MARCADO DE UNA TECLA/DOS TECLAS Le permite ingresar números. 1 Presione [Abc] y desplácese hasta que el modo de entrada para cambiar a “NUM (Modo numérico)”. 2 Para ingresar un número, presione una tecla de dígito.
MEMORANDO Capítulo 4 C H FUNCIONES DE MENÚ 3 C H 4 En este capítulo se aborda el acceso al menú y el uso de sus funciones y características para personalizar su teléfono.
DIRECTORIO TELEFÓNICO DIRECTORIO TELEFÓNICO Almacena hasta 300 entradas, cada una de las cuales se puede asignar a un grupo. Las entradas se pueden recuperar por nombre o grupo. AGREGAR NUEVA Agrega una nueva entrada. BUSCAR Recupera una entrada por nombre y llama simplemente presionando . Puede revisar todas las entradas almacenadas en la lista de su directorio telefónico o buscar una entrada rápidamente ingresando un nombre o su cadena de caracteres.
DIRECTORIO TELEFÓNICO CAMBIAR NOMBRE DE GRUPO 1 Presione MARCADO RÁPIDO [MENÚ] . 2 Seleccione un nombre de grupo existente que haya agregado, con la tecla de navegación. [MENÚ]. 4 Ingrese un nuevo nombre de grupo. C H 4 En modo de reposo, se pueden realizar llamadas a los números almacenados en marcado rápido manteniendo presionado el número de ubicación en el teclado. Para un número de ubicación de 2 dígitos, presione el primer número y luego presione y mantenga presionado el segundo número.
DIRECTORIO TELEFÓNICO DIRECTORIO TELEFÓNICO ENVIAR MENSAJE DE TEXTO GRUPO GRUPO DE MENSAJES Permite al usuario agrupar hasta 10 números de teléfono. El usuario puede agregar, cambiar y eliminar Grupos de mensajes. 1 Presione [MENÚ] . AGREGAR NUEVO GRUPO DE MENSAJES 2 Seleccione un nombre de grupo existente con la tecla de 1 Para agregar un nuevo grupo, presione [MENÚ] . navegación. Se admite un máximo de cinco grupos. 3 Para seleccionar “Send Text Msg.
DIRECTORIO TELEFÓNICO En modo de reposo, puede acceder a las llamadas recientes presionando MI NÚMERO DE TELÉFONO [MENÚ] [MENÚ] . TODAS LAS LLAMADAS Para ver su número de teléfono y proveedor de servicio: 1 Presione LLAMADAS RECIENTES Muestra información acerca de las llamadas entrantes, salientes y perdidas más recientes. . 1 Para ver una lista de las 60 llamadas entrantes, salientes y perdidas 2 Para volver a la página anterior, presione [OK]. más recientes, presione [MENÚ] .
LLAMADAS RECIENTES LLAMADAS RECIENTES LLAMADAS PERDIDAS LLAMADAS RECIBIDAS Muestra información acerca de las 20 llamadas perdidas más recientemente. Realice una llamada a un número de llamada perdida simplemente presionando . recientemente, presione [MENÚ] . Si el número ya está almacenado en el directorio telefónico, sólo aparecerá el nombre. Si el número no está almacenado, sólo aparecerá el número de teléfono. Los detalles de las llamadas incluyen fecha, hora y número de teléfono. [OK].
LLAMADAS RECIENTES LLAMADAS RECIENTES LLAMADAS MARCADAS TEMPORIZADORES DE LLAMADAS Controlan el tiempo de uso y administran sus llamadas dentro de los límites que usted establezca. Los cinco temporizadores incluyen: Muestra información acerca de los 20 números marcados más recientemente. Realice una llamada al número de una llamada marcada simplemente presionando . ÚLTIMA LLAMADA 1 Para ver una lista de los 20 números marcados más recientemente, presione [MENÚ] .
LLAMADAS RECIENTES LLAMADAS DE ROAMING CONTADOR DE PAQUETES DE 1X Muestra el tiempo de uso de las llamadas de roaming. 1 Presione LLAMADAS RECIENTES [MENÚ] Controla el registro de todas las transmisiones de datos en kilobytes. . RECIBIDA Para mostrar el uso en kilobytes recibidos en un intervalo definible por el usuario: 2 Vea el tiempo de los siguientes elementos: 1 Presione l Llamada de voz l Llamada de datos [MENÚ] .
GET IT NOW GET IT NOW Su teléfono proporciona una función única – Get It Now (Obtener ahora) – que le permite descargar tonos de timbre con melodías, papeles tapiz, juegos y más, desde la red hasta su teléfono. Comuníquese con su proveedor de servicio para obtener información sobre la disponibilidad de estos servicios. INICIAR GET IT NOW 1 Para iniciar “Get It Now de espera, presione ” (“Obtener ahora”) desde el modo [MENÚ] o .
GALERÍA DE MEDIOS GALERÍA DE MEDIOS IMÁGENES TONOS GRÁFICOS 1 Presione [MENÚ] . Este menú muestra la lista de imágenes fijas descargadas. 1 Presione [MENÚ] 2 Desplácese hasta el memorando de voz guardado que desee . enviar y luego presione Presione [MENÚ] para seleccionar 1. Borrar, 2. Borrar todo, 3. Cambiar título. 2 Desplácese a través de las fotografías captadas para ver la que desee enviar y luego presione [ENVIAR]. 3 Ingrese su mensaje de fotografía. C H 4 4.
GALERÍA DE MEDIOS Personaliza su teléfono y optimiza el rendimiento mediante diversas configuraciones. SONIDOS CONFIGURACIÓN VOLUMEN Controla el timbre, tono de tecla, llamada de voz y volumen del teléfono de altavoz. Establece el tipo de timbre, volumen, alerta, timbre de roaming, duración de tono y etiqueta. TIMBRE TIPO DE TIMBRE Controla el volumen del Timbre y le avisa sobre las llamadas entrantes en los modos indicados en el cuadro gris a continuación.
CONFIGURACIÓN CONFIGURACIÓN TELÉFONO DE ALTAVOZ DESVANECER Para ajustar el volumen del teléfono de altavoz: Hace sonar una alerta al ingresar a un área donde no se pueden realizar llamadas debido a la potencia de señal débil. 1 Presione [MENÚ] . 1 Presione [MENÚ] . 2 Ajuste el volumen del teléfono altavoz con la tecla de navegación. 2 Seleccione “Off” (“Desactivado”) o bien, “On” (“Activado”) con la Nivel 1- 5 (Min- , Max- 3 Para confirmar, presione tecla de navegación y presione ) [OK].
CONFIGURACIÓN ETIQUETA PANTALLA Para colocar el teléfono en Modo de etiqueta, de modo que se silencien todos los sonidos de éste: 1 Presione CONFIGURACIÓN [MENÚ] Le permite personalizar la pantalla. ESTILO DE MENÚ . Para seleccionar un estilo de menú de pantalla: 2 Seleccione “Off” (“Desactivado”) o bien, “On” (“Activado”) con la tecla de navegación y presione [OK] para guardarlo. l ACTIVADO: Modo de etiqueta activado. l DESACTIVADO: Modo de etiqueta desactivado. 1 Presione [MENÚ] .
CONFIGURACIÓN CONFIGURACIÓN APAGADO 1 Presione PROTECTOR DE PANTALLA [MENÚ] Establece el tiempo del Protector de pantalla y selecciona las imágenes que aparecerán en la pantalla de LCD. . 2 Seleccione Predeterminada, para elegir una pantalla preinstalada o Descargas, para elegir una pantalla que usted haya descargado a su teléfono. 1 Presione [MENÚ] . 2 Seleccione “Time Setting” (“Configuración de tiempo”) o “Screen Saver” (“Protector de pantalla”) con la tecla de navegación.
CONFIGURACIÓN MENSAJE DE SALUDO LUZ DE FONDO Para ingresar un saludo personal: Ilumina el fondo de pantalla, el teclado y activa la atenuación para facilitar la visibilidad en los lugares oscuros. 1 Presione [MENÚ] . 2 Aparecerá el campo de mensajes resaltado. Presione la tecla de C H 4 CONFIGURACIÓN navegación hacia la izquierda o derecha para elegir entre activado o desactivado. Presione la tecla de navegación hacia abajo para desplazarse al siguiente campo, fuente.
CONFIGURACIÓN LLAMADAS RECIENTES SEGURIDAD Evita el uso no autorizado de su teléfono. Se pueden restringir las siguientes configuraciones: Evita que se use el teléfono sin ingresar primero la contraseña. [MENÚ] y luego ingrese su contraseña. La contraseña predeterminada corresponde a los últimos 4 dígitos de su número telefónico. 2 Presione C H 4 y seleccione “Lock Now” (“Bloquear ahora”), “Lock On Power Up” (“Bloquear al encender”) o “Unlock” (“Desbloquear”). l Lock Now: Bloquear el teléfono ahora.
CONFIGURACIÓN CONFIGURACIÓN LARGA DISTANCIA NÚMEROS ESPECIALES Restringe las llamadas a los números de larga distancia; el teléfono está limitado a llamar a números dentro del área. Almacena 3 números de teléfono a los cuales se puede llamar incluso en modo de bloqueo. y luego ingrese su contraseña. 1 Presione [MENÚ] y seleccione “Allow” (“Permitir”) o “Restrict” (“Restringir”) con la tecla de navegación.
CONFIGURACIÓN CONFIGURACIÓN RESTABLECER TELÉFONO OTROS Restablece el teléfono en la configuración predeterminada. 1 Presione [MENÚ] 2 Presione . OPCIONES DE CONTESTACIÓN y luego ingrese su contraseña. CONTESTACIÓN DE LLAMADAS Para seleccionar un modo de contestación: 1 Presione 3 Seleccione “Yes” (“Sí”) o “No” con la tecla de navegación. Presione [OK]. Cuando seleccione “Yes” (Sí), verá en la pantalla “Reset Phone! this will reset to default settings.
CONFIGURACIÓN CONFIGURACIÓN CONTESTACIÓN AUTOMÁTICA IDIOMA Contesta automáticamente una llamada después de una cantidad preestablecida de tiempo. La Contestación automática sólo funciona cuando el teléfono está abierto. Selecciona el idioma en que aparecerán las letras en pantalla. 1 Presione [MENÚ] . 2 Seleccione una de las siguientes opciones con la tecla de navegación. l Desactivado/5 segs/10 segs/18 segs. 3 Para guardar, presione [MENÚ] .
CONFIGURACIÓN MODO DE TTY SISTEMA Su teléfono puede funcionar con un dispositivo TTY (Teletipo) en los modos analógico y digital. Esta función depende del sistema y podría no estar disponible en todas las áreas. 1 Presione CONFIGURACIÓN [MENÚ] . 2 Seleccione una de las siguientes opciones (TTY desactivado/ TTY+conversación/TTY+escuchar/TTY completo) con la tecla de navegación y luego presione [OK]. DEFINIR MODO Selecciona el sistema preferido. 1 Presione [MENÚ] .
CONFIGURACIÓN CONFIGURACIÓN CAMBIAR NAM INFORMACIÓN SOBRE EL TELÉFONO Cambia el NAM usado por el teléfono cuando usted tiene varios registros. 1 Presione [MENÚ] . VERSIÓN DE SOFTWARE 2 Seleccione “NAM1-VERIZON” o “NAM2-VERIZON” y luego presione [OK] para guardarlo. Muestra la PRL del teléfono (Lista de roaming preferida). 1 C H [MENÚ] 1 Presione [MENÚ] . 2 Aparece la versión de software. ID DE LISTA DE ROAMING PREFERIDA Presione Muestra la versión de su teléfono: 3 Presione [OK]. .
UTILITARIOS UTILITARIOS CALENDARIO 4 Presione [GUARDAR] para guardarlo o volver al calendario. Establece un evento y le recuerda ese evento. AGREGAR NUEVO PLAN 1 Presione 5 La fecha del evento se marcará en su calendario. [MENÚ] . VER PLAN 2 Mueva la tecla de navegación hacia la izquierda, derecha, arriba o abajo para seleccionar una fecha en el calendario y presione [OK]. 3 Se resalta el campo de fecha. Presione la tecla de navegación hacia abajo para establecer las opciones de alarma.
UTILITARIOS UTILITARIOS CONFIGURACIÓN DE FECHA Use el teclado para cambiar o ingresar la fecha de la alarma y presione [OK]. Si se elige la configuración semanal, el campo de fecha pasa a ser un día del campo de semana. C H 4 AGREGAR MEMORANDO Para redactar un memorando (hay un límite de 80 letras): Única: Ingrese una fecha. Diaria: Seleccione una hora. Semanal: Para seleccionar “Lunes”, “Martes”, “Miércoles”, “Jueves”, “Viernes”, “Sábado”, “Domingo”.
UTILITARIOS UTILITARIOS CALCULADORA CRONÓMETRO En forma simultánea, cronometra hasta seis eventos diferentes. Para usar el cronómetro: Para acceder a la calculadora: 1 Presione [MENÚ] 1 Presione . 2 Siga las instrucciones para calcular 8*6÷4-2.5= 9.5 C H 4 : -, : /, : +, 3 Para restablecer, presione : ., 1. Para iniciar el cronómetro, presione [INICIAR]. 2. Para ponerlo en pausa, presione [DETENER]. 3. Para reanudarlo, presione . Para restablecerlo, presione [RESTABLECER].
MEMORANDO Capítulo 5 SERVICIO DE VOZ C H 4 En este capítulo se trata el Servicio de voz, una función avanzada que le permite realizar llamadas usando su voz. Con el Memorando de voz (VM) puede grabar mensajes de voz y configurar la Máquina contestadora.
MENÚ DE HERRAMIENTAS DE VOZ MENÚ DE HERRAMIENTAS DE VOZ MEMORANDO DE VOZ MARCADO DE VOZ El Marcado de voz le permite llamar a una persona simplemente diciendo su nombre. Para acceder a Marcado de voz: El Memorando de voz le permite grabar un mensaje recordatorio de hasta 60 segundos de duración. Para grabar un memorando: 1 Para iniciar el menú Herramientas, presione [MENÚ] 2 Para ingresar un memorando de voz, presione . . 3 1.1. Para grabar un memorando de voz, presione .
MENÚ DE HERRAMIENTAS DE VOZ MENÚ DE HERRAMIENTAS DE VOZ DESPERTAR ENTRENAR PALABRAS Entrenar le permite usar palabras de Control para realizar una llamada sin utilizar el teclado. SÍ Úsela para entrenar o anular el entrenamiento del Reconocimiento de voz con la palabra de control, “Wake-up” (“Despertar”). 1 Presione Úsela para entrenar o anular el entrenamiento del Reconocimiento de voz con la palabra de control, “Yes” (“Sí”). 1 Presione [MENÚ] .
MENÚ DE HERRAMIENTAS DE VOZ MODO DE RECONOCIMIENTO DE VOZ El Reconocimiento de voz (VR) le permite realizar llamadas usando su voz y grabar memorandos de voz. Sólo se puede llamar a los números de teléfono con etiquetas de voz guardadas en modo VR. Vea la página 87 para obtener más detalles sobre etiquetas voz. CONFIGURACIÓN DE VOZ DEFINIR ACTIVO Permite al usuario activar o desactivar el servicio de marcado de voz. 1 Presione [MENÚ] .
MEMORANDO Capítulo 6 CORREO DE VOZ Y MENSAJERÍA TXT Este capítulo aborda las funciones de Correo de voz y de Mensajería TXT, entre las que se incluyen: C H CUANDO LLEGA UN MENSAJE NUEVO 5 CORREO DE VOZ NUEVO MENSAJE TXT BANDEJA DE ENTRADA BANDEJA DE SALIDA C H ALERTAS DE WEB 6 GUARDADO TEXTO RÁPIDO BORRAR TODO CONFIGURACIÓN 92 93
CUANDO LLEGA UN MENSAJE NUEVO NUEVO MENSAJE TXT Para enviar un nuevo mensaje: 1 Aparecerá la siguiente pantalla cuando 1 Presione llegue un mensaje nuevo. [MENÚ] o . 2 Bajo “Send To” (“Enviar a”), ingrese el número de teléfono y presione 2 Para ver el mensaje, presione [OK]. Al presionar [MENÚ], usted puede elegir entre las siguientes opciones: 1. Buscar: Buscar el número de teléfono almacenado en el directorio telefónico. 2. Guardar: Almacena el número de teléfono al cual se envió el mensaje. 3.
BANDEJA DE ENTRADA La Bandeja de entrada administra los mensajes TXT recibidos. Para acceder: 1 Presione [MENÚ] o . BANDEJA DE ENTRADA REENVIAR 1 Para reenviar el mensaje TXT: : Nuevo mensaje urgente (no leído) 2 Ingrese el número telefónico de la persona a la cual está : Mensaje urgente leído enviando el mensaje y presione : Nuevo mensaje (no leído) [OK]. 3 Ingrese cualquier mensaje de texto que se incluya con el : Mensaje antiguo (ya leído) mensaje reenviado y presione [OK].
BANDEJA DE SALIDA BANDEJA DE SALIDA Administra los mensajes de texto enviados o los mensajes en espera de ser enviados. VERIFICACIÓN DE MENSAJES TXT ENVIADOS 1 Presione [MENÚ] o GUARDAR EN CONTACTO 1 Seleccione para guardar un número en contactos. . GUARDAR EN GUARDADOS : REENVÍO AUTOMÁTICO : ENTREGADO 1 Seleccione para guardar el mensaje TXT en su teléfono. : FALLA : NO ENVIADO BLOQUEAR Y DESBLOQUEAR : LEÍDO : ENVIADO 1 Para bloquear o desbloquear el mensaje TXT: 2 2.1.
ALERTAS DE WEB GUARDADO ALERTAS DE WEB GUARDADO Administra los mensajes guardados de la Bandeja de entrada/Bandeja de salida. 1 Presione [MENÚ] o . 1 Presione 2 Para seleccionar GoTo (Ir a), presione . Para seleccionar Borrar el mensaje, presione 3 Aparecerá el mensaje Alertas de Web. [ . [ ] : Mensaje no leído [ ] : Muestra el texto restante. GoTo (Ir a): Conexión a un sitio seleccionado. Borrar: Borrar mensaje seleccionado. o . 2 2.1. Seleccione un mensaje TXT y luego presione [OK].
TEXTO RÁPIDO BORRAR TODO TEXTO RÁPIDO BORRAR MENSAJES Para editar el mensaje de Texto rápido que ha guardado: 1 Presione 1 Presione [MENÚ] o [MENÚ] o . . 2 1. Para borrar todos los mensajes de la bandeja de entrada, 2 2.1. Seleccione un mensaje de la lista. Presione [MENÚ]. 2.2. Para agregar un mensaje de Texto rápido nuevo, presione [AGREGAR NUEVO]. Para editar el mensaje de Texto rápido que ha seleccionado presione [EDITAR].
CONFIGURACIÓN CONFIGURACIÓN Administra las funciones de mensajería mediante diferentes funciones. DEVOLUCIÓN DE LLAMADA PREDETERMINADA Edita un número de devolución de llamada predeterminado, de manera que el destinatario pueda devolver la llamada o responder. GUARDAR MENSAJE ENVIADO 1 Presione [MENÚ] o 1 Presione . 2 Presione . Seleccione entre “Off” (“Desactivada”), “On” (“Activada”) o “Prompt” (“Indicación”), con la tecla de navegación. 3 Presione [MENÚ] o . 2 Presione .
CONFIGURACIÓN CONFIGURACIÓN RECORDATORIO 1 Presione VISTA DIRECTA [MENÚ] o . 2 Presione . Seleccione “On” (“Activada”) o bien, “Off” (“Desactivada”) con la tecla de navegación. 3 Presione [OK]. EDITAR FIRMA Cree una firma que se pueda insertar automáticamente al final de un mensaje. 1 Presione [MENÚ] o . 2 Presione . Para ingresar “Signature” (“Firma”), coloque el cursor sobre Editar firma y luego ingrese a la ventana Edición de firma usando las teclas de dirección derecha o izquierda.
CONFIGURACIÓN BLOQUEAR O DESBLOQUEAR 1 Presione [MENÚ] o . 2 Luego presione . Seleccione “Block” (“Bloquear”), “Unblock” (“Desbloquear”) o “View List of Blocked Addresses” (“Ver lista de direcciones bloqueadas”) con la tecla de navegación. BLOQUEAR: Ingrese la dirección que se bloqueará. DESBLOQUEAR: Ingrese la dirección que se desbloqueará. VER LISTA DE DIRECCIONES BLOQUEADAS: Muestra la lista bloqueada en la pantalla de LCD. 3 Presione Capítulo 7 SEGURIDAD Y GARANTÍA [OK].
INFORMACIÓN DE SEGURIDAD PARA TELÉFONOS MANUALES INALÁMBRICOS Lea esta información antes de usar su teléfono manual celular portátil. EXPOSICIÓN A SEÑALES DE RADIOFRECUENCIA Su teléfono inalámbrico portátil manual es un transmisor y receptor de radio de baja potencia. Cuando está encendido, recibe y también envía señales de radiofrecuencia (RF).
INFORMACIÓN DE SEGURIDAD PARA TELÉFONOS MANUALES INALÁMBRICOS INFORMACIÓN DE SEGURIDAD PARA TELÉFONOS MANUALES INALÁMBRICOS DISPOSITIVOS ELECTRÓNICOS OTRAS PAUTAS DE SEGURIDAD La mayoría de los equipos electrónicos modernos están protegidos contra la energía de RF. Sin embargo, es posible que ciertos equipos electrónicos no estén protegidos contra las señales de RF provenientes de su teléfono inalámbrico.
INFORMACIÓN DE SEGURIDAD PARA TELÉFONOS MANUALES INALÁMBRICOS PRECAUCIONES INFORMACIÓN DE SEGURIDAD PARA LA EXPOSICIÓN A LA RADIOFRECUENCIA DE LA FCC ¡ADVERTENCIA! Lea esta información antes de su uso Su teléfono manual portátil es un equipo de alta calidad. Antes de utilizarlo, lea todas las instrucciones y señalizaciones de precaución en el (1) Adaptador de CA (2) Batería (3) Producto que utiliza la batería. NO use este equipo en un ambiente extremo, donde existan altas temperaturas o mucha humedad.
INFORMACIÓN SOBRE SAR ESTE MODELO DE TELÉFONO CUMPLE CON LAS EXIGENCIAS GUBERNAMENTALES PARA LA EXPOSICIÓN A LAS ONDAS DE RADIO. Su teléfono inalámbrico es un transmisor y receptor de radio. Está diseñado y fabricado para que no supere los límites de emisión para la exposición a la energía de radiofrecuencia (RF) determinados por la Federal Communications Commission del Gobierno de Estados Unidos.
ACTUALIZACIÓN DE LA FDA PARA EL CONSUMIDOR Actualización sobre teléfonos inalámbricos del Center for Devices and Radiological Health (Centro de Dispositivos y Salud Radiológica) de la U.S. Food and Drug Administration (Administración de Drogas y Alimentos de los Estados Unidos) para el consumidor 1. ¿Los teléfonos inalámbricos representan un peligro para la salud? Los datos científicos disponibles no demuestran que exista algún problema de salud asociado al uso de teléfonos inalámbricos.
ACTUALIZACIÓN DE LA FDA PARA EL CONSUMIDOR ACTUALIZACIÓN DE LA FDA PARA EL CONSUMIDOR 6. ¿Qué está haciendo la FDA para averiguar más sobre los posibles efectos en la salud de la RF de los teléfonos inalámbricos? La FDA está trabajando con el U.S.
PROTEJA SU GARANTÍA GARANTÍA LIMITADA POR 12 MESES Lea cuidadosamente su Garantía, considerando especialmente el párrafo siete de la Garantía Limitada para su unidad. Audiovox Communications Corp.
GARANTÍA LIMITADA POR 12 MESES MEMORANDO Además, para ser remitido a un local autorizado de Garantía en su área, puede telefonear al (800) 229-1235 en Estados Unidos y al (800) 465-9672 en Canadá (en Ontario, llame al 905712-9299). EL GRADO DE RESPONSABILIDAD DE LA COMPAÑÍA, EN VIRTUD DE ESTA GARANTÍA, SE LIMITA A LA REPARACIÓN O REEMPLAZO ANTES DISPUESTOS Y, EN NINGÚN CASO, LA OBLIGACIÓN DE LA COMPAÑÍA SUPERARÁ EL PRECIO DE COMPRA QUE PAGÓ EL COMPRADOR POR EL PRODUCTO.