2” LCD TV/Monitor and DVD Player D1210 Owner’s Manual 128-6524
TABLE OF CONTENTS A. B. C. D. E. F. G. H. I. J. K. L. M. N. O. Introduction .................................................................. 3 Cautions and Warnings ............................................... 3 Contents ..................................................................... 10 Indoor Installation ......................................................... 10 Car Installation............................................................. 11 Controls/Indicators/Connectors ...................
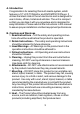
A. Introduction Congratulation for selecting this multi-media system, which features a 12” LCD TV/Monitor and DVD/MP3/CD Player. It utilizes the latest state of the art electronics and is designed for use in home, offices, hotels and vehicles. The unit is compact so that you can take it with you anywhere and is designed for easy installation. Please read all the instructions in this manual to assure proper installation and best equipment performance. B. Cautions and Warnings 1.
9. Water – DO NOT use this product near water. For example, avoid placing it near a bathtub, washbowl, kitchen sink, or laundry tub, in a wet basement, or near a swimming pool, etc… 10. Cabinet Slots – NEVER push objects or any kind into the unit through the cabinet slots as they may touch dangerous voltage points or short out parts that could result in a fire or electric shock. NEVER spill liquid of any kind on the product. 11. Ventilation – DO NOT block any ventilation openings.
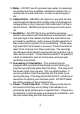
14. Power Sources – This product should be operated only from the type of power source indicated on the rear panel. If you are not sure of the type of power supply to your home consult your product dealer or local power company. 15. Lightning – For added protection for this product during a lightning storm, or when it is left unattended and unused for a long period of time, unplug it from the outlet and disconnect the antenna or cable system.
19. Replacement parts – When replacement parts are required, be sure the service technician has used replacement parts specified by the manufacturer or have the same characteristics as the original part. UNAUTHORIZED substitution may result in fire, electric shock or other hazards. 20. Safety Check – Upon completion of any service or repair to this product, ask the service technician to perform safety checks to determine that the product is in proper operating condition. 21.
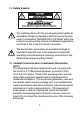
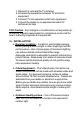
24. Safety Caution The Lightning flash with the arrowhead symbol within an equilateral triangle is intended to alert the user to the presence of uninsulated “DANGEROUS VOLTAGE” within the product’s enclosure that may be of sufficient magnitude to constitute a risk or electric shock to persons. The Exclamation point within an equilateral triangle is intended to alert the user to the presence of important operating and maintenance (servicing instructions in the literature accompanying the product). 25.
1. Reorient or relocate the TV antenna 2. Increase the separation between TV and other equipment. 3. Connect TV into separate outlet from equipment. 4. Consult the dealer or an experienced radio/TV technician for help FCC Caution: Any changes or modifications not expressly approved by the party responsible for compliance could void the user’s authority to operate this equipment 26. INSTALLATION a. Receiver Location – Locate for comfortable viewing.
27. DVD CAUTION: This unit employs a laser system. To ensure the proper use of the unit, read this manual carefully and keep it for future reference. To prevent direct exposure to the laser radiation, do not open the cabinet. Invisible laser radiation could be present when the cabinet is opened or the interlocks are defeated. DO NOT stare into the laser beams.
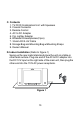
C. Contents 1. TV /DVD Combination Unit with Speakers 2. Coaxial Connector 3. Remote Control 4. AC to DC Adapter 5. Cig. Lighter Adapter 6. Wireless IR Headphones(2 pcs) 7. 3.5mm-RCA AV Cable 8. Storage Bag and Mounting Bag w/Mounting Straps 9. Owner’s Manual D. Indoor Installation (Refer to Figure 1) Swing up the rear metal stand and place the unit on a table or other level surface.
E. Car Installation Between two seats (Refer to Figure 2) Figure 2 1. Take one of the supplied straps from the storage bag and connect the latch to the top metal ring on the mounting bag. Wrap the strap around the base of one the headrests. Attach the “S” hook to the same top metal ring. Repeat this process for the other side (Passenger Seat). 2. Take another strap and connect the latch to the lower metal ring on the back of the bag.
F. Controls/Indicators/Connectors (Refer to Figure 3) 1. DVD Previous 2. DVD Play 3. DVD Next 4. DVD Eject 5. DVD Stop 6. IR Headphone Sensor 7. TV Antenna Input 8. Headphone Input #1 9. AV Input 10. Power On/Off 11. DVD/TV/AV Switch 12. Picture Select 13. Volume Down 14. Volume Up 15. TV Channel Down 16. TV Auto Program 17. TV Channel Up 18. Surround Sound 3D 19. Headphone Input #2 20. DC 12V Input 21. DVD Video Output 22. DVD Left Audio Output 23. DVD Right Audio Output 24.
G. Remote Controls (Refer to Figure 4) 1. TV/DVD/AUX Select 2. DVD Number Control Select 3. Numbers 0-9 4. TV/CATV Select 5. Mute 6. Picture Select 7. Volume Up/Down (+/-) 8. DVD Eject Button 9. Up/Down-Left/Right/Enter 10. DVD Menu 11. DVD Display 12. DVD Stop 13. DVD Reverse 14. DVD Forward 15. DVD Audio Select 16. DVD Subtitle Select 17. Power On/Off 18. TV Number Control Select 19. TV Channel Auto Memory 20. TV Channel Skip Search 21. TV Channel Erase Write 22. Channel Up/Down (+/-) 23.
H. DVD Player 1.
2. Menu A DVD is divided into sections called title and chapter. When you play a DVD, a root menu of the disc will appear on the screen of your TV or Monitor. The contents of the menu vary from disc to disc. Press MENU during playing to display the menu, and press ENTER or PLAY to start playing. Some DVDs allow you to select disc playback options using the DVD menu. 3. Display (The contents vary from disc to disc.) 1) Playing time and remaining time a.
c. Press DISPLAY the 3rd time to display the elapsed time for the chapter. The heading will disappear automatically in about 3 seconds. d. Press DISPLAY the 4th time to display the remaining time for the chapter. The heading will disappear automatically in about 3 seconds. Press DISPLAY the 5th time to exit. 2) Subtitle During play press SUBTITLE to select the subtitle language you desire, with the current subtitle language number (1) and the total number of subtitle languages (2) displayed.
3) Audio During playback, press AUDIO to select the audio language you desire, with the current audio channel number (1) and the total number of audio channels (2) displayed. Press AUDIO again to select another audio language. The audio display will disappear automatically if the AUDIO button isn’t pressed again for 3 seconds. 4) Repeat a. During playback, press REPEAT to repeatedly play the current chapter.
b. During playback, press REPEAT again to repeatedly play the current title. c. During playback, press REPEAT a 3rd time to cancel the repeated playing and resume normal playback. The repeat display will disappear automatically if the REPEAT button isn’t pressed again for 3 seconds. 4. Setup Press SETUP to display the main page of the setup menu on the screen. Press SETUP again to exit the SETUP menu and the unit will resume playback or stop mode.
1) Select GENERAL SETUP using UP/DOWN and then press ENTER to enter the general page. a. Select TV DISPLAY using UP/DOWN, and then press RIGHT to enter the submenu. Select the TV display mode on the screen using UP/DOWN, and press ENTER to confirm the setting. Press LEFT to return. * NORMAL/PS: When the player is connected to a normal TV, and a wide picture is shown on the full screen, with a portion that may be cut off automatically.
* ON: The screen will show an angle mark. (If angle option is available) * OFF: the screen won’t show an angle mark. c. Select MAIN PAGE using UP/DOWN and then press ENTER to return to the main page. 2) When there’s no disc inside the player, select PREFERENCES using UP/DOWN and then press ENTER to enter the preferences page. a. Select AUDIO using UP/DOWN, and then press RIGHT to enter the submenu. Select the audio language you desire using UP/DOWN and then press ENTER to confirm the setting.
b. Select SUBTITLE using UP/DOWN, and then press RIGHT to enter the submenu. Select the subtitle language or SUBTITLE OFF you desire using UP/DOWN and then press ENTER to confirm the setting. Press LEFT to return. c. Select DISC MENU using UP/DOWN and then press RIGHT to enter the submenu. Select the disc menu language you desire using UP/DOWN and then press ENTER to confirm the setting. Press LEFT to return.
Select the parental level you desired using UP/DOWN for discs with lock-out function or multiple rating levels. It’s listed from the lowest level (1 Child) to the highest level (8 Adult). Press ENTER to enter the password verify page. Input the password in 4 digits, and then press ENTER to confirm the parental level setting. For 1st time users, the default password is 3308.
e. Select PASSWORD using UP/DOWN and then press RIGHT to enter the submenu. Press ENTER to enter the password change page. Input the old password or the default password, the new password, and the confirmed new password. Press ENTER to confirm the change.
Note: The default password is 3308 and this password is always effective whether you’ve changed it to another new one or not, in case that you forget the new password. To avoid others using it to set the parental level and change the password, you may note this default password by other means and delete it from this manual. Some discs can be limited depending on the age of users while some discs can not. f. Select DEFAULTS using UP/DOWN and then press RIGHT to enter the submenu.
I. System Operation 1. Press POWER to switch the unit on or off. The switch indicator will light red and the unit will go to the mode last used and stored in memory. 2. Press DVD/TV/AV to select your desired mode. When switching the mode, the DVD player can memorize the present play ing point. 3. Press VOLUME UP/DOWN to raise or lower the sound level Also used to make picture adjustments in the picture select mode. 4.
3. Press AUTO MEMORY; all channels in TV or CATV mode are searched and tuned and the channels with signals detected are automatically stored. 4. SKIP/SEARCH selects between SKIP and SEARCH mode. In SKIP mode, the TV only stops on channels that are programmed into memory when the CHANNEL UP/DOWN buttons are used. When SKIP mode is off, the TV will stop on all active channels. 5. To erase a TV channel, press ERASE/WRITE until MANUAL MEMORY has “erase” displayed on the screen.
M. Support Home TV Match the color-coded plugs to the appropriate DVD outputs in the rear of the unit: Yellow (VIDEO) to Yellow, White (AUDIO L) to White, and Red (AUDIO R) to Red. N. Support External Speaker Connect the EXT. SPEAKER output to an external speaker. O.
12 MONTH LIMITED WARRANTY Applies to Audiovox Mobile Video Products AUDIOVOX ELECTRONICS CORP. (the Company) warrants to the original retail purchaser of this product that should this product or any part thereof, under normal use and conditions, be proven defective in material or workmanship within 12 months from the date of original purchase, such defect(s) will be repaired or replaced with reconditioned product (at the Company's option) without charge for parts and repair labor.