Model D1750T PORTABLE 7" LCD MONITOR AND DVD PLAYER Owner’s Manual
INTRODUCTION Thank you for choosing the 7” portable DVD player. The unit applies the latest state of the art electronics and is designed for use in hotels, offices or your home. The DVD Player is constructed to provide years of reliable, trouble-free service, and is compact so that you can take it with you anywhere and is designed for quick and easy setup. Please read all documentation prior to using this product. The documentation will assist you in obtaining the best equipment performance.
CAUTIONS AND WARNINGS The lightning flash with arrowhead symbol, within an equilateral triangle, is intended to alert the user to the presence of un-insulated “Dangerous Voltage” within the product’s enclosure that may be of sufficient magnitude to constitute a risk of electric shock. The exclamation point within an equilateral triangle is intended to alert the user to the presence of important operating and maintenance (servicing) instructions in the literature accompanying the appliance. 1.
same or equivalent type, in order to protect the environment, please dispose the battery properly. Do not use the DVD Player in temperatures higher than 140 degrees Fahrenheit or 40 degrees Celsius. 4. Warning To reduce the risk of electric shock, do not perform any servicing other than that contained in the operating instructions unless you are qualified to do so. There are no user-serviceable parts inside. Refer all servicing to qualified service personnel.
Table Of Contents INTRODUCTION_____________________________________________________ 1 CAUTIONS AND WARNINGS___________________________________________ 2 Table Of Contents ____________________________________________________ 4 MAIN FEATURES ____________________________________________________ 7 SCREEN AND SYSTEM PANEL CONTROLS ______________________________ 8 Front Panel Controls_______________________________________________ 8 SYSTEM SIDE PANEL CONTROLS______________________________________ 9 Left Side Pane
Charging the Battery Pack _________________________________________ 19 Detaching The Battery Pack ________________________________________ 19 Using a Vehicle DC Adapter ________________________________________ 20 DVD PLAYER OPERATION ___________________________________________ 20 Preparation _____________________________________________________ 20 Playback of DVD Disc ____________________________________________ 20 Pause _________________________________________________________ 20 Zoom _____________________
Resume Playback________________________________________________ 26 Playing MP3”s _________________________________________________ 26 Playing a JPEG _________________________________________________ 27 Normal Playback ________________________________________________ 27 Picture Zoom ___________________________________________________ 27 TROUBLESHOOTING _______________________________________________ 28 SPECIFICATIONS___________________________________________________ 29 WARRANTY _____________________________
MAIN FEATURES High Quality Audio and Video Excellent Sound Dolby Digital output to produce excellent Audio output signal. High Resolution MPEG2 decoding format achieves more than 500 lines of horizontal resolution. LCD (Liquid Crystal Display) Screen Designed with a color 7” LCD screen. Special Functions Supports parental-lock features. AV Input External Audio, Video input can be connected to most external AV sources.
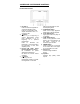
SCREEN AND SYSTEM PANEL CONTROLS Front Panel Controls 1) PIC button Press to enter the brightness or color level-adjusting mode. Press for 1.5 seconds to shift aspect ratio between 16:9, 4:3 and screen Off. 2) /-button Press to go to beginning of current track/chapter. Press twice repeatedly to go to beginning of a previous track/chapter. Press to decrease the brightness or color level while in the brightness or color level adjusting mode.
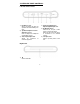
SYSTEM SIDE PANEL CONTROLS Left Side Panel Controls 4) Audio Input/Output and Optical Digital Output Jack 5) AV IN/OUT’ Switch Switch to IN, to input a video game or camcorder signal. Switch to OUT when the player is connected to an external monitor. 6) 12V Input Jack Used to provide power to the unit. 1) Headphone Jack When connecting this jack, the speakers will automatically turn OFF. 2) Speaker/Headphone Volume Adjusting control Used to adjust the headphone and speaker volume.
REMOTE CONTROL Remote Control 1) PWR button Press to turn unit ON or OFF. 2) SUBT button When a DVD with subtitles is playing, press to select a subtitle language or to turn subtitles OFF. 3) TITLE button Press to display titles if present on the disc. 4) Direction buttons Press to select menu items. 5) ENTER button Press to confirm the items or settings. 6) SETUP button Press to access the DVD player’s setup menu. - 10 - 7) Number buttons Select numbers by pressing these buttons.
11) REP button Press to repeat a chapter, track, title, or the entire disc. 12) EJECT button Press to eject disc. 13) AUDIO button Press to access various audio languages, when the DVD disc contains multiple audio languages. 14) BACKLIGHT button Press to turn the screen OFF when playing a DVD on an external monitor or when listening to CD’s. 15) MENU button Press to open the disc menu. 16) INFO button Press for detailed information on the disc. Keep pressing the button to remove information from screen.
SYSTEM CONNECTIONS NOTE: Before plugging the power cord into an AC outlet, make sure that all the connections have been made as described below. Power Supply Connection Connect the supplied adapter to the side of the DVD player in the jack marked “DC 12V In”. Plug the two-prong end of the power cord to an AC100-240V outlet. If you have difficulty inserting the plug, turn it over and reinsert it. If the DVD Player will not be used for a long time, disconnect the plug from the outlet.
Connecting to a Normal Amplifier The DVD player can be connected to an amplifier. Please refer to the equipment’s manual before connecting. Also switch the AV/IN OUT switch to OUT. Connecting to a Digital Ready Amplifier The DVD Player can be connected to an amplifier with a digital optical input. The cable is not supplied, but can be purchased at most home electronics retailer. Also switch the AV/IN OUT switch to OUT.
PLAYBACK PREPARATIONS Usage of Remote Control 1) 2) 3) 4) 5) 6) Using Of Wireless Headphone Remove the empty battery receptacle. Refer to the drawing above. Insert the battery into the receptacle and insert the receptacle into the remote. For best results, aim the remote directly at the player’s receiving window within 15 feet, and angles of not exceeding 60 degrees. The path between the remote control and remote sensor should be free of obstructions.
DISC FORMATS SUPPORTED BY THIS PLAYER DISC LOGO DIAMETER PLAYBACK TIME/ PLAYABLE SIDES 133 min (SS-SL) 12cm 242 mi n (SS-DL) 266 min (SS-SL) 484 mi n (SS-DL) DVD 41 min (SS-SL) 8cm 75 min (SS-DL) 82 min (DS-SL) 150 min (DS-DL) 12cm 74 min 8cm 20 min 12cm 600 min CD MP3 The disc maker specifies the operation of some DVD discs. Please refer to the instruction manual with the disc. Care of Discs Cleaning of Discs Do not touch the playing surface of the compact disc.
Power Adapter The DVD player is supplied with a switching power adapter. 1) Connect AC adaptor in the jack the on side of the unit. 2) Plug the of the power cord to a grounded AC Outlet. NOTE: To prevent malfunction, turn the power to the DVD Player OFF before removing the power cord from the AC Outlet Pre-Operation 1) 2) 3) 4) Connect DVD Player to power. Press the “POWER” switch. Handing the disc with its printed side toward you. (Referring to the above picture), push the disc in about ¾ of the way.
POWER SUPPLY About Rechargeable Battery Pack Your portable DVD player comes with a lithium ion rechargeable battery that attaches to the bottom of the player. Your new battery should be fully charged before initial use. Charging time is normally about 4 hours. A fully charged battery delivers about 2.5-3 hours of use, but playing time varies from disc to disc. If the battery will not be used for a long period of time, first fully charge the battery prior to storage.
POWER SUPPLY Battery Pack Attaching And Placement The DVD Player’s power supply is the AC power adapter or the battery pack, which are provided with the player. The battery pack also can be used as a stand. Refer to the following steps for attaching the Battery Pack: Place the DVD Player on a soft and smooth surface with its back cover facing UP (to avoid scratching the screen). Position the Battery Pack directly toward the battery slot on the back cover of the DVD Player.
POWER SUPPLY Charging the Battery Pack The battery must be attached to the DVD player to charge it. Plug the Power Adapter into the Player’s DC-IN 12 V Jack, which is located on left Side of the DVD Player. Plug the other end of the Power Cord into a wall Outlet. Detaching The Battery Pack If the DVD Player is not going to be used for long periods of time, the Battery Pack should be detached. When the DVD Player is turned OFF, the DVD Player is still consuming some power in STANDBY mode.
POWER SUPPLY Using a Vehicle DC Adapter To use the Vehicle DC Adapter disconnect the Battery pack and connect the supplied Vehicle Power Plug Adapter into the DVD Player’s Power Jack and the other end into the Vehicle DC outlet (Cigarette Lighter Socket) as shown below. Note: Do not operate the unit or view video software while driving a vehicle. Place the unit in a secure position for viewing. Do not leave battery attached when using car adaptor as power source.
Stop During playback, press the STOP button once on the remote control to stop playback of a disc. Press the PLAY/PAUSE button again, and the DVD Player will resume playback of the disc from the point where it stopped. Screen Mode Press the PIC button on the front panel for three (3) seconds to shift the screen aspect ratio between 16:9, 4:3 and OFF. (NOTE: OFF Mode can be used to turn the screen OFF when the unit is attached to an external monitor or when listening to CD’s.
Language Setup Press the ENTER button to enter the Language setup menu, the screen will display the following: Language Video Audio Rating OSD Menu English Auto Subtitle Audio English English DVD Menu Restore Default OK In the language setup menu, use the UP/DOWN direction buttons ( ) to select folders. Press the ENTER button to enter. Use the UP/DOWN direction buttons ( ) to select items. Press the ENTER button to confirm selection and return.
Video Setup Press the Right direction button ( ) to select Video setup menu, then press the ENTER button to enter the video setup menu. The screen will display the following: Language Video Audio Rating TV Shape 16:9 Close Caption Off In this menu, use the UP/DOWN direction buttons ( ) to select an item. Press the ENTER button to select, use the UP/DOWN direction buttons ( ) to select item. Press the ENTER button to confirm selection and return.
IR This item is used to set the infrared Audio signal to ON or OFF. When ON is selected, there will be infrared Audio signal emitted from the infrared audio signal emitter. When OFF is selected, no infrared Audio signal emitted. NOTE: Using optical digital audio output: during CD, MP3 disc playback, the digital audio is in PCM format; during DVD disc playback, the digital audio is in Bitstream format.
Repeat Repeat a Title, Chapter or Track. Press the REP button on the remote control. Continually pressing the REP button will display a menu as follows: Repeat OFF, Repeat and Repeat All. You can temporarily mark Chapter, Title section of a DVD that you would like to play repeatedly. You do this by marking the start and the end of the section using the A/B button. During playback press the A-B button on the remote control at the beginning of the segment (point A) you wish to play repeatedly.
Resume Playback Press the STOP button at the point if you wish to stop the playback of a disc. The DVD Player will memorize the location where playback of the disc was stopped. Press the Play/Pause button to resume normal playback. The DVD Player will resume the playback of the disc from the location where it was stopped. This function will not operate if the disc is removed from the DVD Player. Press the STOP button twice (2). Playback of the disc will stop.
Playing a JPEG JPEG is a common picture format. Hundreds of pictures can be stored in a disc in this format. Normal Playback Load a JPEG disc into the DVD Player. After reading the disc, the DVD Player will display the images on the disc in sequence. Press the STOP button to return to the root menu. Press the MENU button to enter the preview menu. Use the direction buttons to select the items you wish to view and then press the ENTER button to confirm and start playback.
TROUBLESHOOTING Symptom What To Check The DVD Player will not play. • Make sure the AV IN/OUT switch ON the side of the player is in the OUT position for standard play. • Make sure a disc is loaded. • Make sure the disc isn’t loaded backwards. • Disc should be clean and not warped. • Player’s region code should be the same as region code of DVD disc. • The DVD was exposed to humid conditions. If it has, remove the disc and keep the DVD Player powered up for at least two hours. There is no sound.
SPECIFICATIONS TFT Screen Size 7 inches Laser Wavelength Wavelength: 780/650nm Video System NTSC Frequency Response 20Hz 20KHz ±2.5dB Audio Signal-To-Noise Rate ≥ 80 dB Audio Distortion + Noise ≤ -70dB (1KHz) Channel Separation ≥ 70dB (1KHz) ≥ 80dB (1KHz) Dynamic Range Audio 0.2 Audio Out Analog Video Out Video Out Power AC100-240V 50/60Hz Power Consumption 13W Dimension w/o Battery 7.87”×6.06”× 1.6”/1.14” (L/W/H) Weight w/o Battery About 1.0kg / 2.2 Lbs Out Level: 1.5V±1.
WARRANTY 90 DAY LIMITED WARRANTY Applies to Audiovox Video Products AUDIOVOX ELECTRONICS CORP. (the Company) warrants to the original retail purchaser of this product that should this product or any part thereof, under normal use and conditions, be proven defective in material or workmanship within 90 days from the date of original purchase, such defect(s) will be repaired or replaced with reconditioned product (at the Company's option) without charge for parts and repair labor.
For Customer Service Visit Our Website At WWW.audiovox.com Product Information, Photos, FAQ’s Owner’s Manuals © 2004 Audiovox Electronics Corp., 150 Marcus Blvd., Hauppauge, N.Y.