PVI-170BI In-Dash 7” Monitor Touch Screen DVD/CD/MP3/MP4 AM/FM Radio With Bluetooth Support iPod/iPhone Owner’s Manual Take the time to read through this owner’s manual. Familiarity with installation and operation procedures will help you obtain the best Performance from your new DVD-receiver.
WARNING! To promote safety, certain functions are disabled unless the parking brake is on. The Unit is designed to detect parked status and must be connected to the power supply side of the parking brake switch. Improper connection or use of his connection may violate applicable law and may result in serious injury or damage. To avoid the risk of damage and injury and the potential violation of applicable laws, this unit is not for use with a video screen that is visible to the driver.
CONTENTS WARNING! ................................................................................................................. 2 OPERATION PRECAUTIONS.................................................................................... 2 CONTENTS ................................................................................................................ 3 INSTALLATION / UN-INSTALLATION ....................................................................... 5 WIRING CONNECTIONS ......................
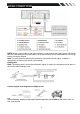
Accessories Package contains the following accessories for installation and operation of the unit.
INSTALLATION / UN-INSTALLATION Note Before starting installation of the unit, make sure the wiring is connected properly. Use only the parts provided with the unit to ensure proper installation. The use of unauthorized parts may cause malfunction. Install the unit where it does not get in the driver’s way and will not injure the passenger in case there is a sudden stop, like an emergency stop.
WIRING CONNECTIONS NOTE: Never connect cable to the system while it is connected to the battery power. Whenever the unit is disconnected from the battery, the preset memory will be erased and the unit will go back to its factory defaults. Note: To watch video the parking wire should be connected to break signal. 2 cables is connected to a Hands-Free device (not included).
Note: - Only use groundless loudspeakers. Use only loudspeakers of minimal 40Watt, using fewer watts may result in damaging your loudspeakers at higher volumes. Use 4~8 Ω (Ohm impedance) loudspeakers only; using higher or lesser impedance may damage the unit. Do not use 3-cable loudspeakers and do not connect the loudspeakers minus to the car body (GND). The unit is using a BTL circuit and each loudspeaker must be connected with insulated cables according the diagram.
FRONT PANEL 1. Release Button Press to detach and release the front panel. When released the unit will switch off automatically after a few second. Detach/Attach the Panel: Press REL button and pull out the left side to detach the panel. To attach it, insert the right side first and then press the left side until hear a click sound. 2. BAND/TILT Button In Radio mode, press to change radio band in sequence of FM1 → FM2 → FM3 → AM1 → AM2. 3.
Short press it to MUTE the volume output, press it again to resume volume when the power is on. 5. / PLAY / PAUSE / Button In Disc, USB, SD CARD mode, press it to pause / play. Press it again to resume playback; long press it to stop, Press it again to resume playback. 6. Button/ Button In RADIO mode, press to start automatic searching, press and hold for two seconds to start manual searching, then press to tune each frequency step downward.
19. SD/MMC CARD slot SD/MMC card slot, for Multimedia playback files only. Insert a SD/MMC CARD into this slot and the unit will automatically start reading and playback the card. * Supported Music File Format: MP3, WMA Files REMOTE CONTROL MODE POWER BAND/RANDOM/Clear ENTER UP/DOWN/LEFT/RIGHT EJECT STEREO/MONO/* P.
In BLUETOOTH mode, press it to make a * symbol. 8. P.SCN/ RPT /# In SD CARD/ USB mode, press to repeat REP 1 => REP DIR => REP ALL In DVD mode, press to start repeat REP OFF=>REP Chapter=>REP Title=>REP Off. In Radio mode: PS (Preset Scan): Press to scan all preset stations in the memory of the current band and stay on each memory stations for about 5 seconds. AS (Auto Save): Long press to save the stations with good reception automatically. In BLUETOOTH mode, press it to make a # symbol. 9.
22. A-B/ZOOM button During playback, press it at the starting point of section you want to repeat(A), press this button again at the ending point of the section you want to repeat (B), section A-B repeating starts. Press it again to cancel the A-B repeat function. Press it and hold for two seconds in DVD mode to zoom the image in or out in the sequence of ZOOM 2-> ZOOM 3-> ZOOM 4-> ZOOM 1/2-> ZOOM 1/3-> ZOOM 1/4. 23.
REMOVE BATTERY Note: The distance may vary according to the brightness of ambient light. If the remote is not used for an extended period of time, remove the battery to prevent possible damage from battery leakage and corrosion. Do not place any objects between the remote control unit and the sensor on the unit. Do not drop the remote control onto the floor; it will damage it beyond repair.
MAIN MENU The best way to discover the program is to explore each screen in detail, and to find out how to move from one to another. Read this chapter for a guided tour. Unit starts by displaying the Main menu. This is the root of the screen hierarchy, and you can simply access all features by tapping on the touch screen buttons. Tap the icons to enter a desired mode. ◆ RADIO PLAYER To start Radio, tap RADIO button on main menu screen.
◆ DVD PLAYER To start DVD Player, tap on DVD button from main menu screen. TOUCH SCREEN MENU You will not see any buttons while DVD is played. Buttons will appear when you tap on TFT screen. Tap the screen again to hide the buttons. Insert DVD disc insert VCD disc NOTE DVD Player will automatically start playing when you insert any DVD disc, MEMORY card or USB device. 2. Warning displays if the vehicle is moving for driver's safety. 3.
/ Select the viewing angle of the touch-screen. ◆USB/SD/MMC CARD OPERATION Insert USB/SD/MMC and play track will display as follows: Mute the sound. Decrease the volume. Increase the volume. Stop button. Press it to Stop playback from the current position, press it again to final stop to the very beginning Play/pause button. Press it to pause the track, press again to resume. Press it button to restart a track, FR×2×4×8×20-play will be display. Press it button to skip to the next track.
Note: If there is no external video input, the TFT displays “NO SIGNAL”. 1. Press the △ / ▽ icon to adjust TFT angle. 2. Press the icon to be back to main menu. ◆IPOD/IPHONE OPERATION Use the supplied iPod/iPhone connection cable to connect to the USB socket on the panel to play back iPod/iPhone audio and video. The unit turns to USB/iPod mode automatically when an iPod/iPhone is connected. To start iPod/iPhone mode in other modes, press MODE button repeatedly to change.
Songs: you can find all of songs in songs option. Genre: you can find the corresponding songs according to different Genre. Composer: you can find the corresponding songs according to different composer. iPod- video playback The unit support video playback. In USB/iPod mode, select the video option to show below the options: Movies=>Music Video=>TV Shows=>Video Podcasts=>Rented Movies. Touch one of all categories to play corresponding video.
DISPLAY CONTROL Tap DISPLAY button to show DISPLAY menu. SCREEN Screen setting 16:9, 4:3,FULL Backlight Backlight setting LOW, MID, HIGH AREA Set AREA:EUROPE-U.S.A-SOUTH AMERICA-RUSSIA RADIO CONTROL Tap RADIO button to show RADIO menu. STEREO Set STEREO ON or OFF LOCAL Set LOCAL ON or OFF GENERAL CONTROL Tap GENERAL button to show GENERAL 1 menu.
DVD SET UP MENU During the DVD playback, press the SETUP button to enter into the system settings main menu; press the up or down arrow buttons to move to the highlighted menu item and select one of the Setup Pages: [1]. Subtitle Lang setting: With this option you can select the preferred language for the subtitles. When the selected language is recorded on the disc then this language will automatically be shown. If not, the first language recorded on the disc is displayed. [2].
[6] TV SHAPE: Set TFT screen mode to the correct ratio: Three screen ratio modes are available, Normal/PS (4:3 Pan Scan), Normal/LB (4:3 Letterbox) and Wide (16:9). Different disc formats will display different images depending this setting and the screen size used. [7] NTSC/ PAL: Select this menu item to set up your preferred video output format. PAL is commonly used in Europe, NTSC is commonly used in the USA and Japan. Auto is commonly used. [8] DEFAULT: Factory reset.
Tap CALLING button to use phone functions. Tap MUSIC button to start BLUETOOTH music player . Tap HISTORY button to check dialed, received, missed calls . Tap PHONEBOOK button to use phone book functions. Pairing Mode At the 1st time when using BLUETOOTH, you need to pair the mobile phone first. When a phone have not been paired with the unit, the BT icon and Pairing mark will blink continually on the panel.
the mobile Phone. Dialed /Received/Missed calls are saved In History mode .Tap Up/Down arrow load previous/next history record. The calls in each category are orderly saved from the latest one to the final one.. Select a number and tap Send button to enter calling mode. 4. (A2DP) Music Mode Tap MUSIC button to listen music in Bluetooth mode. Tap the button for ‘music’ in Bluetooth main menu. You can select the function with the key for previous, play / pause, stop, and next.
NOTES ON DISC Only use groundless loudspeakers. Use only loudspeakers of minimal 40Watt, using fewer watts may result in damaging your loud speakers at higher volumes. Use 4~8 Ω (Ohm impedance) loudspeakers only; using higher or lesser impedance may damage the unit. Do not use 3-cable loudspeakers and do not connect the loudspeakers minus to the car body. (GND). using a BTL circuit and each loudspeaker must be connected with insulated cables according the diagram.
TROUBLESHOOTING Symptom LCD CD General Power does not turn on. (No sound is produced.) No sound output when operating the unit with amplifiers or power antenna attached. Cause Remedy Fuse is blown In correct wiring Power antennal lead is shorted to ground excessive current is required or remote on the amplifiers or power antenna. Nothing happens The microprocessor when buttons are has malfunctioned pressed. due to noise, etc.
TROUBLESHOOTING SYMPTOM NO POWER DISC CANNOT BE LOADED. CAUSE THE CAR IGNITION IS NOT ON. THE FUSE IS BLOWN. REPLACE THE FUSE. PRESENCE OF DISC INSIDE THE PLAYER REMOVE THE DISC IN THE PLAYER THEN PUT A NEW UPWARD. INSERT THE COMPACT DISC WITH THE LABEL FACING UPWARD. CLEAN THE DISC OR TRY TO PLAY A NEW ONE. INSERTING THE DISC IN UPSIDE DOWN. DISC CANNOT BE READ. NO SOUND THE OPERATION KEYS DO NOT WORK. SOUND SKIPS. THE RADIO DOES NOT WORK, THE RADIO STATION AUTOMATIC SELECTION DOES NOT WORK.
TECHNICAL SPECIFICATIONS General Power supply: Current consumption: Maximum power output: Compatible formats: Dimensions (W x D x H) / weight: Working temperature range: ESP function: 11~16V DC max. 10 A 52W x 4 channels (max) DVD/SVCD/VCD/HDCD/MP3/MP4/VIDEO/CDDA/Picture CDCD-R/-RW/DVD±R/±RW playback 165*178*50 mm/2 kg -10℃ - +60℃ 10 sec. for Audio CD, 120 sec.