
Installation guide

128-7219A
10 of 12
-10-
d. Apply power to the XR9 home system as
outlined in the associated User Guide and
obtain an audio output. If no audio is heard,
move the antenna to different positions on the
surface until an audio output is heard. This is
the desired antenna position and should be
marked with masking tape or by another non-
scratch method.
e. After determining the optimum position, turn
off XR9 power, disconnect the power adapter
from the wall outlet receptacle and
disconnect the antenna cable.
f. Plan the routing of the antenna cable to the
cradle. Make sure you avoid any obstructions
that could crimp, kink or twist the cable; use
protective grommets wherever rough
openings are encountered.
g. If the antenna is mounted outside, route the
cable from the antenna position to the interior
of the home, working the cable through the
basement,under a window sill, etc.; make
adjustments and take up slack whenever
necessary.
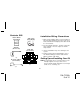
h. Plug the antenna cable into the ANT connector
on the back of the cradle.
i. Plug the DC Adapter jack into the “DC IN” 6V
receptacle on the cradle.
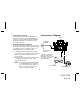
j. Plug the other end of the AC/DC wall adapter
into 110-volt wall receptacle; then press the XR9
Power button (
) to energize the unit. You are
now ready to enjoy XM programming within
your home.
NOTE: When using the rear audio output with an
external amplifier, the XR9 FM transmitter
option should be set to Off. (Refer to the
XR9 User Guide, 128-7220.)
NOTE: Do not cut the antenna cable and
attempt to splice it or attach alternative
connectors or cable. The cable and
connectors used in your XH9 Home Kit
are specially chosen and attached at
the factory to ensure that they will work
with XM’s unique frequency band. Use
an XM-approved antenna extension kit
from your local consumer electronics
retailer. Failure to do so could damage
the unit.