
User Guide
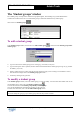
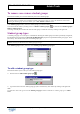
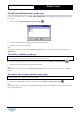
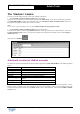
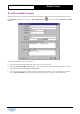
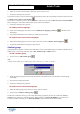
Table Of Contents

Copyright 2003 Auralog S.A. All rights reserved. 20
TELL ME MORE
®
EDUCATION
Admin Tools
Example 2
File with the ‘UserName’ and ‘LessonLanguages’ columns (with two lesson languages for each student).
Some basic rules for creating a valid file to be imported
§ The minimum any student import file must include is the ‘UserName’ column. The lesson language will be
subsequently asked for in order to complete the importation. You can, therefore, either add one of the columns
(‘Learninggroups,’ ‘IDLearninggroups’ or ‘lessonlanguages’), or wait for the conclusion of the importation. The
lesson language you add will be the same for all the students imported in the file. To know more about this, refer to
the To import the file section.
§ The Tutors, language groups and student groups must have first been created in Admin Tools for them to be
integrated into the file to be imported.
§ Certain fields represent the same element (‘PupilsGroup’ and ‘IDPupilsGroup’ or ‘LearningGroups’ and
‘IDLearningGroups’). The simultaneous presence of these fields in the same file could cause conflicts. You must,
therefore, choose either the name or the ID.
§ The columns can be arranged in any order.
§ If a student is learning multiple languages or belongs to multiple language groups and/or student groups, the
different codes must be separated by a comma.
Refer to example 2 of the files to be imported above (each student is learning two languages).
§ You can decide to put no data in a certain column. However, in this case, you must retain the semi-colons marking
out the column and put a space between them.
Example: durand; michel; ; fra
§ Do not forget to put #students at the beginning of the file and # before the name in the first column.
§ The file must be in text format (*.txt).
To import the file
Ø Select the menu Students/Import student accounts from a file.
Ø Select the file you want to import.
The file will be analysed during importation. There are several scenarios which may occur during this analysis:
§ The file contains no errors: the importation is completed successfully (the list of student accounts is updated) and
the following message will appear: ‘x student(s) added successfully.’
§ The file contains no errors, but some information is missing: a dialogue box will appear asking for the information
necessary to complete the importation.