TM DIDO Jr. Installation Manual Manual Number 090501 Firmware Version 1.17 above 205 Commercial Court Morganville, NJ 07751 Phone: (732) 591-5800 Fax: (732) 591-5801 www.auroramultimedia.
DIDO Jr. Installation Manual TABLE OF CONTENT 1 INTRODUCTION .................................................................................................................................2 2 ACCESSORIES .....................................................................................................................................4 2.1 OPTIONAL ACCESSORIES ..................................................................................................................
DIDO Jr. Installation Manual 1 Introduction The DIDO Jr. is a high quality video processor engine. The DIDO Jr. supports advanced functionality such as video format /scan rate conversions, real time image rotation (patents pending), and window effects. All these can be controlled via IR remote and RS-232 commands. The device is small enough to fit in tight areas. The progressive output(s) produces a high quality image using the latest 3:2 / 2:2 pulldown, motion handling, and noise reduction technologies.
DIDO Jr. Installation Manual Just a few examples of the DIDO Jr.’s capabilities: Single Image Scaling Side by Side Single with PiP Single with Translucent PiP Single Rotated Dual Rotated Single Rotated PiP Single Rotated Translucent PiP \ Video Wall Mode Rotated Using 3 DIDO Jr.
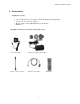
DIDO Jr. Installation Manual 2 Accessories Supplied accessories: 1 - 12V / 14.
DIDO Jr. Installation Manual 2.1 Optional Accessories Optional accessories available from Aurora Multimedia: SRK-001 Single Rack Mount Kit DRK-001 Dual Rack Mount Kit CA0020-1 DVI-I to DVI-D / VGA Adapter Cable CA0022-1 DVI-I to DVI-D / RCA Adapter Cable CA0021-1 DVI-I to DVI-D / BNC Adapter Cable DIDO LOOP KIT RS-485 Loop Through Kit for connecting multiple DIDO Jr.
DIDO Jr.
DIDO Jr. Installation Manual 3 IR Remote and basic key functions The DIDO Jr. can be controlled using an IR remote control, via the front panel, or RS-232 commands. The remote is addressable for installing with multiple DIDO Jr. units. To change the address on the remote: - Press and hold the ‘Up’ and ‘Down’ arrows together for 5 seconds. The red LED will start to blink - Enter the address (0-255) and press ‘Select’ In order for the IR remote to properly control a DIDO Jr.
DIDO Jr. Installation Manual For details of DIDO Jr. operation, refer to the corresponding chapter of this document. Below is a brief description of the remote transmitter and the keys used for DIDO Jr. control. IR Remote POWER ZOOM CROP POS SIZE VOLUME + VOLUME MUTE ARROWS MENU SEL EXIT 0..
DIDO Jr. Installation Manual 5 LCD / Keypad The LCD helps to navigate through menus with the front keypad. - Menu: brings up the menu on the screen and the LCD - exits menu levels. - Select: brings up next menu level or confirms an entry. - Arrows: navigates through the menus and changes selections. - Power: Toggles the Power On and Off. This button can also be used to restore all default values if it’s held down for 10 seconds when the power connector is first applied.
DIDO Jr. Installation Manual • • 6.2 DVI/RGB/YPbPr: for hi-res inputs. If a DVI-I breakout cable is used, RGBHV/YPbPr can be input as an additional source to the DVI. DVI/RGB/YPbPr OUTPUT for hi-res outputs. If a DVI-I breakout cable is used RGBHV/YPbPr can be output in addition to the DVI. Power connector Connect the supplied 12V DC adapter to the power jack of the DIDO Jr. unit. It is recommended to connect the power supply only after all other connections are done. 6.
DIDO Jr.
DIDO Jr. Installation Manual 7 Operating the DIDO Jr. The DIDO Jr. has many advanced features to enhance the typical viewing experience. A user can switch the unit on or off, switch the current source, rotate an image, and many other functions. Advanced functionalities may differ in some of the operating modes, which will be described in more details and in the subsequent chapters of this document. 7.1 Remote Control Functions Key: Vol+/Not available for DIDO Jr.
DIDO Jr. Installation Manual • Position: moves the window up/down or left/right. Position will only work if the image is zoomed. Keys: Single, Dual, Tri, Quad These keys select picture layout (how many windows will be displayed) of the output. • Single: only one picture is displayed on the output. • Dual: toggles between PiP and SBS. When in PiP mode, translucency can be adjusted using Up/Down arrows (no menus are present). • Tri: Not available for DIDO Jr. • Quad: Not available for DIDO Jr.
DIDO Jr. Installation Manual 7.2.2 Window Setup This is where source, size, position, zoom, and crop can be modified per window. Once selected, the choice of window for modification will appear. Window Setup affects the characteristics of the window itself and not the image inside the window. Source allows input signal to be assigned to a specific window. For example, the menu below shows that DVI is assigned to window 1 and Video input is assigned to window 2.
DIDO Jr. Installation Manual Window Zoom gives the ability to proportionally change both the horizontal and vertical sizes of a window. Window Crop allows each of the edges of an image to be adjusted into the window to help reduce noise specific to an input. Crop is specific to the current resolution of the input inside the window. It must be saved into a profile in order for it to be automatically applied. If a new resolution is applied, crop must be re-adjusted.
DIDO Jr. Installation Manual 7.2.3 Input Setup Input Setup allows a user to manually configure different connector inputs. SVID: Auto, S-Video, and Video. If the image can not lock well due to poor sync, use the manual selection. DVI: Auto, Norm PC, Wide PC, and Video. The manual selection helps to set correct input timing such as Video or PC. This will help the DIDO Jr. to better sync on an input. RGB: Auto, Norm PC, Wide PC, and Video.
DIDO Jr. Installation Manual Layout selects window layout from Single, PiP, and Dual Stack Type selects the positions of windows 1 and 2 in Dual mode. The selections are Left-Right and UpDown. Left-Right Dual Mode Up-Down Dual Mode Rotate will rotate picture by 0, 90, 180, and 270 degrees. PiP Transparency sets the transparency level (16 levels) of the pip window when in PiP mode. PiP Size adjusts the size of the PiP window from 0 - 100 percent with accuracy down to the tenths.
DIDO Jr. Installation Manual Flip Setup changes the input image orientation with respect to the output. This allows for mirror images or back to back images in rotated modes to create new effects. Horizontal Disabled Horizontal Enabled 7.2.5 Output Setup Output timing for the DVI/RGBHV/YPbPr connector is selected here. Output type can also be modified from this menu for the analog portion of the connector. The selections are RGBHV, RGsB, YPbPr, and No Output.
DIDO Jr. Installation Manual 7.2.7 System Settings This menu allows the selection of items which affect the overall DIDO Jr. operation. Unit Address allows many DIDO JR units to be connected via RS-485. When connecting multiple DIDO JR units via the RS-485, each unit must be addressed differently. This address will be used when controlling via RS-232 from a control system or PC. In addition, the last unit in the chain must have RS-485 Termination enable.
DIDO Jr. Installation Manual Show OSD can disable the On Screen Display. When using the front keypad for setup via the LCD, it will prevent the OSD from coming on the screen. This is handy when making changes to the system while it is being viewed. Background Color determines the color of the window when no input signal is present. Noise reduction allows the DIDO Jr. to clean up an image with random noise caused by poor or weak signal. There are two types of noise reduction filters available.
DIDO Jr. Installation Manual DIDO Jr. Reconfig will re-sync all the current input signals as if the inputs were disconnected and reconnected. Default Settings will reset the DIDO Jr. to factory settings (default settings). All customized settings will be deleted.
DIDO Jr. Installation Manual 8 Signal Timing This menu allows the adjusting and adding of input and output resolutions. There are currently ten user profiles for customized input and output resolutions. Horizontal Frequency and Pixel clock are automatically calculated inside the DIDO Jr. When done making changes, select Apply Changes to save. Keep in mind any change made affect all inputs using the resolution as well as outputs.
DIDO Jr. Installation Manual Time Events are events based on the time of day. The DIDO Jr. can have 5 different time events programmed. When the an event is turned on, the time selected will cause the DIDO Jr. and all other DIDO Jr. units connected on the RS-485 bus to carry out a preset, power on, or power off. Timer Events are events based on a cycling time line. This means the DIDO Jr. will carry out repeating functions in a timeline. The DIDO Jr. can have 5 different timer events programmed.
DIDO Jr. Installation Manual Video Wall Functionality When multiple DIDO Jr. units are used, a very powerful but yet cost effective video wall can be created. The DIDO Jr. can create video walls that have real time vertical rotation of single or multiple images. For easy setup, the DIDO Jr. has a Video Wall Setup menu under Windows Setup. This menu allows a user to enter the amount of rows and columns of the video wall as well as the current location of the DIDO Jr.. Once entered, the DIDO Jr.
DIDO Jr. Installation Manual 9 Real Time Image Rotation The DIDO Jr. can do real-time image rotation with resolutions up to 1900 x 1200 @ 60Hz. Its patent pending multi-image rotation allows a display to show multiple rotated images at the same time. These examples below show some of the many possibilities. Single Rotated Dual Rotated Rotated PiP Single Rotated Translucent PiP Images can be cropped and zoomed for stretch to fit.
DIDO Jr. Installation Manual 10 Control Software Aurora Multimedia has developed control software for use with the DIDO Jr. to make control of the unit even easier. This firmware is available free of charge on the Aurora website www.auroramultimedia.com It can be found in the DIDO Jr. section under products. The software is written in Flash as an executable file to be run from a PC’s communication port and can also be run from Aurora WACI control systems.
DIDO Jr. Installation Manual 8 Troubleshooting Symptom Key on remote is pressed but nothing happens The display does not turn on or show an image No control via RS-232 connection to DIDO Jr.
DIDO Jr. Installation Manual 11 Firmware update The internal software of DIDO Jr. (the firmware) can be updated. This is necessary since new FW will correct bugs from previous versions or add new functionalities. The serial port of the DIDO Jr. must be connected to the RS-232 (“COM”) port of a PC-compatible personal computer, running MS-Windows 98, 2000, or XP operating systems. Make certain to set the baud rate to 115k, unit address to 0, and back up the settings before updating firmware.
DIDO Jr. Installation Manual 12 Cloning The DIDO Jr. can be cloned to save and restore all current parameters. There are two steps involved in cloning procedure. They are: 1. Learning or downloading data (settings) from DIDO Jr. to the computer. 2. Teaching or uploading data (settings) from computer to the DIDO Jr. Before cloning the DIDO Jr., a folder which will be used to store data from the master DIDO Jr. needs to be created (for example: C\DIDO Jr.\data). The clone utility (CloneLdr.
DIDO Jr. Installation Manual 13 RS-232 Protocol Serial Control Setup: 115k 8N1 (Default) Baud Rate: 2400 – 115k (Selectable). Serial Connector Type: 9 to 6 pin RS 232 cable (NULL). Note: this cable is supplied by the manufacturer. The DIDO Jr. is addressable. Units will be addressable from 000-254. Address 255 or *** is reserved for broadcasting.
DIDO Jr.
DIDO Jr.
DIDO Jr.
DIDO Jr. Installation Manual QUERY COMMAND LIST: ? 1 2 3 4 5 6 7 8 9 10 11 12 13 14 15 16 17 18 19 20 21 22 23 24 25 COMMANDS RSADDR OUTFORMAT HPOSIT n VPOSIT n HSIZE n VSIZE n HPOSITPIP VPOSITPIP HSIZEPIP VSIZEPIP VER PRESET VOLUME BRIGHTNESS CONTRAST SATURATION HUE ZOOM n INFO CROPLEFT n CROPRIGHT n CROPTOP n CROPBOTTOM n FLIP STACK FUNCTION ADDRESS OUTPUT FORMAT H.POSITION V.POSITION H.SIZE V.SIZE PIP H.POSITION PIP V.POSITION PIP H.SIZE PIP V.
DIDO Jr. Installation Manual General Info: After each command you need to wait for the following answer "~ OK " before sending the next RS-232 command. Some commands require time to carry out the function assigned. If another command is sent before the DIDO Jr. can complete the first task it may ignore the next function. Always allow the DIDO Jr. the proper time to finish the command. Commands which take the longest would be Preset Load and Save and Source changes.
DIDO Jr. Installation Manual 14 Specifications 14.1 Supported Video Timing Input Format Horiz. Freq. (KHz) Vertical Freq. (Hz) Active Resolution Total Resolution Pixel Clock (MHz) 525/60 NTSC, ITU-R BT601-5, RS-170M 15.75/1.001 60.0/1.001 720x480 @ 59.94i 858x525 13.500 525/60 NTSC, CCIR 656 15.75/1.001 60.0/1.001 720x480 @ 59.94p 858x525 27.000 625/50 PAL/SECAM, ITU-R BT601-5 15.625 50.000 720x576 @ 50.00i 864x625 13.500 625/50 PAL/SECAM, CCIR 656 15.625 50.000 720x576 @ 50.
DIDO Jr. Installation Manual 14.2 Power source 12v 14.4 Watt DC wall supply 2.1mm Power Connector (12 volts) Center is Positive - Outer Shell is Ground 14.
DIDO Jr. Installation Manual RS232 - Pins 1, 3, 5 Pin 1: Ground Pin 3 - TX Pin 5 – RX RS-485 – Pins 1, 4, 6 (Used for looping multiple DIDO Jr. units) Pin 1: Ground Pin 4: 485+ Pin 6: 485When connecting multiple units, the first unit will have the RS-232 connected. Then its 485+, 485-, and ground, are connected parallel to all other DIDO Jr. RS-485 ports. Aurora has made available DIDO LOOP KIT which makes this task easier to connect. Example of multiple DIDO Jr.
DIDO Jr. Installation Manual 15 Limited Lifetime Warranty Aurora Multimedia Corp. (“Manufacturer”) warrants that this product is free of defects in both materials and workmanship for the product lifetime as defined herein for parts and labor from date of purchase. This Limited Lifetime warranty covers products purchased in the year of 2003 and after. Product lifetime is defined as 7 years from discontinuance of product.
DIDO Jr. Installation Manual 16 FCC Part 15 Statement RADIO AND TELEVISION INTERFERENCE This equipment has been tested and found to comply with the limits for a Class A digital device, pursuant to Part 15 of the FCC rules. These limits are designed to provide reasonable protection against harmful interference in a residential installation.
DIDO Jr.
DIDO Jr.
DIDO Jr.
DIDO Jr. Installation Manual Aurora Multimedia Corp. 205 Commercial Court Morganville, NJ 07751 Phone: (732) 591-5800 Fax: (732) 591-5801 www.auroramultimedia.