
Manual
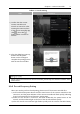

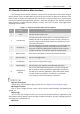

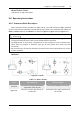
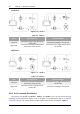
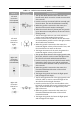
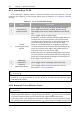

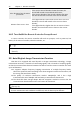
Table Of Contents
- Chapter 1 Aircraft
- Chapter 2 Remote Controller
- Chapter 3 Smart Battery
- Chapter 4 Autel Enterprise App
- Chapter 5 First Flight
- 5.1 Instructions for First Flight
- 5.2 Flight Precautions
- 5.3 Pre-Flight Preparations
- 5.3.1 Unpacking
- 5.3.2 Charging
- 5.3.3 Preparing the Aircraft
- 5.3.4 Installing/Removing Propellers
- 5.3.5 Preparing the Remote Controller
- 5.3.6 Login, Pairing, Activation (activation only upon first use)
- 5.3.7 Novice Guide (first time use only)
- 5.3.8 Reconnect the aircraft (not required by default, required after disconnection)
- 5.4 Pre-Flight Inspection
- 5.5 Basic Flight Process
- Chapter 6 Firmware Update and Maintenance
- Appendix A Product Specifications

22 Chapter 2 Remote Controller
EVO Max 4T User Manual
indicator light flashes quickly, it indicates that the frequency pairing is successfully done.
2.2.7 Remote Controller Calibration
If the remote controller is abnormal, it is recommended to calibrate it, as shown in Table
2-6.
Table 2-6 Remote Controller Calibration
Step Reference
1)
Confirm that the current
Remote Controller is turned
on. After entering the app,
click " ">" ">"remote
controller Calibration", and
finally follow the page
prompts to calibrate the
remote controller.
2)
Calibration of the dials and
command sticks: According
to the calibration guide page
of the remote controller,
move the left and right dials
and the left and right
command sticks according to
the directions shown in the
figure and hold for 1 second.
At this time, a beep will be
heard, and the calibration
direction icon will be changed
from gray to dark blue,
indicating that the
orientation calibration was
successful. There is no order
in which directions are
calibrated, until all directions
are calibrated, the remote
controller calibration is done.