
Full Product Manual

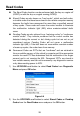
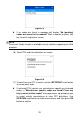

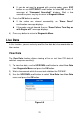
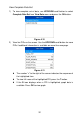
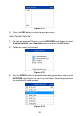
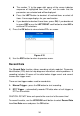
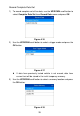
Table Of Contents
- Trademarks
- Copyright Information
- Disclaimer of Warranties and Limitation of Liabilities
- For Services and Support:
- Safety Precautions and Warnings
- 1 General Information
- 2 Using the Scan Tool
- 3 Print and Update
- 4 OBDII Diagnostics
- 5 Ready Test
- 6 Compliance Information
- 7 Warranty and Service

34
The number “x” to the upper right corner of the screen indicates
sequence of highlighted item; and “#x” are the order that the
parameters are selected and will be displayed.
Press the LEFT button to deselect all marked items or select all
items. A message displays for your confirmation.
If you decide to deselect these items, press OK; if you decide not
to, press ESC or use the LEFT/RIGHT scroll button to select NO to
continue PID selections.
4) Press the OK button to view selected PIDs on screen.
Figure 4-15
5) Use the ESC button to return to previous menu.
Record Data
The Record Data function allows recording vehicle modules’ Parameter
Identification (PID) data to help diagnose intermittent vehicle problems. A
recording includes 5 frames of live data before trigger event and several
frames after trigger event.
There are two trigger modes used to record data:
A. Manual Trigger – press the OK button to start recording.
B. DTC Trigger – automatically records PID data when a fault triggers a
DTC on the vehicle.
CAUTION: DO NOT drive and operate the scan tool at the same time!
To record live data, use the UP/DOWN scroll button to select Record Data
from Live Data menu and press the OK button.