
User's Manual


55
55
5
II
II
I
NSTNST
NSTNST
NST
ALLINGALLING
ALLINGALLING
ALLING
THETHE
THETHE
THE
A A
A A
A
SSEMBLSSEMBL
SSEMBLSSEMBL
SSEMBL
YY
YY
Y
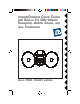
Referring to the diagram below:
You can install the motion activated camera in a wall box that is power at all
times or in a wall box that is controlled by a wall switch, but if it is powered
from a wall switch, make sure you leave the switch on at all times. Turning the
switch off will completely disable the motion activated camera.
CACA
CACA
CA
UTIONUTION
UTIONUTION
UTION
::
::
: To prevent severe damage to the unit, do not connect it to a wall
box that is controlled by any kind of dimmer of remote controlled switch.
WARNING:WARNING:
WARNING:WARNING:
WARNING: Before making the following connections, be sure the power to
the junction box you are installing the motion activated camera into is turned
off. If not, a serious shock hazard will exist.
1. Install the gasket (supplied) onto the junctions box, and route the house
wiring through the gasket.
2. Connect the house wiring's bare copper wired to the grounding screw on
the mounting plate.
3. Connect WHITE wire from the motion activated camera to the house
wiring's WHITE wire, using a wire nut.
4. Connect BLACK wire from the motion activated camera to the house
wiring's BLACK wire, using a wire nut.
Make sure no bare whiskers of wire stick out (cover with electrical tape if
necessary).
5. Secure the mounting plate to the junction box using the screws supplied.
6. Secure the insulating ring in each lamp holder and screw in a bulb (max
150W, not supplied) into each lamp holder.