RS-750lcd PROFESSIONAL REMOTE CAR STARTER WITH ALARM SYSTEM & 2-WAY LCD COMMUNICATION OPERATION MANUAL THIS PRODUCT IS DESIGNED FOR PROFESIONAL INSTALLATION ONLY
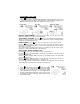
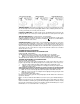
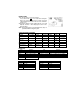
XT-75S STANDARD TRANSMITTER OPERATION: (Note: For 2-Way LCD Transmitter operation, see XT75LCD User Manual) Transmitter Button - - - - - System Function Lock Doors & Arm System Remark Arm and Noiseless mode Press within 3 seconds. Arm and Delete The Zone 1 / SIS-11 Shock Sensor Arm and Delete The Zone 4 / PIR Optional Sensor Arm and Delete The Zone 1 / Shock Sensor Delete The Zone 4 / PIR Optional Sensor Unlock Doors & Disarm System Press twice within 3 seconds.
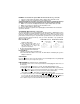
ACTIVE ARMING – LOCK & ARM 1. Press button on the transmitter. 2. The siren will chirp once and parking light will flash once indicating that the system is now armed. The vehicle doors will lock upon arming when interfaced with the security system. Note: The (optional) wireless PIR sensor will take 30 seconds to set up. System Arm Door Ajar Trunk / Hood Ajar DEFECTIVE SENSOR REMINDER: If the siren sounds 3 chirps, then you have left a door, trunk, or hood lid ajar.
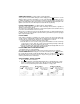
ARMING WHILE DRIVING: (see Alarm Feature I - 6 Programming) Your system can be armed while driving the vehicle! Simply press the button for 2 seconds while the vehicle is running, or the ignition is on. The system will chirp once and then once more to indicate the ignition is on. The system will not respond to any input triggers except the door trigger. The ignition trigger will not be activated. The system will disarm automatically when the ignition is turned off.
Shock Sensor Trigger Ignition Trigger (optional) PIR Sensor TAMPER DISARMING: If the alarm was triggered in your absence, when disarming the system, the siren will chirp 4 times and the parking lights will flash 3 times, indicating an intrusion to the security system while you were away from the vehicle. PATHWAY ILLUMINATION (See Alarm Feature “II - 4” Programming): This feature turns the parking light “ON” for 30 seconds upon a unlock signal and for 10 seconds upon the lock signal.
EXAMPLE: To Override The System With The Password Code 51, you would; 1. Enter the vehicle and turn the ignition switch to 'ON’ position. (Alarm will sound.) 2. Within 5 seconds, Press and Release the Valet Switch 5 times (When finished above procedures, the system's siren will stop; parking light will stop flashing and all sensors will stop triggering but the vehicle cannot be started.) 3. Within 15 seconds of the first digit entered, turn the Ignition Switch “OFF” then “ON”. 4.
TRIGGER THE SYSTEM When armed, your vehicle is protected as follows: 1. Light impacts will trigger the warn-away signal. A [3] long chirp from siren/horn. 2. Heavy impacts / Doors open / Hood open / Trunk open / Turn on the ignition key/ Activate PIR sensor / Activate door/window sensor will trigger the programmed sequence. The starter disable relay (if installed) prevents the vehicle’s starter from cranking.
PASSIVE CAR JACK: Operates as below: 1. Turn the ignition switch “ON”, Car-Jacking will arm. 2. Once the system is armed, if you are forced from the vehicle, the system will trigger when the door is opened and closed while the ignition is “ON”. TRIGGER THE CAR JACK MODE: 3-timer circuits will function as follows: First timer: a. 50 seconds after the system has beer triggered. The siren will start chirping for 15 seconds. b.
DRIVER PAGING 1:This function works only in armed status. Press and hold the for 2 seconds when arming the alarm. The system will chirp and a melody sound and "call" indication flashes on the LCD screen to confirm the function is on. 2:Tapping the window near the paging (knock) sensor will chirp the siren/horn 1 time and page the carrier of the LCD transmitter. Note: This paging feature is not operable unless step 1 is performed while arming the system.
REMOTE START OPERATION WARNINGS: As with any product that performs automatic functions, there are certain safety precautions that you must practice and be aware of. 1. Keep the transmitter out of children’s reach. 2. Do not leave anyone in the vehicle while running on remote control. 3. Alert servicing personnel that the vehicle can be started automatically. 4. Do not start the vehicle by remote while it’s in an enclosed area or garage. 5.
TO OPERATE THE VEHICLE WHILE RUNNING ON THE REMOTE START: 1. Insert the ignition key and turn it to “ON” (not the start) position. 2. Press the brake pedal. Note: If the brake pedal is pressed before the key is in the ON position, the engine will shut down. TEMPORARY STOP FEATURE: This feature allows the vehicle to remain running after the key has been removed from the ignition.
TEMPERATURE CHECK If you installed the optional temperature sensor, you can monitor, thru the LCD screen, the present indoor temperature of the passenger compartment before cooling or heating your vehicle. PrPress the and button at the same time on the “Two Way LCD Screen Transmitter”, the in-door temperature and system’s status will be shown on the LCD screen. Note: Press the buttons on the LCD transmitter to reset the screen back to clock display.
LIMITED LIFETIME WARRANTY PROVISIONS ( U.S. and Continental U.S. Only) 1. AutoPage, Inc. WARRANTS that this new unit has been thoroughly inspected and tested at the factory prior to delivery. Your AutoPage equipment is guaranteed for “life” to the original purchaser/user of the equipment under the following conditions: If the product proves defective (according to AutoPage’s testing) within the first year, the defective unit may be exchanged or repaired free of charge.
This WARRANTY CARD is for your record. However, AutoPage reserves the right to request you to submit this WARRANTY CARD, which must have complete information to receive warranty service. Please keep this card in a secured place . AUTOPAGE WARRANTY SERVICE CARD Model: _______________ Serial # _______________ CUSTOMER TO COMPLETE DEALER TO COMPLETE Mr./Mrs./Ms.
1815 West 205th Street Suite 101 Torrance, California 90501-1525 Main Office: 310-618-2002 Customer Service: 800-262-2527 Ext. 462 www.autopageusa.