
2009
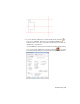
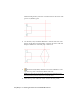
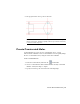
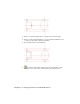
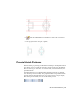
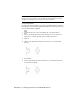
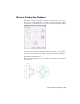
Table Of Contents
- Contents
- 1 Introduction
- 2 Get Familiar with the Work Area
- 3 Drawing Commands in AutoCAD Mechanical
- 4 Modify Drawings with Power Commands
- 5 Generate Standard Parts
- 6 Organize Objects with Layers
- 7 Create Hidden Lines
- 8 Reusable Detailing Tools
- 9 Power Dimensions
- 10 Add Part Lists and Balloons
- 11 International Drafting Standards
- Index

NOTE User-defined and predefined hatches are non-associative by default. To
change both to be associative, select the Make Predefined Hatches Associative
checkbox on the AM:Preferences tab of the Options dialog box.
Create Hatch Patterns
For many parts in an assembly, you can apply predefined hatches quickly by
selecting the part and using a Hatch menu command. For this exercise, select
the User-defined hatch command.
1 From the Draw toolbar, click Hatch ➤ User-defined hatch.
2 Select User-defined pattern in the Pattern Type list. Set 45 degrees for
angle and 2.50 mm for Spacing in the Pattern properties list.
3 Click OK.
4 Click a point within the boundary area of the part to add the hatch
pattern.
5 Press ENTER.
6 Click a point within the next boundary area to add the hatch pattern.
See the following image.
20 | Chapter 3 Drawing Commands in AutoCAD Mechanical