
Technical data

Using iParts—Intelligent Family of Parts
55
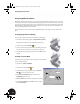
Inserting the Fastener
As an example of how iParts automate the design process, you will now place a fastener into the hole of the
sheet metal part. This fastener was designed as an iPart with a variety of lengths and diameters.
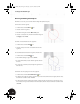
1. On the Panel bar, click the Place Component tool.
2. In the Open dialog box, select the Use iMate check
box in the lower-left corner.
3. Select the part Stud.ipt and then click Open.
The Place Standard iPart dialog box is displayed,
which allows you to select a version of the iPart.
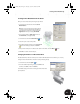
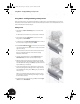
4. In the Place Standard iPart dialog box, click the
Table tab, select the second entry in the table (with a
length of 18 mm), and then click anywhere in the
graphics window to place the iPart.
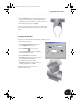
A few things happened just after you placed the part:
• The iPart with a length of 18 mm was created.
• The iPart was automatically positioned into the
hole using the iMate you created.
• Autodesk Inventor zoomed into the placement
location so that you can easily find the placed part.
5. Press the F5 key to return to your previous view.
Placing the Quick-Action Lever
Next, you will add the quick-action lever to the other side of the bolt. The quick-action lever contains several
different parts and also contains an iMate for automatic positioning in an assembly.
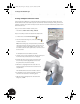
1. On the Panel bar, click the Place Component tool.
2. In the Open dialog box, select Clamp_screw.iam, ensure
that the Use iMate option is checked, and then click Open.
The quick-action lever is automatically placed into the
assembly using the iMate you defined on the opposite side
of the Clamp_C part. You can still rotate the part about the
center of the hole.
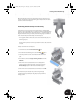
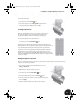
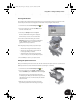
3. With the cursor, drag the quick-action lever into the
approximate position shown in the image to the right.
INV8_TD_Book5.book Page 55 Tuesday, October 28, 2003 10:51 AM