
Instruction Manual


2
ATS-3AM & ATS-2AM Dominator Tempo & Syncro Instruction Manual
CONTENTS
Overhead Garage Door Operator
1. System Specifications 3
2. Safety Information 4
3. Operating controls 6
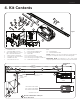
4. Kit Contents 7
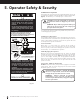
5. Operator Safety & Security 8
5.1 Manual Door Operation 8
5.2 Emergency Evacuations 8
5.3 Power Failure 8
5.4 Re-Engaging the Operator 8
5.5 Security - Inbuilt Locking Facility 8
6. Installation Instructions 9
6.1 C-Rail Assembly 10
6.2 Mounting Operator for a Track Type Door 10
6.2.1 Determine Bracket Position 10
6.2.2 Mounting the Wall Bracket 10
6.2.3 Attach the C-Rail to the Wall Bracket 10
6.2.4 Securing the Powerhead Perforated Angle or equivalent 11
6.2.6 Mounting Door Bracket 11
6.2.7 Attaching the Arms 12
6.3 Safety Beam Installation 13
6.3.1 Safety Infra-Red Beam Kit (P/N 62047) 13
6.3.2 Assembling the Mounting Bracket 13
6.3.3 PE Assist Alignment 13
6.4 Setting Speed and Limits 14
6.4.1 Set the Limit Positions and adjust drive speed: 14
6.4.2 Clearing the Door Limit Positions 14
6.4.3 Re-profiling the Door 14
6.5 Safety Testing 15
6.5.1 Obstruction Detection Test 15
6.5.2 Test the Close Cycle and Safety Reversal 15
6.5.3 Testing the Open Cycle 15
6.5.4 Test the Manual Door Operation 15
6.6 Coding Premium Remote Controls 16
6.6.1 Setting Remote Control Functions 16
6.6.2 Erasing All Premium Remote Control Codes 18
6.6.3 Vacation Mode 18
6.6.4 Remotely Coding Premium Remote Controls 18
6.6.5 Install Premium Wall Control 18
6.7 Battery Backup 19
6.7.1 Connecting the Battery Backup 19
6.7.2 Test the Opener 19
6.7.3 LED Battery indicator 19
6.8 Accessories 19
6.8.1 Terminal Block 19
6.8.2 Connecting or Disconnecting Accessories 19
6.9 Auto-Ki Smart Phone Control 20
6.10 Auto-Close 22
6.11 Attach Warning Labels 22
6.12 Homelink 23
6.12.1 Coding in the HomeLink
®
button 23
6.12.2 Coding HomeLink
®
button into the Operator 23
6.12.3 Erasing all HomeLink
®
buttons from Operator 23
7. Operation Instructions 24
7.1 How to Use Your Operator 25
7.1.1 To Operate the opener: 25
7.1.2 Replacing the Battery: 3V Lithium Battery CR2032. 25
7.2 User Operating Controls 26
7.3. Troubleshooting 27
7.4. Service / Warning Indicator 28
7.4.1 Main Light = Service / Warning Indicator: 28
7.4.2 Main Light = FAULT Status Indicator (when MODE is on): 28
7.4.3 Connecting or Disconnecting Accessories: 28
7.5 Disposal of Batteries 29
8. User Maintenance Instruction 30
8.1 Door Maintenance 30
8.2 If You Need a Service Call 30
9. Appendix 31
A - Status Indication during Operating Mode. 31
B - Adjustment Mode Instructions 32
C - Adjusting Force Margins 33
D - Battery Functions 33
E - Setting up Tilt Door 33
F - Setting the PET Mode position 34
G - Setting limits via Premium Remote Control 34