
Setup guide

Using the Auto-Adjust
Once you have the unit displaying the resolution you desire for your application do the
following:
Press and release the “Select” button on the membrane. This will place the unit into a
“Geometry Auto Adjust” mode. This operation will adjust the picture so it is centered both
vertically and horizontally on the LCD screen. It will also make the necessary
adjustments to the internal clock timing so that the picture is stable (without any
decernable pixel jitter).
After having completed this step you may wish to adjust the color balance. This
procedure adjusts for any imbalance in the Red, Green, and Blue levels from the video
cable or video card. This is accomplished using the LCDs OSD ( On Screen Menu)
system.
OSD (On Screen Display) Adjustments
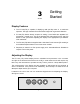
There are four membrane buttons (see Fig 1, above) located on the rear of the unit.
They will activate the OSD and allow navigation to all adjustments if your unit requires
adjustment.
OSD Layout
Main Menu Component Being Adjusted
Automatic Adjust Geometry & Color Balance
Horizontal Position Horizontal position
Vertical Position Vertical Position
Horizontal Size Horizontal Size
Phase Phase
Brightness Brightness
Contrast Contrast
Color Red, Green, Blue Levels
OSD Language English, Espanol, Deutsch, Francais, Italiano
Advanced Factory Preset, OSD Hor. Pos., OSD Vert. POS.
Cancel
All adjustment follows the basic adjustment procedure outlined below. If during
adjustment you encounter difficulity. Exit the Menu system by pressing the Menu button
and press the Select to Auto Adjust the unit.
To adjust the Auto Color Balance:
1. Press the Menu button.
2. Press Select to Highlight this Sub Menu
3. Press the to highlight Auto Color Balance.
4. Press the Select button.
The unit will test your video color balance and adjust it accordingly. When complete
press Menu to Exit the OSD Menu system
When you press the “Menu” the new settings are saved and your setting will be stored in
the unit’s non-volatile memory.