
Setup guide
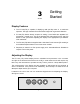
Following are complete instructions on how to adjust each individual function on
the OSD menu:
Automatic Adjustment
Press Menu and the automatic adjustment will be the first item to appear on the OSD.
Hit Select and then press the Up/Down button to navigate to Geometry.
Press Select again and the display will automatically adjust the geometry.
Press the Up/Down button to Color Balance.
Hit Select again and the display will automatically preset the color balance to a factory
preset value.
Horizontal Position
Press Menu. Press the Up button to the second icon which is Horz. Pos
Hit Select and then press the Up/Down button to achieve the desired position. The
desired value will be graphically illustrated along with a digital value.
When complete press Select and you are ready to move to the next adjustment.
Vertical Position
Press Menu. Press the Up button to the third icon which is Vertical Position.
Hit Select and then press the Up/Down button to achieve the desired position. The
desired value will be graphically illustrated along with a digital value.
When complete press Select and you are ready to move to the next adjustment.
Horizontal Size
Press Menu. Press the Up button to the fourth icon which is Horizontal Size.
Hit Select and then press the Up/Down button to achieve the desired size. The
desired value will be graphically illustrated along with a digital value.
When complete press Select and you are ready to move to the next adjustment.
Phase
Press Menu. Press the Up button to the fifth icon which is Phase.
Hit Select and then press the Up/Down button to achieve the desired phase.
The phase should be adjusted until the screen image is sharp and there is no
When complete press Select and you are ready to move to the next adjustment.
Brightness
Press Menu. Press the Up button to the sixth icon which is Brightness. Hit Select
and then press the Up/Down button to achieve the desired brightness level. The
desired value will be graphically illustrated along with a digital value.
When complete press Select and you are ready to move to the next adjustment.
Contrast
Press Menu. Press the Up button to the seventh icon which is Contrast.
Hit Select and then press the Up/Down button to achieve the desired contrast level.
The desired value will be graphically illustrated along with a digital value.
When complete press Select and you are ready to move to the next adjustment.
Color
Color temperature adjustments allows the user to adjust for desired white balance.
This can be achieved by adjusting the Color Temperature control or adjusting the
individual Red, Green or Blue controls.
Press Menu. Press the Up button to the eight icon which is Color .