
Operation Instructions


RFID Tag iOpen/K9
Introducing new RFID Tag to the transmitter
1. Open the top cover of transmitter unit.
2. Press the hidden button using a pin or screw driver.
a. The LED light turns On in Red colour.
b. The light indicates the learning mode. Transmitter awaits the signal from the Tag.
3. Bring the Tag into the range of activation (default range is around 2.5m).
4. Red light will start flashing when the signal is received from the Tag.
5. Now Tag is saved into Transmitter’s memory.
Activation by Tag
1. Bring the Tag into activation range.
2. Transmitter will turn on the Blue LED to indicate the activation.
3. Every transmission from the Tag is indicated by Red LED flash (one transmission per second).
4. Relay is activated when the LED Blue light is on.
Changing the range of activation
Default range is set to a maximum sensitivity and corresponds to a distance around 2.5m. To change
the range of activation, follow the steps:
1. Bring the Tag to the desired range from the transmitter. Make sure transmitter is activated
by the Tag.
2. Press and hold the Tag button for approximately 3 seconds, until the LED indicator on the
Tag is permanently On.
3. Once the LED is On, release the button.
4. If Tag is within the range, the Tag LED should flash 3 times and then switch Off.
5. Check the new range by taking the Tag in and out from the new range border. Make sure the
Transmitter is not activated when Tag is outside the desired border and is activated when
the Tag is within the new border.
6. If the range needs adjustment, repeat the steps 1 to 5.
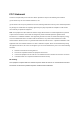
Tag LED indicator
Tag button