
Use and Care Guide


8
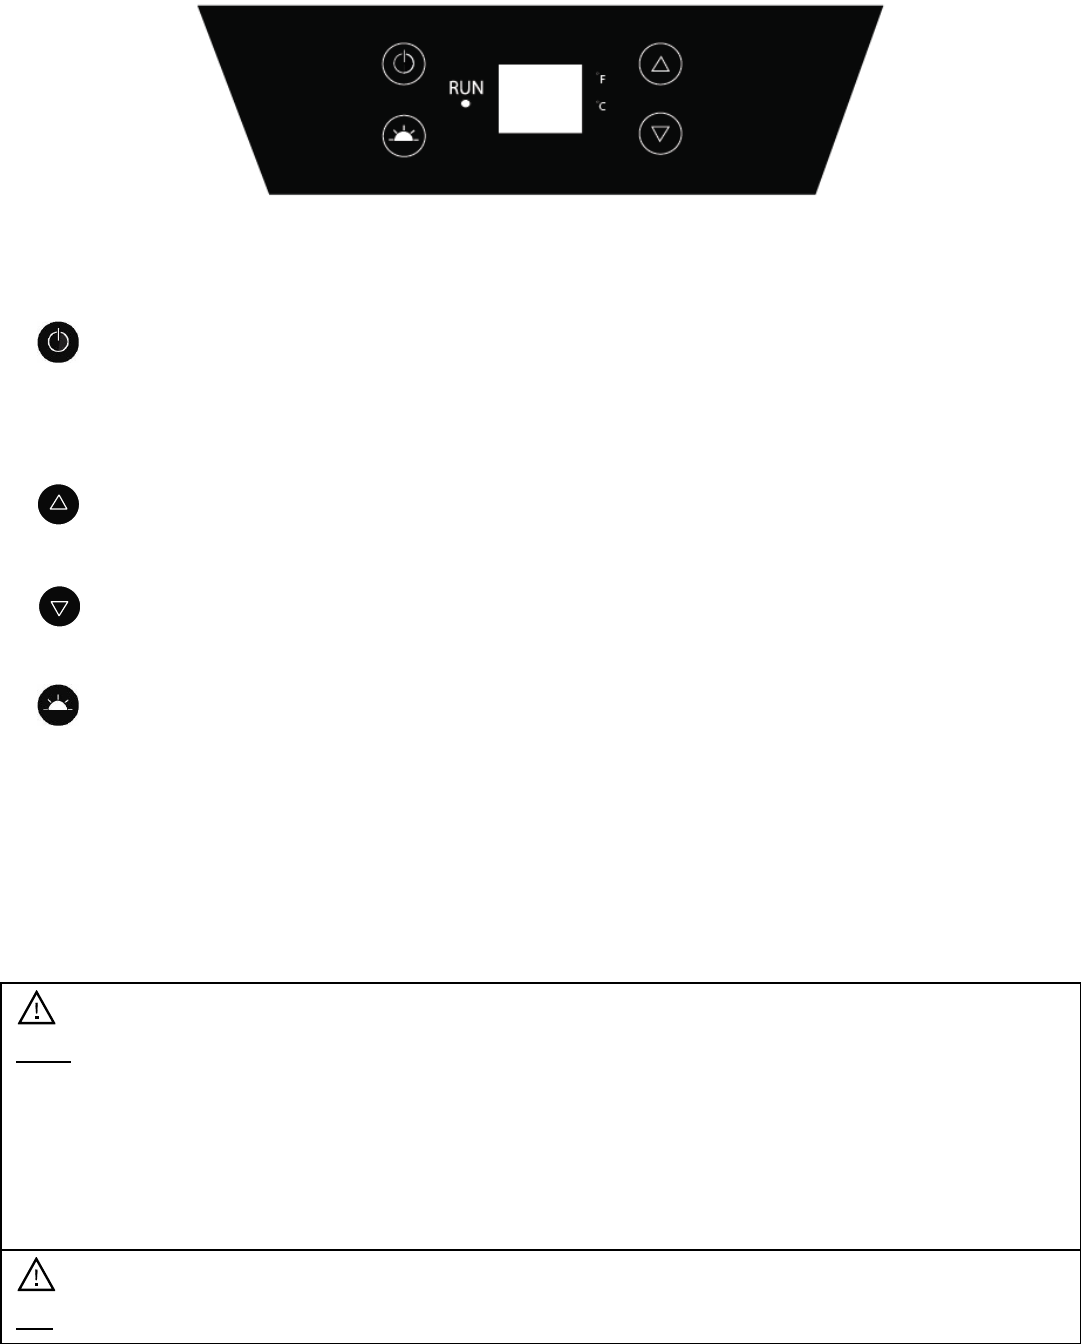
USING YOUR CONTROL PANEL:
Each independently controlled temperature zone – right and left – has a temperature range of 39° F to 65° F.
Each zone contains its own control panel.
Power Button
Press and hold this button down for three seconds to power your unit on. Once pressed, the “Run”
indicator light will illuminate to indicate the unit is on and running. Press and hold this button for three
seconds again and the unit will power off and the “Run” Indicator light will turn off.
Increasing the Temperature
To increase the temperature, press this button to raise the temperature by one (1) degree increments.
Decreasing the Temperature
To decrease the temperature, press this button to lower the temperature by one (1) degree increments.
Interior Light
Press this button to cycle through the different internal light settings. There are four light settings:
Constant Blue, Constant White, Automatic Blue, and Automatic White. Press this button to choose the
next option in the progression, eventually cycling back to the original setting. The lights will fade out of
the previous setting and into the next setting in the cycle each time you press this button. Press and hold
this button for three seconds to turn the lights completely off or to turn them back on. Open and close
the door to check the internal light color and whether the lights stay on with the door closed (Constant
Mode) or illuminate only when the door is open (Automatic Mode). Please refer to the “Internal Light”
section on the next page for further detail.
Note:
Pressing and holding the Increase and Decrease Temperature buttons at the same time will switch the
temperature display from °F to °C.
The unit has a Temperature Memory function. If power is suddenly lost, the previously set temperature
will be saved by the unit and the unit will remain set at that temperature once power is restored.
Tip: If you powered the unit off, please wait at least five (5) minutes before powering it back on.