ECM-VX900 A.2. 3.5” VIA VX900 Micro Module User’s Manual 3rd Ed – 31 October 2013 Part No.
ECM-VX900 FCC Statement THIS DEVICE COMPLIES WITH PART 15 FCC RULES. OPERATION IS SUBJECT TO THE FOLLOWING TWO CONDITIONS: (1) THIS DEVICE MAY NOT CAUSE HARMFUL INTERFERENCE. (2) THIS DEVICE MUST ACCEPT ANY INTERFERENCE RECEIVED INCLUDING INTERFERENCE THAT MAY CAUSE UNDESIRED OPERATION. THIS EQUIPMENT HAS BEEN TESTED AND FOUND TO COMPLY WITH THE LIMITS FOR A CLASS "A" DIGITAL DEVICE, PURSUANT TO PART 15 OF THE FCC RULES.
ECM-VX900 otherwise specified. Applications that are described in this manual are for illustration purposes only. Avalue Technology Inc. makes no representation or warranty that such application will be suitable for the specified use without further testing or modification. Life Support Policy Avalue Technology’s PRODUCTS ARE NOT FOR USE AS CRITICAL COMPONENTS IN LIFE SUPPORT DEVICES OR SYSTEMS WITHOUT THE PRIOR WRITTEN APPROVAL OF Avalue Technology Inc. As used herein: 1.
ECM-VX900 Product Warranty Avalue warrants to you, the original purchaser, that each of its products will be free from defects in materials and workmanship for two years from the date of purchase. This warranty does not apply to any products that have been repaired or altered by people other than repair personnel authorized by Avalue, or that have been subject of misuse, abuse, accident or improper installation. Avalue assumes no liability under the terms of this warranty as a consequence of such events.
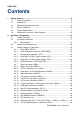
ECM-VX900 Contents 1. Getting Started ............................................................................................................ 8 1.1 Safety Precautions ......................................................................................... 8 1.2 Packing List .................................................................................................... 8 1.3 Document Amendment History....................................................................... 9 1.
ECM-VX900 2.5 Audio / USB Daughter Board (AUX-032) User’s Guide ................................ 35 2.5.1 Jumper and Connector Layout .............................................................. 35 2.5.2 2.5.3 3. Jumper and Connector List ................................................................... 35 Setting Jumper and Connector .............................................................. 36 BIOS Setup ............................................................................................
ECM-VX900 3.6.6.2 North bridge Chipset configuration................................................. 67 3.6.7 Exit Options ........................................................................................... 68 3.6.7.1 3.6.7.2 3.6.7.3 3.6.7.4 3.6.7.5 Save Changes and Exit ................................................................. 68 Discard Changes and Exit ............................................................. 68 Discard Changes .......................................................
ECM-VX900 1. Getting Started 1.1 Safety Precautions Warning! Always completely disconnect the power cord from your chassis whenever you work with the hardware. Do not make connections while the power is on. Sensitive electronic components can be damaged by sudden power surges. Only experienced electronics personnel should open the PC chassis. Caution! Always ground yourself to remove any static charge before touching the CPU card. Modern electronic devices are very sensitive to static electric charges.
ECM-VX900 1.
ECM-VX900 1.4 Manual Objectives This manual describes in details Avalue Technology ECM-VX900 Single Board. We have tried to include as much information as possible but we have not duplicated information that is provided in the standard IBM Technical References, unless it proved to be necessary to aid in the understanding of this board. We strongly recommend that you study this manual carefully before attempting to set up ECM-VX900 series or change the standard configurations.
ECM-VX900 1.5 System Specifications System VIA NanoX2 U4300E 1.2+GHz CPU Optional VIA C7(M) / Nano processor with V4 protocal BIOS AMI BIOS System Chipset VIA VX900 I/O Chip Nuvoton W83627DHG System Memory One 204-pin SODIMM socket supports up to 4GB DDR3 1333MHz SDRAM SSD 1 x CompactFlash Type I/II socket (PCIe to IDE (JMicron JMB368)) Watchdog Timer Reset: 3 ~ 255 min. and 1 min./step H/W Status Monitoring system temperature, voltage, and cooling fan status.
ECM-VX900 Ethernet LAN Chip Dual Realtek 8111E, supports Wake on LAN Ethernet Interface 1000Base-Tx Gigabit Ethernet compatible Mechanical & Environmental Power Requirement ACPI +12V~+26V Single power ATX Support S0, S3, S4, S5 ACPI 3.0 Compliant Power Type AT/ATX Operating Temp. 0~60°C Operating Humidity 0%~90% relative humidity, non-condensing Size (L x W) 5.
ECM-VX900 1.
ECM-VX900 2.
ECM-VX900 2.
ECM-VX900 16 ECM-VX900 User’s Manual
ECM-VX900 2.2 Installation Procedure This chapter explains you the instructions of how to setup your system. 1. Turn off the power supply. 2. Insert the DIMM module (be careful with the orientation). 3. Insert all external cables for hard disk, floppy, keyboard, mouse, USB etc. except for flat panel. A CRT monitor must be connected in order to change CMOS settings to support flat panel. 4. Connect power supply to the board via the ATXPWR. 5. Turn on the power. 6.
ECM-VX900 2.2.1 Main Memory ECM-VX900 provides one 204-pin SODIMM socket that supports up to 4GB DDR3 1333MHz SDRAM. SODIMM (Rear side) Make sure to unplug the power supply before adding or removing DIMMs or other system components. Failure to do so may cause severe damage to board and components.
ECM-VX900 Locate the SODIMM socket on the board. Carefully hold two edges of the SODIMM module. avoid touching its connectors. Align the notch key on the module with the rib on the slot. Firmly press the modules into the socket which automatically snaps into the mounting notch. Do not force the SODIMM module in with extra force as the SODIMM module only fits in one direction.
ECM-VX900 2.3 Jumper and Connector List You can configure your board to match the needs of your application by setting jumpers. A jumper is the simplest kind of electric switch. It consists of two metal pins and a small metal clip (often protected by a plastic cover) that slides over the pins to connect them. To “close” a jumper you connect the pins with the clip. To “open” a jumper you remove the clip. Sometimes a jumper will have three pins, labeled 1, 2, and 3.
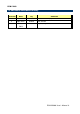
ECM-VX900 Connectors Label Function Note BBAT1 Battery connector 2 x 1 wafer, pitch 1.25 mm COM1 Serial port 1 connector D-sub 9-pin, male CF1 CF card connector CF type II 50 pin CPU_FAN1 CPU fan connector 3 x 1 wafer, pitch 2.54 mm DIMM1 204-pin DDR3 SODIMM socket HDMI1 HDMI connector J422/485 Serial port 2 in RS-422/485 mode 3 x 2 header, pitch 2.0 mm JAUDIO1 Audio connector 6 x 2 header, pitch 2.0 mm JBKL1 +12V power connector 2 x 1 wafer, pitch 2.
ECM-VX900 2.4 Setting Jumpers & Connectors 2.4.1 Clear CMOS (JBAT1) Protect* Clear CMOS * Default 2.4.
ECM-VX900 2.4.
ECM-VX900 2.4.4 Serial port 1 (COM1) signal selector (JRI1) +5V Ring* +12V * Default 2.4.
ECM-VX900 2.4.6 5VSB connector in ATX (PWR_SB1) Signal PIN ATX5VSB 3 GND 2 PSON 1 2.4.
ECM-VX900 2.4.8 Battery connector (BBAT1) Signal PIN +V3.3A 1 GND 2 2.4.
ECM-VX900 2.4.10 Serial port 2 in RS-422/485 mode (J422/485) Signal PIN PIN Signal 485RX- 2 1 485TX- 485RX+ 4 3 485TX+ GND 6 5 +5V 2.4.
ECM-VX900 2.4.12 +12V power connector (JBKL1) Signal PIN GND 2 +12V 1 2.4.
ECM-VX900 2.4.13 LCD Inverter Connector (JBKL2) Signal PIN +V5S 5 L_BKLT_CTRL_R 4 LVDS_BKLT_EN 3 GND 2 +V12S 1 Note: For inverters with adjustable Backlight function, it is possible to control the LCD brightness through the VR signal controlled by JVR1. Please see the JVR1 section for detailed circuitry information. 2.4.13.1 Signal Description – LCD Inverter Connector (JBKL2) Signal Signal Description L_BKLT_CTRL_R Vadj = 0.75V ~ 4.25V (Recommended: 4.
ECM-VX900 2.4.14 2.4.15 Serial port 2 connector (JCOM2) P Signal PIN DCD#_2 1 2 RxD_2 TxD_2 3 4 DTR#_2 G D 5 6 DSR#_2 RTS#_2 7 8 CTS#_2 RI#_2 9 10 NC N Signal Low Pin Count connector (JLPC1) Signal 30 ECM-VX900 User’s Manual PIN PIN Signal AD0 1 2 +V3.
ECM-VX900 2.4.
ECM-VX900 2.4.
ECM-VX900 2.4.18 2.4.19 PS2 KB/MS connector (JKB/MS1) Signal PIN PIN Signal KB_DT 1 2 KB_CK GND 3 4 PS2PWR MS_DT 5 6 MS_CK NC 7 Signal PIN PIN Signal +V3.
ECM-VX900 2.4.20 USB connector 0 & 1/ 2 & 3/ 4&5 (JUSB1_1/ JUSB2_1/ JUSB4_1) Signal JUSB1_1 JUSB2_1 JUSB4_1 2.4.21 PIN PIN Signal +5V 1 2 GND N1/ N2/N4 3 4 GND P1/ P2/P4 5 6 P0/ P3/P5 GND 7 8 N0/ N3/N5 GND 9 10 +5V LCD backlight brightness adjustment (JVR1) Signal PIN +5V 1 L_BKLT_CTRL_R 2 GND 3 Variation Resistor (Recommended: 4.
ECM-VX900 2.5 Audio / USB Daughter Board (AUX-032) User’s Guide 2.5.1 Jumper and Connector Layout 2.5.2 Jumper and Connector List Connectors Label Function Note CN1, CN2 USB connector CN4 Line out connector Phone Jack CN5 Line in connector Phone Jack CN6 Mic in connector Phone Jack JAUDIO Audio connector 6 x 2 header, pitch 2.0mm JP1 2.54mm USB connector 5 x 2 header, pitch 2.54mm JP2 2.54mm USB connector 5 x 2 header, pitch 2.54mm JP4 2.0mm USB connector 5 x 2 header, pitch 2.
ECM-VX900 2.5.3 Setting Jumper and Connector Audio Connector (JAUDIO) Signal PIN PIN 2.54mm USB Connector (JP1) Signal Signal PIN PIN Signal OUTR 1 2 OUTL +5V 1 2 GND GND 3 4 GND D1- 3 4 GND INR1 5 6 INL1 D1+ 5 6 D2+ MICIN1 7 8 AREF GND 7 8 D2- FRONT-JD1 9 10 LINE1-JD1 GND 9 10 +5V MIC1-JD1 11 12 GND 2.54mm USB Connector (JP2) Signal PIN PIN Note: Wrong USB cable configuration with your USB devices might damage USB devices.
ECM-VX900 3.
ECM-VX900 3.1 Introduction The BIOS setup program allows users to modify the basic system configuration. In this following chapter will describe how to access the BIOS setup program and the configuration options that may be changed. 3.2 Starting Setup The AMI BIOS™ is immediately activated when you first power on the computer. The BIOS reads the system information contained in the CMOS and begins the process of checking out the system and configuring it.
ECM-VX900 3.3 Using Setup In general, you use the arrow keys to highlight items, press to select, use the PageUp and PageDown keys to change entries, press for help and press to quit. The following table provides more detail about how to navigate in the Setup program using the keyboard.
ECM-VX900 3.4 Getting Help Press F1 to pop up a small help window that describes the appropriate keys to use and the possible selections for the highlighted item. To exit the Help Window press or the F1 key again. 3.5 In Case of Problems If, after making and saving system changes with Setup, you discover that your computer no longer is able to boot, the AMI BIOS supports an override to the CMOS settings which resets your system to its defaults.
ECM-VX900 3.6 BIOS setup Once you enter the AMI BIOS CMOS Setup Utility, the Main Menu will appear on the screen. The Main Menu allows you to select from several setup functions and exit choices. Use the arrow keys to select among the items and press to accept and enter the sub-menu. 3.6.1 Main Menu This section allows you to record some basic hardware configurations in your computer and set the system clock. 3.6.1.1 System Date Use the system time option to set the system time.
ECM-VX900 3.6.2 Advanced BIOS settings This section allows you to configure your CPU and other system devices for basic operation through the following sub-menus.
ECM-VX900 3.6.2.1 Configure advanced CPU settings Use the CPU configuration menu to view detailed CPU specification and configure the CPU.
ECM-VX900 3.6.2.
ECM-VX900 3.6.2.2.1 Primary IDE Master Item Type LBA/Large Mode Block (Multi-Sector Transfer) PIO Mode DMA Mode S.M.A.R.T. 32Bit Data Transfer Options Not Installed Auto CD/DVD ARMD Disabled Auto Disabled Auto Auto 0 1 2 3 4 Auto Auto Disabled Enabled Disabled Enabled Description Select options for type Select options for LBA/Large Mode Select options for Block (Multi-Sector Transfer) Select options for PIO Mode Select options for DMA Mode Select options for S.M.A.R.T.
ECM-VX900 3.6.2.2.1 Primary IDE Slave Item Type LBA/Large Mode Block (Multi-Sector Transfer) PIO Mode DMA Mode S.M.A.R.T. 32Bit Data Transfer 46 ECM-VX900 User’s Manual Options Not Installed Auto CD/DVD ARMD Disabled Auto Disabled Auto Auto 0 1 2 3 4 Auto Auto Disabled Enabled Disabled Enabled Description Select options for type Select options for LBA/Large Mode Select options for Block (Multi-Sector Transfer) Select options for PIO Mode Select options for DMA Mode Select options for S.M.A.R.T.
ECM-VX900 3.6.2.3 Super IO Configuration Use the Super IO Configuration menu for serial ports. Item Serial Port1 Address [3F8/IRQ4] Serial Port2 Address [2F8/IRQ3] Serial Port 2 Type [232] Options Disabled 3F8/IRQ4 (DEFAULT) 3E8/IRQ4 2E8/IRQ3 Disabled 2F8/IRQ3 (DEFAULT) 3E8/IRQ4 2E8/IRQ3 232 422 485 Description Use the Serial Port1 Address option to select the Serial Port 1 base address. Use the Serial Port2 Address option to select the Serial Port 2 base address.
ECM-VX900 3.6.2.4 Hardware Health Configuration This section shows the operating temperature, fan speed and system voltage. The following system temperature, fan speed and voltage are monitored.
ECM-VX900 3.6.2.5 ACPI Settings The ACPI Configuration menu configures Advanced Configuration and Power Interface (ACPI) options. 3.6.2.5.1 General ACPI settings Use this option to select the ACPI state when the system is suspended.
ECM-VX900 Item Suspend Mode [Auto] Repost Video on S3 Resume [No] Options Description S1 (POS), S3 (STR), Auto (DEFAULT) No (DEFAULT) Yes Use the Suspend Mode option to specify the sleep state the system enters when it is not being used. This item allows you to invoke VA BIOS POST on S3/ STR resume. 3.6.2.5.2 Advanced ACPI Configuration Use this menu to select ACPI state when system is suspended. Item APCI Cycle Control PCICFG Cycle Control ACPI Version Features [ACPI v1.
ECM-VX900 3.6.2.5.
ECM-VX900 3.6.2.6 APM Configuration The APM menu configures the advanced power management options. Item Options Power Management/ APM Enabled (DEFAULT) Disabled This item helps to select power management mode. On/ Off, Suspend C3 S1 Power On, Power Off (DEFAULT) Last State 0%-6.25% 6.25%-12.5% 18.75%-25% 31.25%-37.5% 37.5%-43.75% 43.75%-50% 50%-56.25% 56.25%-62.5% 62.5%-68.75% 68.75%-75% 75%-87.5% 75%-87.25% 81.25%-87.5% 87.5%-93.75% 93.
ECM-VX900 Suspend Time Out Hard Disk Time Out (Minute) Green PC Monitor Power State Video Power Down Mode Hard Disk Power Down Mode Display Activity Monitor IRQ3 Monitor IRQ4 Monitor IRQ5 Monitor IRQ7 Monitor IRQ9 Monitor IRQ10 Monitor IRQ11 Monitor IRQ13 Monitor IRQ14 Monitor IRQ15 Resume On Ring [Disabled] Resume On PME Resume On PS/2 KBC Wake-up Key Resume On PS/2 Mouse Resume On RTC Alarm RTC Alarm Date (Days) System Time Disabled 1/2/4/8/10 20/30/40/50/60min Disabled 1/2/3/4/5/6/7/8/9 10/11/12/13
ECM-VX900 3.6.2.7 PCI Express Configuration This item allows configuring PCI Express.
ECM-VX900 3.6.2.8 USB Configuration Item OnChip UHCI Device OnChip UHCI2 Device OnChip UHCI3 Device OnChip UHCI4 Device OnChip EHCI Device USB Device Mode Enable Options Enabled Disabled Enabled Disabled Enabled Disabled Enabled Disabled Enabled Disabled Enabled Disabled Description Enable or disable USB1.1 Function 0 port 0-1 Enable or disable USB1.1 Function 1 port 2-3 Enable or disable USB1.1 Function 2 port 4-5 Enable or disable USB1.1 Function 3 port 6-7 Enable or disable USB2.
ECM-VX900 3.6.3 Advanced PCIPnP Settings The settings in this section specifically deal with the PCI bus and Plug and Play (PnP).
ECM-VX900 3.6.4 Boot Settings Use the Boot menu to configure system boot options.
ECM-VX900 3.6.4.1 Boot settings configuration Use Boot Settings Configuration menu to configure advanced boot options.
ECM-VX900 3.6.4.2 Boot device Priority Use the Boot Device Priority to specify the boot sequence from the available devices. 3.6.4.
ECM-VX900 3.6.5 Security settings Security Setup options such as password protection and virus protection are described in this section. Change Supervisor / User Password Use the Change User/ Supervisor Password to set or change a User/supervisor password. The default for this option is Not Installed. If a User/ supervisor password must be installed, select this field and enter the password. After the password has been added, Install appears next to Change User/ Supervisor Password.
ECM-VX900 3.6.6 Advanced Chipset Settings Use Advanced Chipset Settings menu to access Northbridge and Southbridge Configuration menus 3.6.6.1 North bridge Chipset configuration Northbridge chipset configuration menu will configure the Northbridge chipset.
ECM-VX900 3.6.6.1.
ECM-VX900 BA1 SEL BA2 SEL VR Interleave Address Bit 0 VR Interleave Address Bit 1 Virtual Rank Interleave BA Scramble RDRDY Conversion Circuit DRAM 32-Bit data width DramInitMethod Dram self Refresh Dynamic CKE Memory Remap Control VGA Share Memory (Frame buffer) Size Internal VGA DVO Support CPU Direct Access Frame Buffer A12 A15 A16 A18 A20 A14 A15 A18 A19 A15 A17 A19 A21 A14 A16 A18 A20 Auto Disabled Enabled Disabled Default Slowest Auto Async Disabled Enabled Auto Force_SW Disabled Enabled Disable
ECM-VX900 3.6.6.1.
ECM-VX900 3.6.6.1.
ECM-VX900 3.6.6.1.
ECM-VX900 3.6.6.2 North bridge Chipset configuration Southbridge chipset configuration menu will configure the Southbridge chipset.
ECM-VX900 3.6.7 Exit Options Use the Exit menu to load default BIOS values, optional failsafe values and to save changes in configuration. 3.6.7.1 Save Changes and Exit Use the save changes and reset option to save the changes made to the BIOS options and to exit the BIOS configuration setup program. 3.6.7.2 Discard Changes and Exit Use the Discard changes and Exit option to exit the system without saving the changes made to the BIOS configuration setup program. 3.6.7.
ECM-VX900 4. Drivers Installation Note: Installation procedures and screen shots in this section are for your reference and may not be exactly the same as shown on your screen.
ECM-VX900 4.1 Install Display Driver (For VX900) Insert the Supporting DVD-ROM to DVD-ROM drive, and it should show the index page of Avalue’s products automatically. If not, locate Index.htm and choose the product from the menu left, or link to [\Drivers\VGA\VX900] Note: The installation procedures and screen shots in this section are based on Windows XP operation system. Step 2. Click Next. Step 1. Locate 「Drivers\VGA\VX900\Setup.exe」. 70 ECM-VX900 User’s Manual Step 3. Click Yes.
ECM-VX900 4.2 Install Audio Driver (For VIA HDMI ALC892) Insert the Supporting CD-ROM to CD-ROM drive, and it should show the index page of Avalue’s products automatically. If not, locate Index.htm and choose the product from the menu left, or link to [\Drivers\Audio alc892] Note: The installation procedures and screen shots in this section are based on Windows 2000 operation system. Step 1. Locate 「\Drivers\Audio alc892\setup.exe」. Step 2. Select Driver and click Next to continue. Step 3.
ECM-VX900 5.
ECM-VX900 Unit: mm ECM-VX900 User’s Manual 73
ECM-VX900 Unit: mm 74 ECM-VX900 User’s Manual