ERX-Q77 Intel® Q77 with Core™ i7/ i5 /i3 Micro-ATX Motherboard User’s Manual 1st Ed – 27 November 2012 Part No.
ERX-Q77 User’s Manual FCC Statement THIS DEVICE COMPLIES WITH PART 15 FCC RULES. OPERATION IS SUBJECT TO THE FOLLOWING TWO CONDITIONS: (1) THIS DEVICE MAY NOT CAUSE HARMFUL INTERFERENCE. (2) THIS DEVICE MUST ACCEPT ANY INTERFERENCE RECEIVED INCLUDING INTERFERENCE THAT MAY CAUSE UNDESIRED OPERATION. THIS EQUIPMENT HAS BEEN TESTED AND FOUND TO COMPLY WITH THE LIMITS FOR A CLASS "A" DIGITAL DEVICE, PURSUANT TO PART 15 OF THE FCC RULES.
ERX-Q77 User’s Manual products are free from patent, copyright, or mask work right infringement, unless otherwise specified. Applications that are described in this manual are for illustration purposes only. Avalue Technology Inc. makes no representation or warranty that such application will be suitable for the specified use without further testing or modification.
ERX-Q77 User’s Manual If you still cannot find the answer, gather all the information or questions that apply to your problem, and with the product close at hand, call your dealer. Our dealers are well trained and ready to give you the support you need to get the most from your Avalue’s products. In fact, most problems reported are minor and are able to be easily solved over the phone. In addition, free technical support is available from Avalue’s engineers every business day.
ERX-Q77 User’s Manual Product Warranty Avalue warrants to you, the original purchaser, that each of its products will be free from defects in materials and workmanship for two years from the date of purchase. This warranty does not apply to any products which have been repaired or altered by persons other than repair personnel authorized by Avalue, or which have been subject to misuse, abuse, accident or improper installation.
ERX-Q77 User’s Manual Contents 1. Getting Started ............................................................................................................... 9 1.1 Safety Precautions ....................................................................................................... 9 1.2 Packing List .................................................................................................................. 9 1.3 Document Amendment History .....................................................
ERX-Q77 User’s Manual 2.8.4 COM5 RS232/485 SETTING (CN4) .................................................................................................. 39 2.8.5 COM3 POWER SETTING (JCOMPWR1) ......................................................................................... 39 2.8.6 LVDS Backlight power selection (JBKLVOL1)................................................................................... 40 2.8.7 LVDS Backlight control mode (JBKL2) .........................................
ERX-Q77 User’s Manual 3.4.13 Super IO Configuration .................................................................................................................. 72 3.4.14 Hardware Monitor .......................................................................................................................... 76 3.4.15 Option Rom Policy ......................................................................................................................... 79 3.4.16 CPU PPM Configuration ......
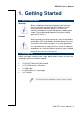
ERX-Q77 User’s Manual 1. Getting Started 1.1 Safety Precautions Warning! Always completely disconnect the power cord from your chassis whenever you work with the hardware. Do not make connections while the power is on. Sensitive electronic components can be damaged by sudden power surges. Only experienced electronics personnel should open the PC chassis. Caution! Always ground yourself to remove any static charge before touching the CPU card.
ERX-Q77 User’s Manual 1.
ERX-Q77 User’s Manual 1.4 Manual Objectives This manual describes in detail the Avalue Technology ERX-Q77 motherboard Board. We have tried to include as much information as possible but we have not duplicated information that is provided in the standard IBM Technical References, unless it proved to be necessary to aid in the understanding of this board. We strongly recommend that you study this manual carefully before attempting to interface with ERX-Q77 series or change the standard configurations.
ERX-Q77 User’s Manual 1.5 System Specifications System CPU Intel LGA1155 socket supports Intel Core i7/ i5/ i3 CPU BIOS AMI 64Mb SPI System Chipset Intel® Q77 I/O Chipset Nuvoton NCT6776F + FINTEK F81216AD Memory Four 240-pin UDIMM sockets support up to 32GB dual channel DDR3 1066/ 1333/ 1600 SDRAM Watchdog Timer Reset: 1 to 255 sec/min per step H/W Status Monitor Monitoring temperature, voltage and cooling fan status. Auto throttling control when CPU overheats. 1 PCI-E x 16 2.
ERX-Q77 User’s Manual 2 x SATAIII connectors 3 x USB connectors support additional 6 USB 2.
ERX-Q77 User’s Manual 1.6 Architecture Overview – Block Diagram DDR3 1600/ 1333/1066MHz Channel B DDR3 1600/ 1333/1066MHz Intel LGA1155 Core i7/ i5/ i3 CPU DMI PCI-E x 16 FDI PCI-E x 16 slot Channel A VGA RGB PCIe x1 LAN1 Intel 82579LM LVDS DDSP-B PCIe x1 LAN2 Intel 82574L HDMI DDSP-C USB 2.0 USB 2.0 6 ports Realtek ALC892 HD audio USB 3.0 USB 3.0 4 ports PCI slot PCI 33MHz SATA 3.0 SATA 3.0 2 ports SPI ROM SPI SATA 2.0 SATA 2.
ERX-Q77 User’s Manual 2.
ERX-Q77 User’s Manual 2.1 Product Overview Supports latest Intel LGA 1155 CPU-socket interface processor, the 3rd Generation Intel® Core i3, i5, i7 desktop processors which are built on 22/32 nm technologies to provide smart performance and responsiveness on executing tasks, It combines the CPU and GPU to offer fantastic HD media and graphics, especially on 3D gaming experience. Doubles the bandwidth of your system memory up to 32GB/s and pumps up the system performance at lower power.
ERX-Q77 User’s Manual - POS Ready 2009 - OpenSUSE 12.1 x86 2.1.2 Key Architecture Features •Supports Intel LGA 1155 CPU, the 3nd Generation Intel® Core i3, i5, i7 desktop processors.
ERX-Q77 User’s Manual - USB: 2.0, up to 6 ports - SMBus 2.0 - LPC Bus Supports SPI devices - Hardware Monitor Fan control (Voltage, Temp) Watchdog timer • Power Management - Support AT/ATX mode - Advanced Configuration and Power Interface (ACPI) 3.0 2.2 Before you Proceed Take note of the following precautions before you install motherboard components or change any motherboard settings. Unplug the power cord from the wall socket before touching any component.
ERX-Q77 User’s Manual 2.3 Motherboard Overview Before you install the motherboard, study the configuration of your chassis to ensure that the motherboard fits into it. Refer to the chassis documentation before installing the motherboard. Make sure to unplug the power cord before installing or removing the motherboard. Failure to do so can cause you physical injury and damage motherboard components. 2.3.
ERX-Q77 User’s Manual 2.3.
ERX-Q77 User’s Manual 2.4 Jumper and Connector List Slots & socket Label Function Note LGA1155 LGA1155 socket P23 DIMMA1 240-pin DDR3 DIMM Slot A1 P30 DIMMA2 240-pin DDR3 DIMM Slot A2 P30 DIMMB1 240-pin DDR3 DIMM Slot B1 P30 DIMMB2 240-pin DDR3 DIMM Slot B2 P30 PCIEX16 PCI-e x16 Slot P36 PCI1~3 PCI Slot P36 Jumpers Label Function Note CLCMOS1 Clear CMOS 3 x 1 header, pitch 2.54mm P37 PSON1 AT/ATX Mode Select 3 x 1 header, pitch 2.
ERX-Q77 User’s Manual 2.4.1 Internal Connectors Internal Connector Label Function Note CPU_FAN CPU Fan Connector 4 x 1 wafer, pitch 2.54mm P43 SYS_FAN System Fan Connector 4 x 1 wafer, pitch 2.54mm P43 CHA_FAN Chassis Fan Connector 4 x 1 wafer, pitch 2.54mm P43 F_PANEL Intel Front Panel connector 5 x 2 header, pitch 2.54mm P44 EATXPWR1 ATX power connectors 12 x 2 wafer P45 ATX12V1 12V ATX power connectors 2 x 2 wafer P45 COM3 ~ 5 Serial Port Connector 5 x 2 header, pitch 2.
ERX-Q77 User’s Manual 2.5 Central Processing Unit (CPU) The motherboard comes with a surface mount LGA1155 socket designed for the Intel® Core™ i7/ i5/ i3 processor in the 1155-land package. Your boxed Intel® Core™ i7/ i5/ i3 LGA1155 processor package should come with installation instructions for the CPU, fan and heatsink assembly. If the instructions in this section do not match the CPU documentation, follow the latter.
ERX-Q77 User’s Manual 2.5.1 1 Installing the CPU Locate the CPU socket on the motherboard. Before installing the CPU, make sure that the socket box is facing towards you and the load lever is on your left. 2 Press the load lever with your thumb (A), then move it to the left (B) until it is released from the retention tab. Retention tab A Load lever B To prevent damage to the socket pins, do not remove the PnP cap unless you are installing a CPU.
ERX-Q77 User’s Manual 3. Lift the Load lever with your thumb and forefinger to around 180º angle (A), then pull the PnP cap from the CPU socket to remove (B). B A 4. Position the CPU over the socket, making sure that the gold triangle is on the top-left corner of the socket then fit the socket alignment key into the CPU notch. Gold triangle CPU notch Alignment key 5. Pull back the load lever , then push the load lever (A) until it snaps into the retention tab.
ERX-Q77 User’s Manual 2.5.2 Installing the CPU Heatsink and Fan Intel® Core™ i7/ i5/ i3 LGA1155 processor requires a specially designed heatsink and fan assembly to ensure optimum thermal condition and performance. Install the motherboard to the chassis before you install the CPU fan and heatsink assembly. When you buy a boxed Intel® Core™ i7/ i5/ i3 LGA1155 processor, the package includes the CPU fan and heatsink assembly.
ERX-Q77 User’s Manual 2. Push down two fasteners at a time in a diagonal sequence to secure the heatsink and fan assembly in place. A B B A A B B A 3. Connect the CPU fan cable to the connector on the motherboard labeled CPU_FAN. FAN 1 CPU FAN Do not forget to connect the fan cables to the fan connectors. Insufficient air flow inside the system may damage the motherboard components. These are not jumpers! DO NOT place jumper caps on the fan connectors.
ERX-Q77 User’s Manual 2.5.3 Uninstalling the CPU Heatsink and Fan To uninstall the CPU heatsink and fan: 1. Disconnect the CPU fan cable from the connector on the motherboard. 2. Rotate each fastener counterclockwise 3. Pull up two fasteners at a time in a diagonal sequence to disengage the heatsink and fan assembly from the motherboard. A A B B B A B A 4. Carefully remove the heatsink and fan assembly from the motherboard.
ERX-Q77 User’s Manual 5. Rotate each fastener clockwise to ensure correct orientation when reinstalling.
ERX-Q77 User’s Manual 2.6 2.6.1 System Memory Overview The motherboard comes with four 240-pin Double Data Rate 3 (DDR3) Dual Inline Memory Modules (DIMM) sockets. A DDR3 module has the same physical dimensions as a DDR DIMM but has a 240-pin footprint compared to the 240-pin DDR2 DIMM. DDR3 DIMMs are notched differently to prevent installation on a DDR2 DIMM socket.
ERX-Q77 User’s Manual 2.6.2 Memory Configurations You may install 1 GB, 2 GB , and 4 GB unbuffered ECC or non-ECC DDR3 DIMMs into the DIMM sockets using the memory configurations in this section. IF you installed four 1GB memory modules, the system may detect less than 3GB of total memory because of address space allocation for other critical functions. This limitation applies to Windows XP 32-bit version operating system since it does not support PAE (Physical Address Extension) mode.
ERX-Q77 User’s Manual DDR3 DIMM notch Unlocked retaining clip 3. Firmly insert the DIMM into the socket until the retaining clips snap back in place and the DIMM is properly seated. Locked retaining clip A DDR3 DIMM is keyed with a notch so that it fits in only one direction. DO NOT force a DIMM into a socket to avoid damaging the DIMM. The DDR3 DIMM sockets do not support DDR DIMMs. DO NOT install DDR2 DIMMs to the DDR3 DIMM socket.
ERX-Q77 User’s Manual 1. Unlock a DIMM socket by pulling the retaining clips outward 2. Align a DIMM on the socket such that the notch on the DIMM matches the break on the socket. 3. Firmly insert the DIMM into the socket until the retaining clips snap back in place and the DIMM is properly seated.
ERX-Q77 User’s Manual 2.6.4 Removing a DIMM 1. Simultaneously press the retaining clips downward to unlock the DIMM. 2. Remove the DIMM from the socket. Unlocked retaining clip Support the DIMM lightly with your fingers when pressing the retaining clips. The DIMM might get damaged when it flips out with extra force.
ERX-Q77 User’s Manual 2.7 Expansion Card In the future, you may need to install expansion cards. The following sub-sections describe the slots and the expansion cards that they support. Make sure to unplug the power cord before adding or removing expansion cards. Failure to do so may cause you physical injury and damage motherboard components. 2.7.1 Installing an Expansion Card 1.
ERX-Q77 User’s Manual 2.7.3 PCI Express x16 slot This motherboard supports one PCI Express x16 slot that complies with the PCI Express specifications. The following figure shows a graphics card installed on the PCI Express x16 slot. 2.7.4 PCI slot This motherboard supports one PCI slot that complies with the PCI specifications. The following figure shows a audio card installed on the PCI slot.
ERX-Q77 User’s Manual 2.8 2.8.1 Jumper settings and Connectors Clear CMOS (CLCMOS1) This jumper allows you to clear the Real Time Clock (RTC) RAM in CMOS. You can clear the CMOS memory of date, time, and system setup parameters by erasing the CMOS RTC RAM data. The onboard button cell battery powers the RAM data in CMOS, which includes system setup information such as system passwords. To erase the RTC RAM: 1. Turn OFF the computer and unplug the power cord. 2. Remove the onboard battery. 3.
ERX-Q77 User’s Manual 2.8.2 AT/ATX Power Mode Select (PSON1) This jumper allows you to select ATX Mode or AT mode . ATX MODE (Default) 2.8.
ERX-Q77 User’s Manual 2.8.4 COM5 RS232/485 SETTING (CN4) This jumper allows you to select COM5 to support RS232/485 RS232 (Default) 1 2.8.
ERX-Q77 User’s Manual 2.8.6 LVDS Backlight power selection (JBKLVOL1) This jumper allows you to select LVDS backlight power type +3.3V / +5V +3.3V (Default) 1 2.8.
ERX-Q77 User’s Manual 2.8.8 1 Rear panel connectors 3 4 7 8 11 12 13 2 5 6 9 10 1. PS/2 mouse port (green). This port is for a PS/2 mouse. 2. PS/2 keyboard port (purple). This port is for a PS/2 keyboard. 3 & 4. Serial connector. This 9-pin COM1 & COM2 port is for serial devices. 5. VGA port. This 15-pin VGA port connects to a VGA monitor. 6. HDMI port. This 19-pin HDMI 1.3 port connects to a HDMI monitor. 7 & 8. LAN (RJ-45) port.
ERX-Q77 User’s Manual LAN port LED indications SPEED LED Status Description ACT / LINK LED Status Description OFF 10Mbps connection OFF No link Orange 100Mbps connection Green Link Green 1Gbps connection Blinking Data activity 9 & 10. USB 3.0 ports 1 ~ 4. These four 4-pin Universal Serial Bus (USB) ports are available for connecting USB 3.0 devices. 11. Line In port (light blue). This port connects a tape, CD, DVD player, or other audio sources. 12. Line Out port (lime).
ERX-Q77 User’s Manual 2.8.9 CPU and System fan connectors (CPU_FAN, SYS_FAN, CHA_FAN) The fan connectors support cooling fans of 280mA (3.36 W max.) at 4800rpm or a total of 1A~2.22A (26.64W max.) at +12V. Connect the fan cables to the fan connectors on the motherboard, making sure that the black wire of each cable matches the ground pin of the connector. CPU_FAN 4. FAN_PWM1_C 3. FANCPUDEC1 2. +V12 1. GND SYS_FAN CHA_FAN 4. FAN_PWM2_C 3. FANCPUDEC2 2. +V12 1. GND 4. FAN_PWM3_C 3. FANCPUDEC3 2. +V12 1.
ERX-Q77 User’s Manual 2.8.10 System Panel (F_PANEL) This connector is for a chassis-mounted front panel audio I/O module that supports either HD Audio or legacy AC’97 audio standard. 1. HDD_LED+ 3. SATA_LED# 5. GND 7. SRST# 9. NC 2. +V5_DUAL 4. SUPLED1 6. PANSWIN# 8. GND ATX Power Button/Soft-off Button (Pin 6-8) This 2-pin connector is for the system power button. Pressing the power button turns the system on or puts the system in sleep or soft-off mode depending on the BIOS settings.
ERX-Q77 User’s Manual 2.8.11 ATX power connectors (EATXPWR1 & ATX12V1) The connector is for ATX power supply plugs. The power supply plugs are designed to fit these connectors in only one orientation. Find the proper orientation and push down firmly until the connectors completely fit. ATX12V1 EATXPWR1 Use of a PSU with a higher power output is recommended when configuring a system with more power-consuming devices. The system may become unstable or may not boot up if the power is inadequate.
ERX-Q77 User’s Manual 2.8.12 Serial Port connectors (COM3, COM4, COM5) This connector is for a serial (COM) port. Connect the serial port module cable to this connector, then install the module to a slot opening at the back of the system chassis. COM3 1. COM_C-DCD3# 3. COM_C-TXD3 5. GND 7. COM_C-RTS3# 9. RI3xPOWERxJMP 2. COM_C-RXD3 4. COM_C-DTR3# 6. COM_C-DSR3# 8. COM_C-CTS3# 1. COM_C-DCD4# 3. COM_C-TXD4 5. GND 7. COM_C-RTS4# 9. COM_C-RI4# 2. COM_C-RXD4 4. COM_C-DTR4# 6. COM_C-DSR4# 8. COM_C-CTS4# 1.
ERX-Q77 User’s Manual 2.8.14 Audio Mic.-In & Line-Out Connector (FPAUD1) This connector is for a chassis-mounted front panel audio I/O module that supports either HD Audio or legacy AC ‘97 (optional) audio standard. Connect one end of the front panel audio I/O module cable to this connector. FPAUD1 1. MIC2L 3. MIC2R 5. LINE2R 7. FRONT-IO-SENSE_C 9. LINE2L 2. GND 4. PCH_GPIO34 6. MIC2-JD 8. NC 10.
ERX-Q77 User’s Manual 2.8.15 Digital Audio connector (SPDIF_O) This connector is for the S/PDIF audio module to allow digital sound output. Connect one end of the S/PDIF audio cable to this connector and the other end to the S/PDIF module. SPDIF_O 4. GND 3. SPDIF-OUT 2. NC 1. +V5 2.8.16 Amplifier Connector (JAMP1) JAMP1 1 48 ERX-Q77 User’s Manual 1. 2. 3. 4.
ERX-Q77 User’s Manual 2.8.17 Serial ATA Connector (SATA1~2, SATA3~6 ) SATA 1~2 support SATA 2.0 and SATA 3~6 support SATA 3.0. These connectors are for the Serial ATA signal cables for Serial ATA hard disk drives. SATA Connect the right-angle side of SATA signal cable to SATA device. Or you may connect the right-angle side of SATA cable to the onboard SATA port to avoid mechanical conflict with large graphics cards.
ERX-Q77 User’s Manual 2.8.18 USB connectors (USB56, USB78, USB910) These connectors are for USB 2.0 ports. Connect the optional USB module cable to any of these connectors, then install the module to a slot opening at the back of the system chassis. These USB connectors comply with USB 2.0 specification that supports up to 480 Mbps connection speed. USB56, USB78, USB910 1. USB +5V 3. USB5. USB+ 7. GND 2. USB +5V 4. USB6. USB+ 8. GND 10. NC Never connect a 1394 cable to the USB connectors.
ERX-Q77 User’s Manual 2.8.19 LVDS Connector (LVDS1) The connector is for 24-bit dual channel LVDS panel. 2 2.8.20 1 2. VDD_+5V 4. VDD_+5V 6. DDC_DATA 8. GND 10. LVDS_A0+ 12. LVDS_A014. GND 16. LVDS_A2+ 18. LVDS_A220. GND 22. LVDS_B0+ 24. LVDS_B026. GND 28. LVDS_B2+ 30. LVDS_B232. GND 34. LVDS_A_CLK+ 36. LVDS_A_CLK38. GND 40. VDD_+12V 1. VDD_+3V 3. VDD_+3V 5. DDC_CLK 7. GND 9. LVDS_A1+ 11. LVDS_A113. GND 15. LVDS_A3+ 17. LVDS_A319. GND 21. LVDS_B1+ 23. LVDS_B125. GND 27. LVDS_B3+ 29. LVDS_B331.
ERX-Q77 User’s Manual 2.8.21 LPT Port Connector (LPT1) This connector is for print port. 1 52 ERX-Q77 User’s Manual 2 1. LPT_STB# 3. LPT_PD0 5. LPT_PD1 7. LPT_PD2 9. LPT_PD3 11. LPT_PD4 13. LPT_PD5 15. LPT_PD6 17. LPT_PD7 19. LPT_ACK# 21. LPT_BUSY 23. LPT_PE 25. LPT_SLCT 2. LPT_AFD# 4. LPT_ERR# 6. LPT_INIT# 8. LPT_SLIN# 10. GND 12. GND 14. GND 16. GND 18. GND 20. GND 22. GND 24. GND 26.
ERX-Q77 User’s Manual 3.
ERX-Q77 User’s Manual 3.1 Introduction The BIOS setup program allows users to modify the basic system configuration. In this following chapter will describe how to access the BIOS setup program and the configuration options that may be changed. 3.2 Starting Setup This motherboard supports a programmable firmware chip that you can update using the provided utility. Use the BIOS Setup program when you are installing a motherboard, reconfiguring your system, or prompted to “Run Setup.
ERX-Q77 User’s Manual 3.3 Using Setup The keys in the legend bar allow you to navigate through the various setup menus Key(s) Function Description →← Select Screen ↑↓ Select Item Enter Select +- Change Opt. F1 General Help F2 Previous Values F3 Optimal Defaults F4 Save and Exit ESC Exit 3.3.1 List Box This box appears only in the opening screen. The box displays an initial list of configurable items in the menu you selected. 3.3.
ERX-Q77 User’s Manual 3.4 BIOS setup When you enter the BIOS, the following screen appears. The BIOS menu screen displays the items that allow you to make changes to the system configuration. To access the menu items, press the up/down/right/left arrow key on the keyboard until the desired item is highlighted, then press [Enter] to open the specific menu.
ERX-Q77 User’s Manual 3.4.1 Main Setup This menu gives you an overview of the general system specifications. The BIOS automatically detects the items in this menu. Use this menu for basic system configurations, such as time, date etc. BIOS Information Displays the auto-detected BIOS information. System Date The date format is ,,,. System Time The time format is ,,.
ERX-Q77 User’s Manual 3.4.2 Advanced BIOS Setup Select the Advanced tab from the setup screen to enter the Advanced BIOS Setup screen. You can select any of the items in the left frame of the screen, such as Chipset configuration, to go to the sub menu for that item. You can display an Advanced BIOS Setup option by highlighting it using the keys. All Advanced BIOS Setup options are described in this section. The Advanced BIOS Setup screen is shown below.
ERX-Q77 User’s Manual 3.4.3 PCI Subsystem Setting PCI, PCI-X and PCI Express Settings. PCI Bus Driver Version Displays the information of PCI Bus Driver Version . PCI 64bit Resources Handling Above 4G Decoding [Disabled] Enables or disables 64bit capable devices to decoded in above 4G address space (Only if system supports 64bit PCI decoding) PCI Common Settings PCI Latency Timer [32 PCI Bus Clocks] Allows the PCI Latency Timer to be adjusted.
ERX-Q77 User’s Manual 3.4.4 ACPI Settings ACPI Sleep State [S3 only (Suspend to RAM)] Select the highest ACPI sleep state the system will enter the SUSPEND button is press. Configuration options: [S1 only(CPU Stop Clock)] [S3 only(suspend to RAM )] S3 Video Repost [Disabled] Enable or disable S3 video repost Configuration options: [Disabled] [Enabled] Resume On RTC Alarm [Disabled] Enable or disable system wake on alarm even. When enabled, system will wake upon the hr/min/sec specified.
ERX-Q77 User’s Manual Wake on PCI PME [Enabled] Control PCI device wake up function. Configuration options: [Disabled] [Enabled] 3.4.5 Trusted computing Trusted computing (TPM) settings. Configuration Security Device Support [Disable] Enable or disable TPM support. Configuration options: [Disable] [Enable] Current TPM Status Information Displays the TPM status information.
ERX-Q77 User’s Manual 3.4.6 CPU configuration CPU Configuration Parameter. CPU configuration Displays the CPU information Active Processor Cores [All] Select the numbers of cores in each processor package. Configuration options: [All] [1] [2] [3] [4] [5] [6] [7] It depends on each CPU type. Limit CPUID Maximum [Disable] Disable for Windos XP.
ERX-Q77 User’s Manual 3.4.
ERX-Q77 User’s Manual 3.4.8 Intel TXT(LT) Configuration Display Intel Trusted Execution Technology configuration.
ERX-Q77 User’s Manual 3.4.9 PCH-FW Configuration Display management engine technology configuration.
ERX-Q77 User’s Manual 3.4.10 AMT Configuration AMT Parameters Intel AMT [Enable] Enable or disable Intel active management technology BIOS extension Configuration options: [Disabled] [Enabled] Un-configure ME [Disabled] Perform AMT/ME un-configure without password operation.
ERX-Q77 User’s Manual 3.4.11 USB Configuration USB Configuration Parameters USB Configuration Display how many devices are connected. Legacy USB Support [Enabled] Enables Legacy USB support. AUTO option disables legacy support if no USB devices are connected. DISABLE option will keep USB devices available only for EFI applications.
ERX-Q77 User’s Manual 3.4.12 Second Super IO Configuration Second Super IO Chip Parameters.
ERX-Q77 User’s Manual 3.4.12.
ERX-Q77 User’s Manual 3.4.12.
ERX-Q77 User’s Manual 3.4.12.
ERX-Q77 User’s Manual 3.4.13 Super IO Configuration System Super IO Chip Parameters.
ERX-Q77 User’s Manual 3.4.13.
ERX-Q77 User’s Manual 3.4.13.
ERX-Q77 User’s Manual 3.4.13.
ERX-Q77 User’s Manual Watch Dog Timer [Disabled] Enable or disable Watch Dog Timer Function Configuration options: [Disabled] [Enabled] Deep S5 Support [Disabled] Enable or disable Deep S5 support EuP Configuration options: [Disabled] [Enabled] 3.4.
ERX-Q77 User’s Manual 3.4.14.
ERX-Q77 User’s Manual 3.4.14.1.
ERX-Q77 User’s Manual 3.4.
ERX-Q77 User’s Manual 3.4.
ERX-Q77 User’s Manual 3.4.
ERX-Q77 User’s Manual 3.4.
ERX-Q77 User’s Manual 3.4.18.1 USB Configuration USB3.0 Support [Enabled] Enable or disable the xHCI controller for USB3.0 Configuration options: [Disabled] [Enabled] EHCI1 [Enabled] Control the USB EHCI (USB 2.0) functions. One EHCI controller must always be enabled. Configuration options: [Disabled] [Enabled] EHCI2 [Enabled] Control the USB EHCI (USB 2.0) functions. One EHCI controller must always be enabled.
ERX-Q77 User’s Manual 3.4.18.
ERX-Q77 User’s Manual 3.4.
ERX-Q77 User’s Manual 3.4.19.1 Graphics Configuration Primary Display [Auto] Select which of IGFX/PEG/PCI Graphics device should be primary display or select SG for switchable Gfx Configuration options: [Auto] [IGFX] [PEG] [PCI] Internal Graphics [Auto] Set internal graphics Configuration options: [Auto] [Disabled] [Enabled] DVMT Pre-Allocated [64M] Select DVMT 5.
ERX-Q77 User’s Manual Select DVMT 5.
ERX-Q77 User’s Manual 3.4.19.2 NB PCIe Configuration PEG0 – Gen X [Auto] Set PEG0 B0:D1:F0 Gen1 – Gen3 Configuration options: [Auto] [Gen1] [Gen2] [Gen3] PEG0 ASPM [Auto] Control ASPM support for the PEG: Device 1 Function 0. This has no effect if PEG is not the currently active device.
ERX-Q77 User’s Manual 3.4.19.
ERX-Q77 User’s Manual 3.4.20 Boot Setup Prompt Timeout [1] Number of seconds to wait for setup activation key. 65535(0xFFFF) means indefinite waiting.
ERX-Q77 User’s Manual 3.4.
ERX-Q77 User’s Manual 3.4.22 Save & Exit Save changes and Exit Exit system setup after saving the changes. Discard changes and Exit Exit system setup without saving the changes. Save changes and Reset Reset the system after saving the changes. Restore Defaults Restore/Load default values for all the setup option.